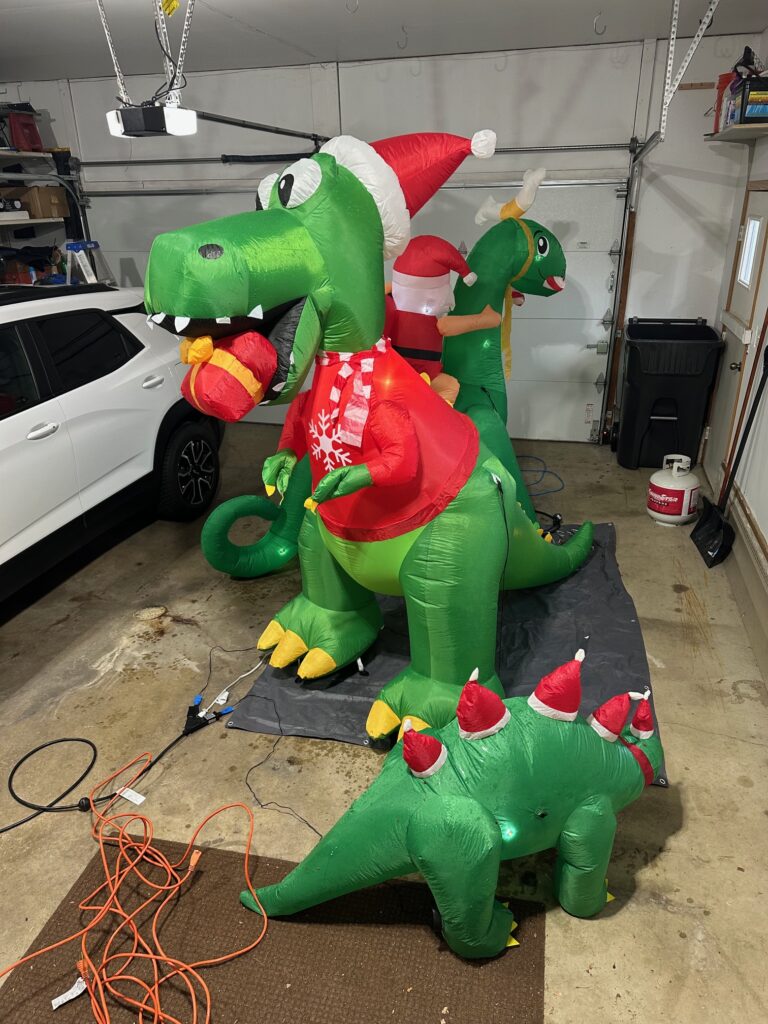
Several years ago, we added a T-rex inflatable to our Christmas decorations, and it quickly became one of my favorites. There’s just something fun about mixing dinosaurs with the holiday season. Over time, the collection has grown to include a brontosaurus and a stegosaurus as well.

This year, when it came time to set everything up, I discovered the T-rex had a problem: several of the internal lights had burned out. Normally, the easy fix would be to replace the incandescent bulbs inside the inflatable and move on. But after installing LED lighting in our basement bathroom earlier this year, I decided this was a good opportunity to try something different—and learn a bit more in the process.
Instead of replacing the bulbs one-for-one, I decided to convert the dinosaur to LEDs.
Planning the Upgrade
I started by searching online for LED modules that would work well inside an inflatable, along with a compatible LED driver. I settled on a 12-watt (12V, 1A) driver paired with a 20-piece LED strand. While the driver wouldn’t support the entire strand at once, I only planned to use 10 LEDs for this project, with the remaining 10 saved for a future inflatable. Once everything arrived, it was time for what I jokingly call “surgery.”
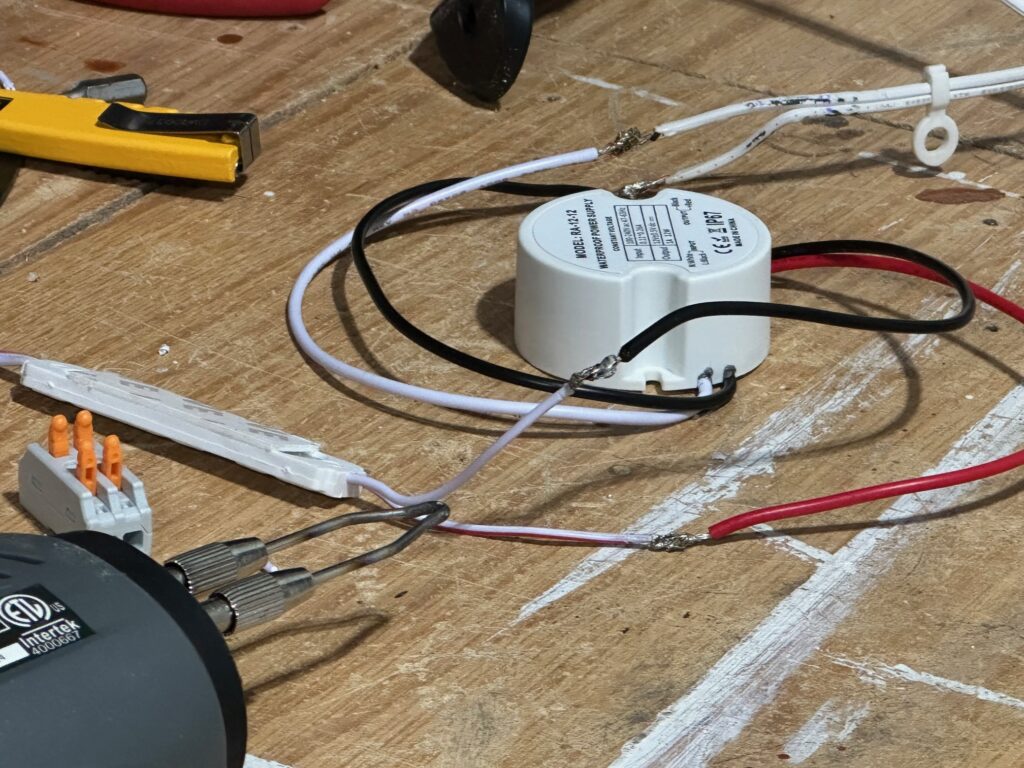
The original lights inside the dinosaur ran directly on 110 volts. I disconnected that line and connected it to a new LED driver, which stepped the voltage down to 12V. From there, I wired the driver to the LED modules, spacing them several feet apart and using 18-gauge wire to make the necessary extensions.
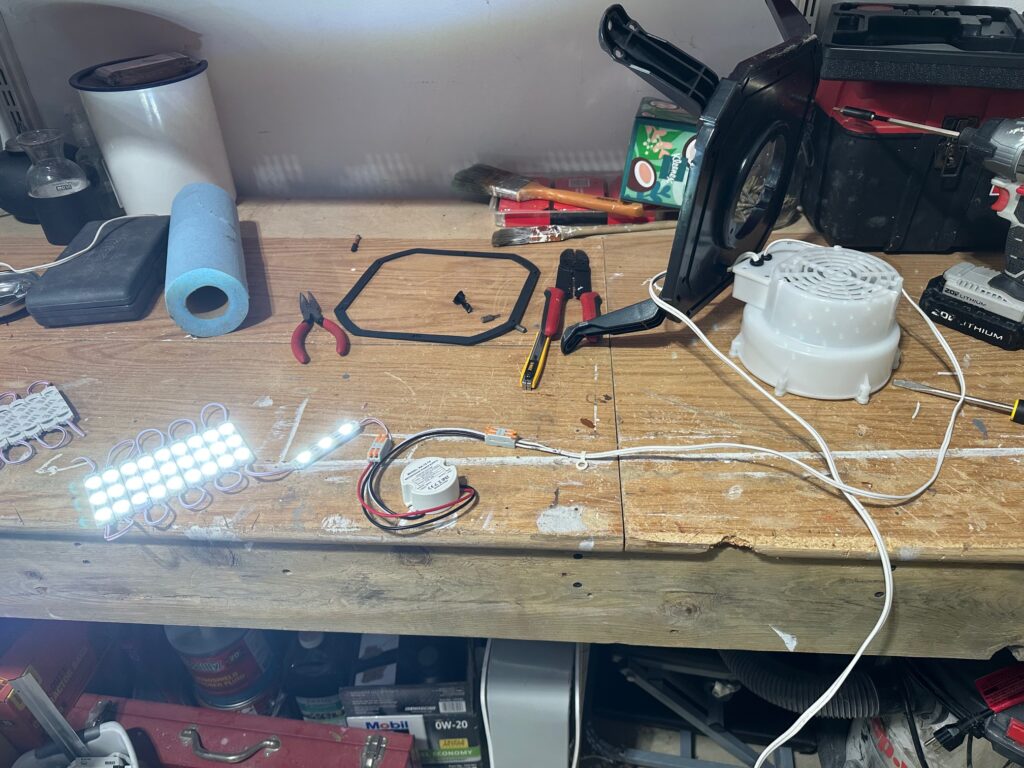
Since these lights would live outdoors—and because I don’t mind overcomplicating things in the name of practice—I soldered all of the connections and added heat-shrink tubing to each joint. My main concern was wires getting tugged or pulled inside the inflatable over time, and I wanted to minimize the risk of anything coming loose.
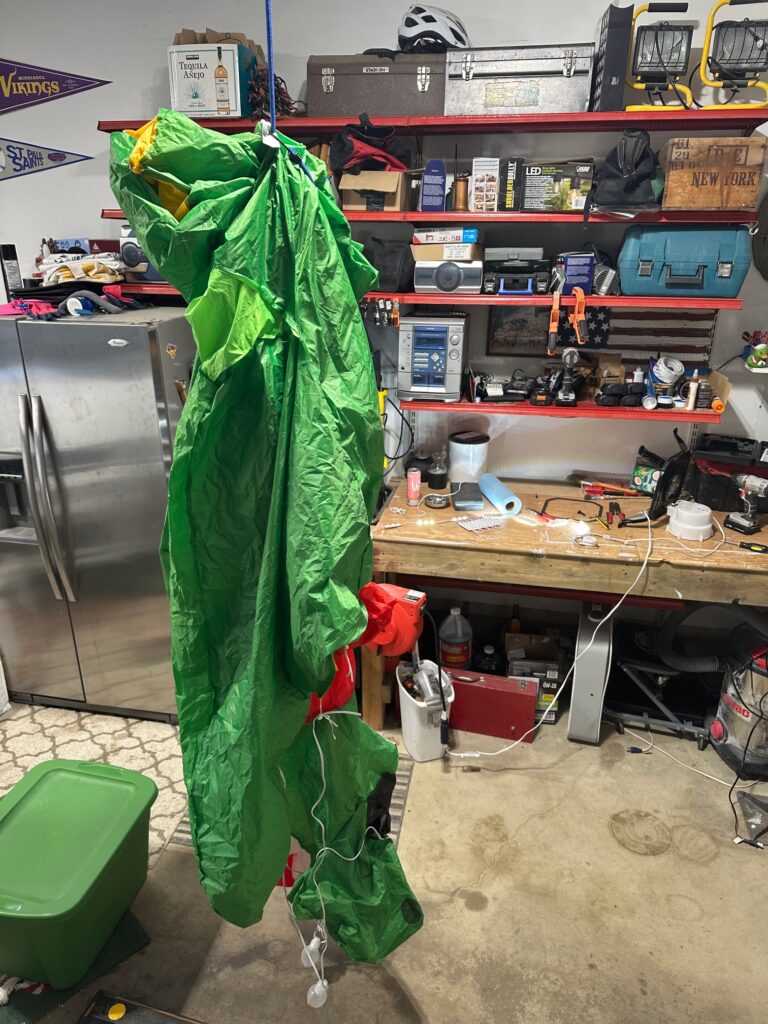
Installing the LEDs
In total, I added ten LED arrays inside the dinosaur. Each array consisted of two groups of three LEDs, taped back-to-back so they would shine light in both directions. This replaced the original five incandescent bulbs with five new groupings of six LEDs each.
That means the dinosaur now has 30 LEDs instead of just 5 incandescent bulbs.
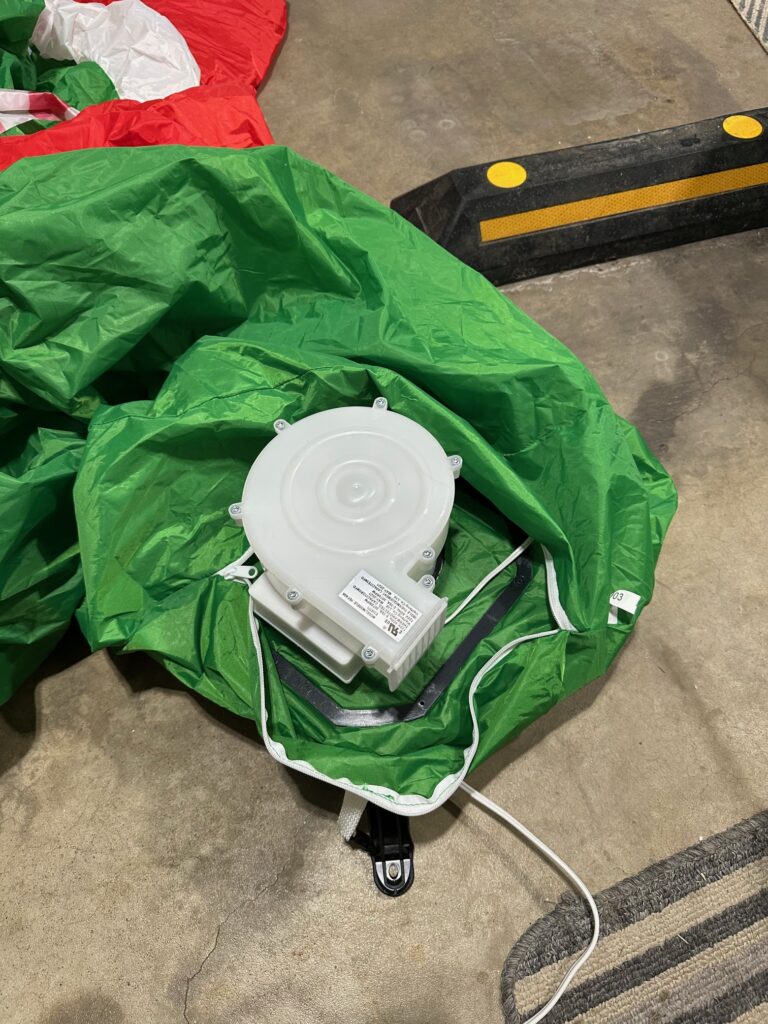
Once everything was wired up, I hung the inflatable from a bungee cord attached to the garage ceiling, flipped it inside-out, and secured the new wiring to the original tie-down points inside the dinosaur. After carefully flipping it back right-side-out, I reattached the fan unit and powered it on.
The Results
Here’s the finished product:

I’m really happy with how it turned out. The light is more even, brighter, and should last much longer than the original bulbs. Was it more expensive than simply replacing the incandescent lights? Absolutely. But the real value for me was the experience—I got hands-on practice soldering wires and more repetition working with LED lighting systems.
And now, our Christmas T-rex is ready for many more holiday seasons.
Parts Used
I ordered all of the components from Amazon:
LED Drivers
MujHoJm Waterproof IP67 LED Driver, 12W, 120V to 12V, 1A
Wire
SPTDACSFP SPT-2 18-Gauge 2-Conductor Lighting Wire, 50 ft
Pingback: A New Addition to Our Christmas Lights: DIY Wooden Trees - Verlo House to Home