Monthly Archives: August 2015

The Banquette

When we purchased this home in August 2013 we immediately struggled with the kitchen layout. While the previous owners had opted for a large dining set in the middle of the room, we felt like this was a cramped setup, and struggled to make the space work with a centered dining table.

9 dining room before

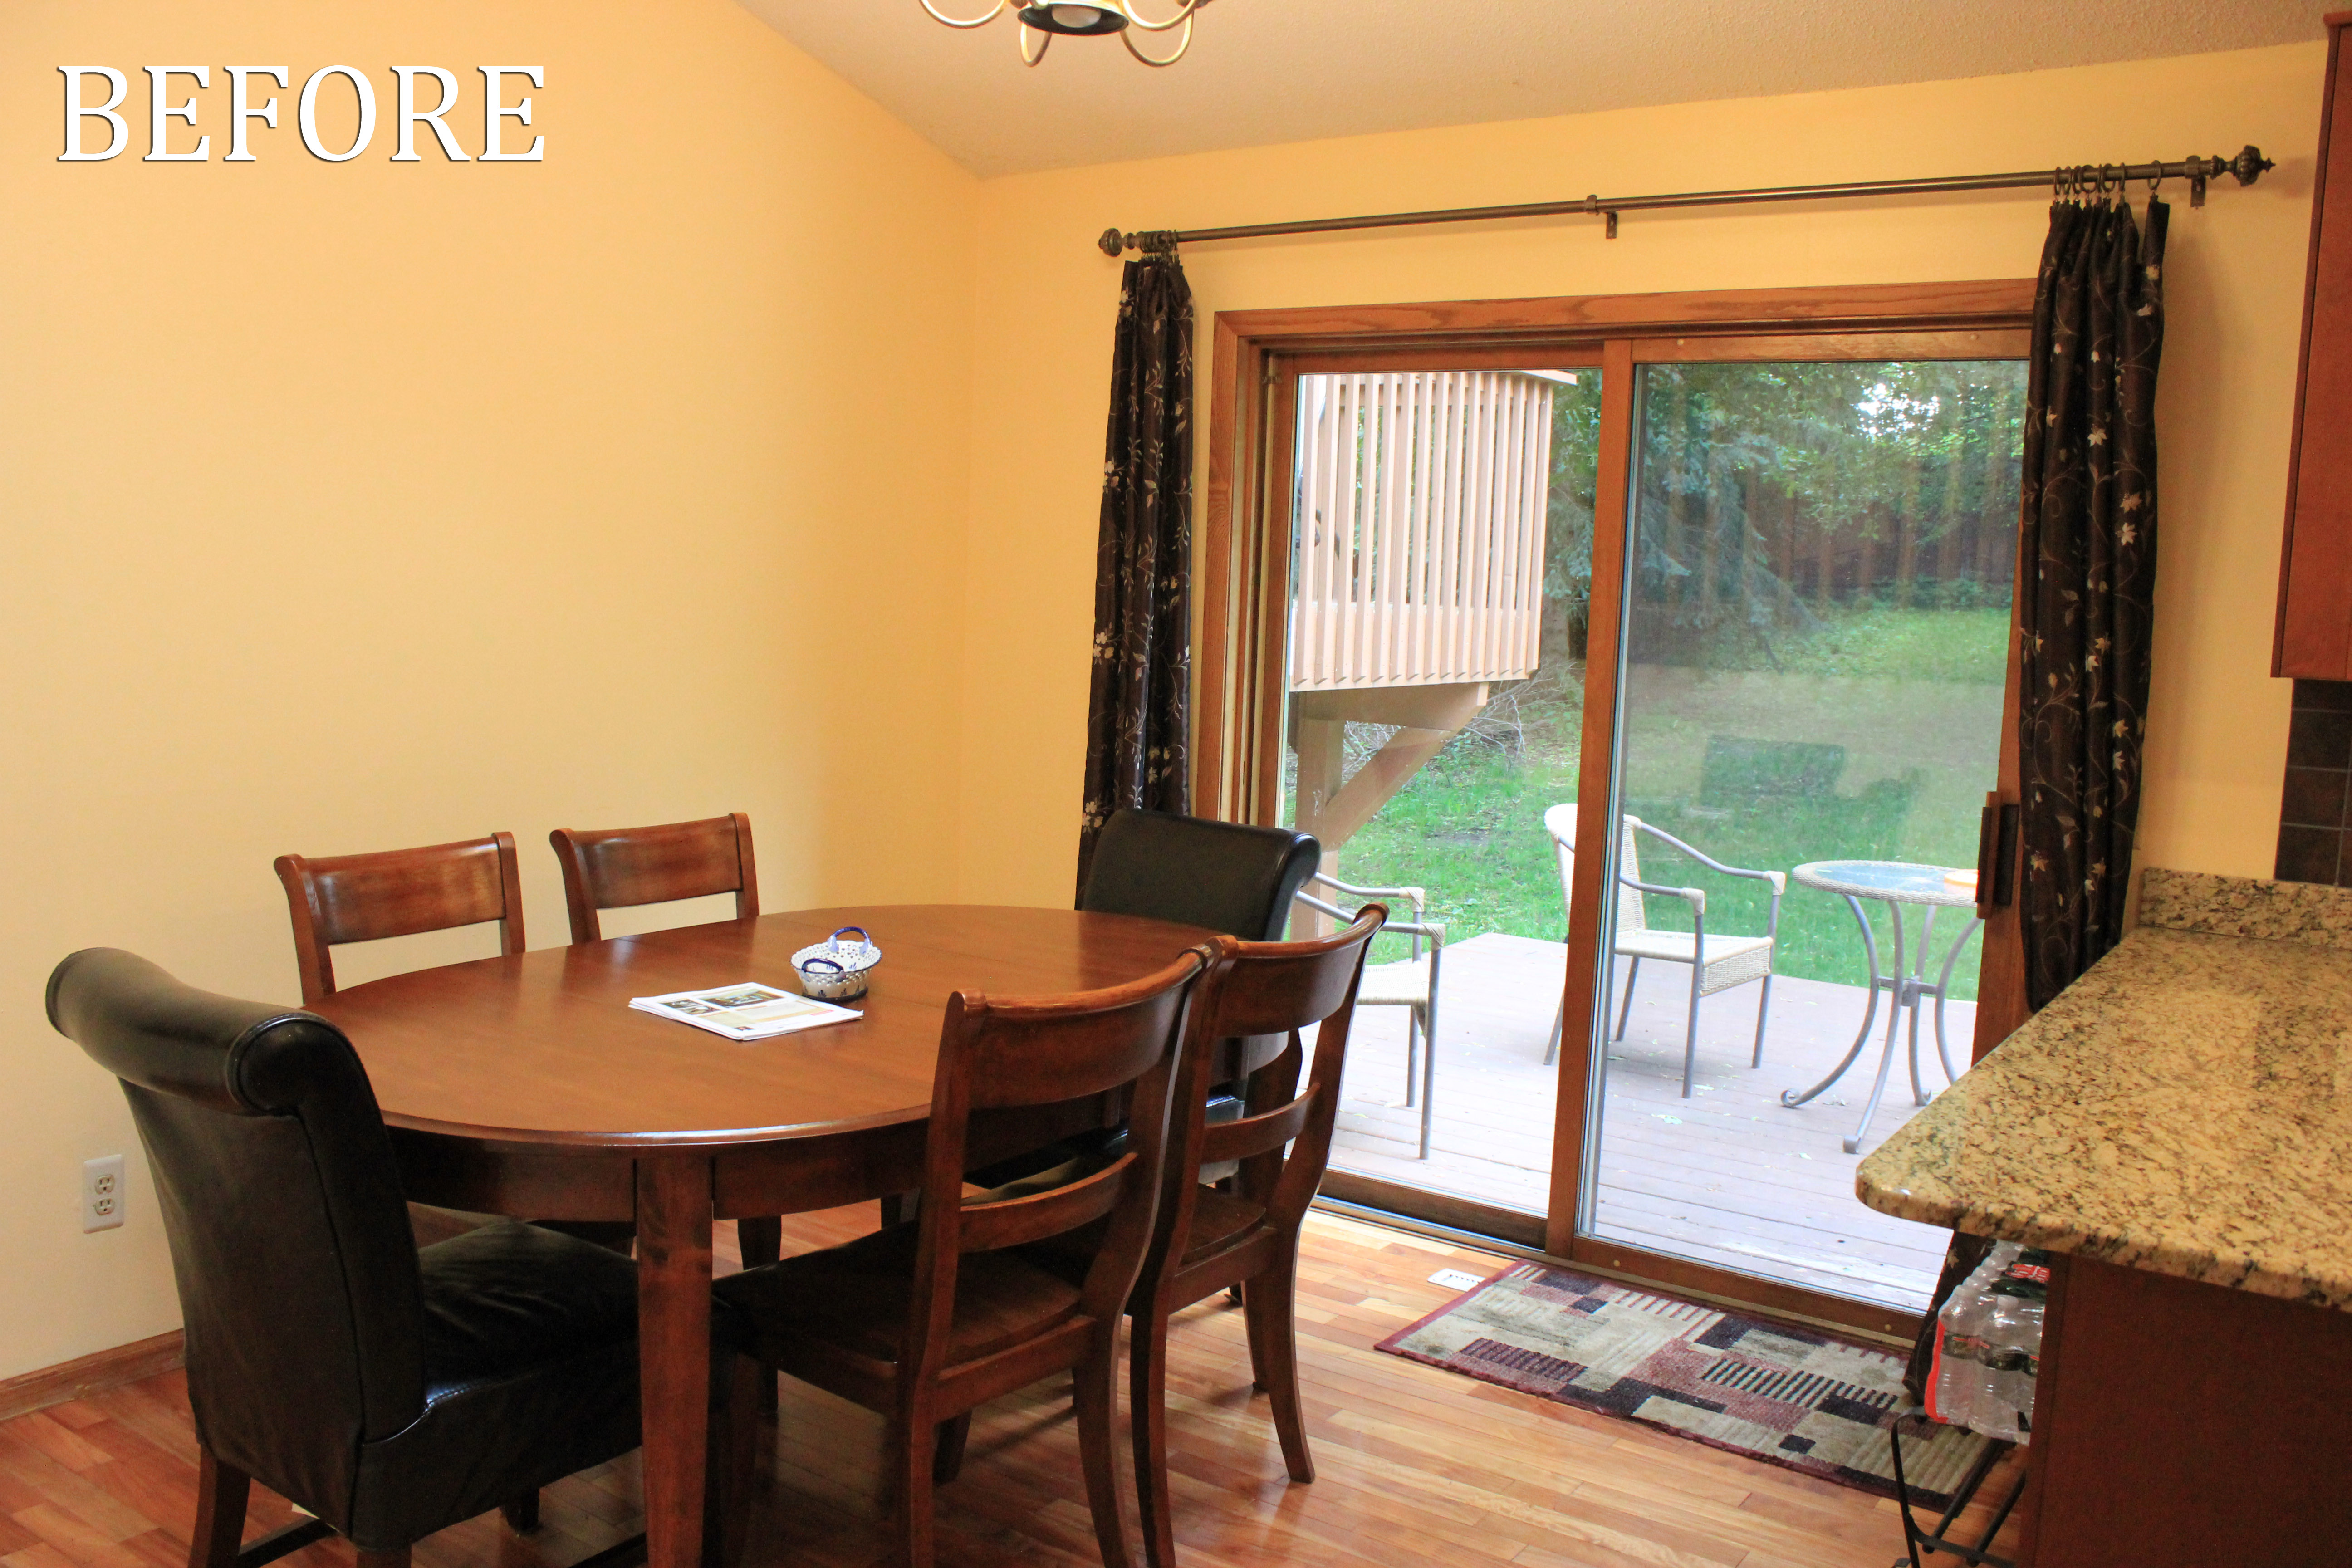
What this image doesn’t show is that when the chairs next to the wall are pulled out, to sit down at the table, they hit the wall. Chair scuffs/wall scuffs galore.

10 dining room after

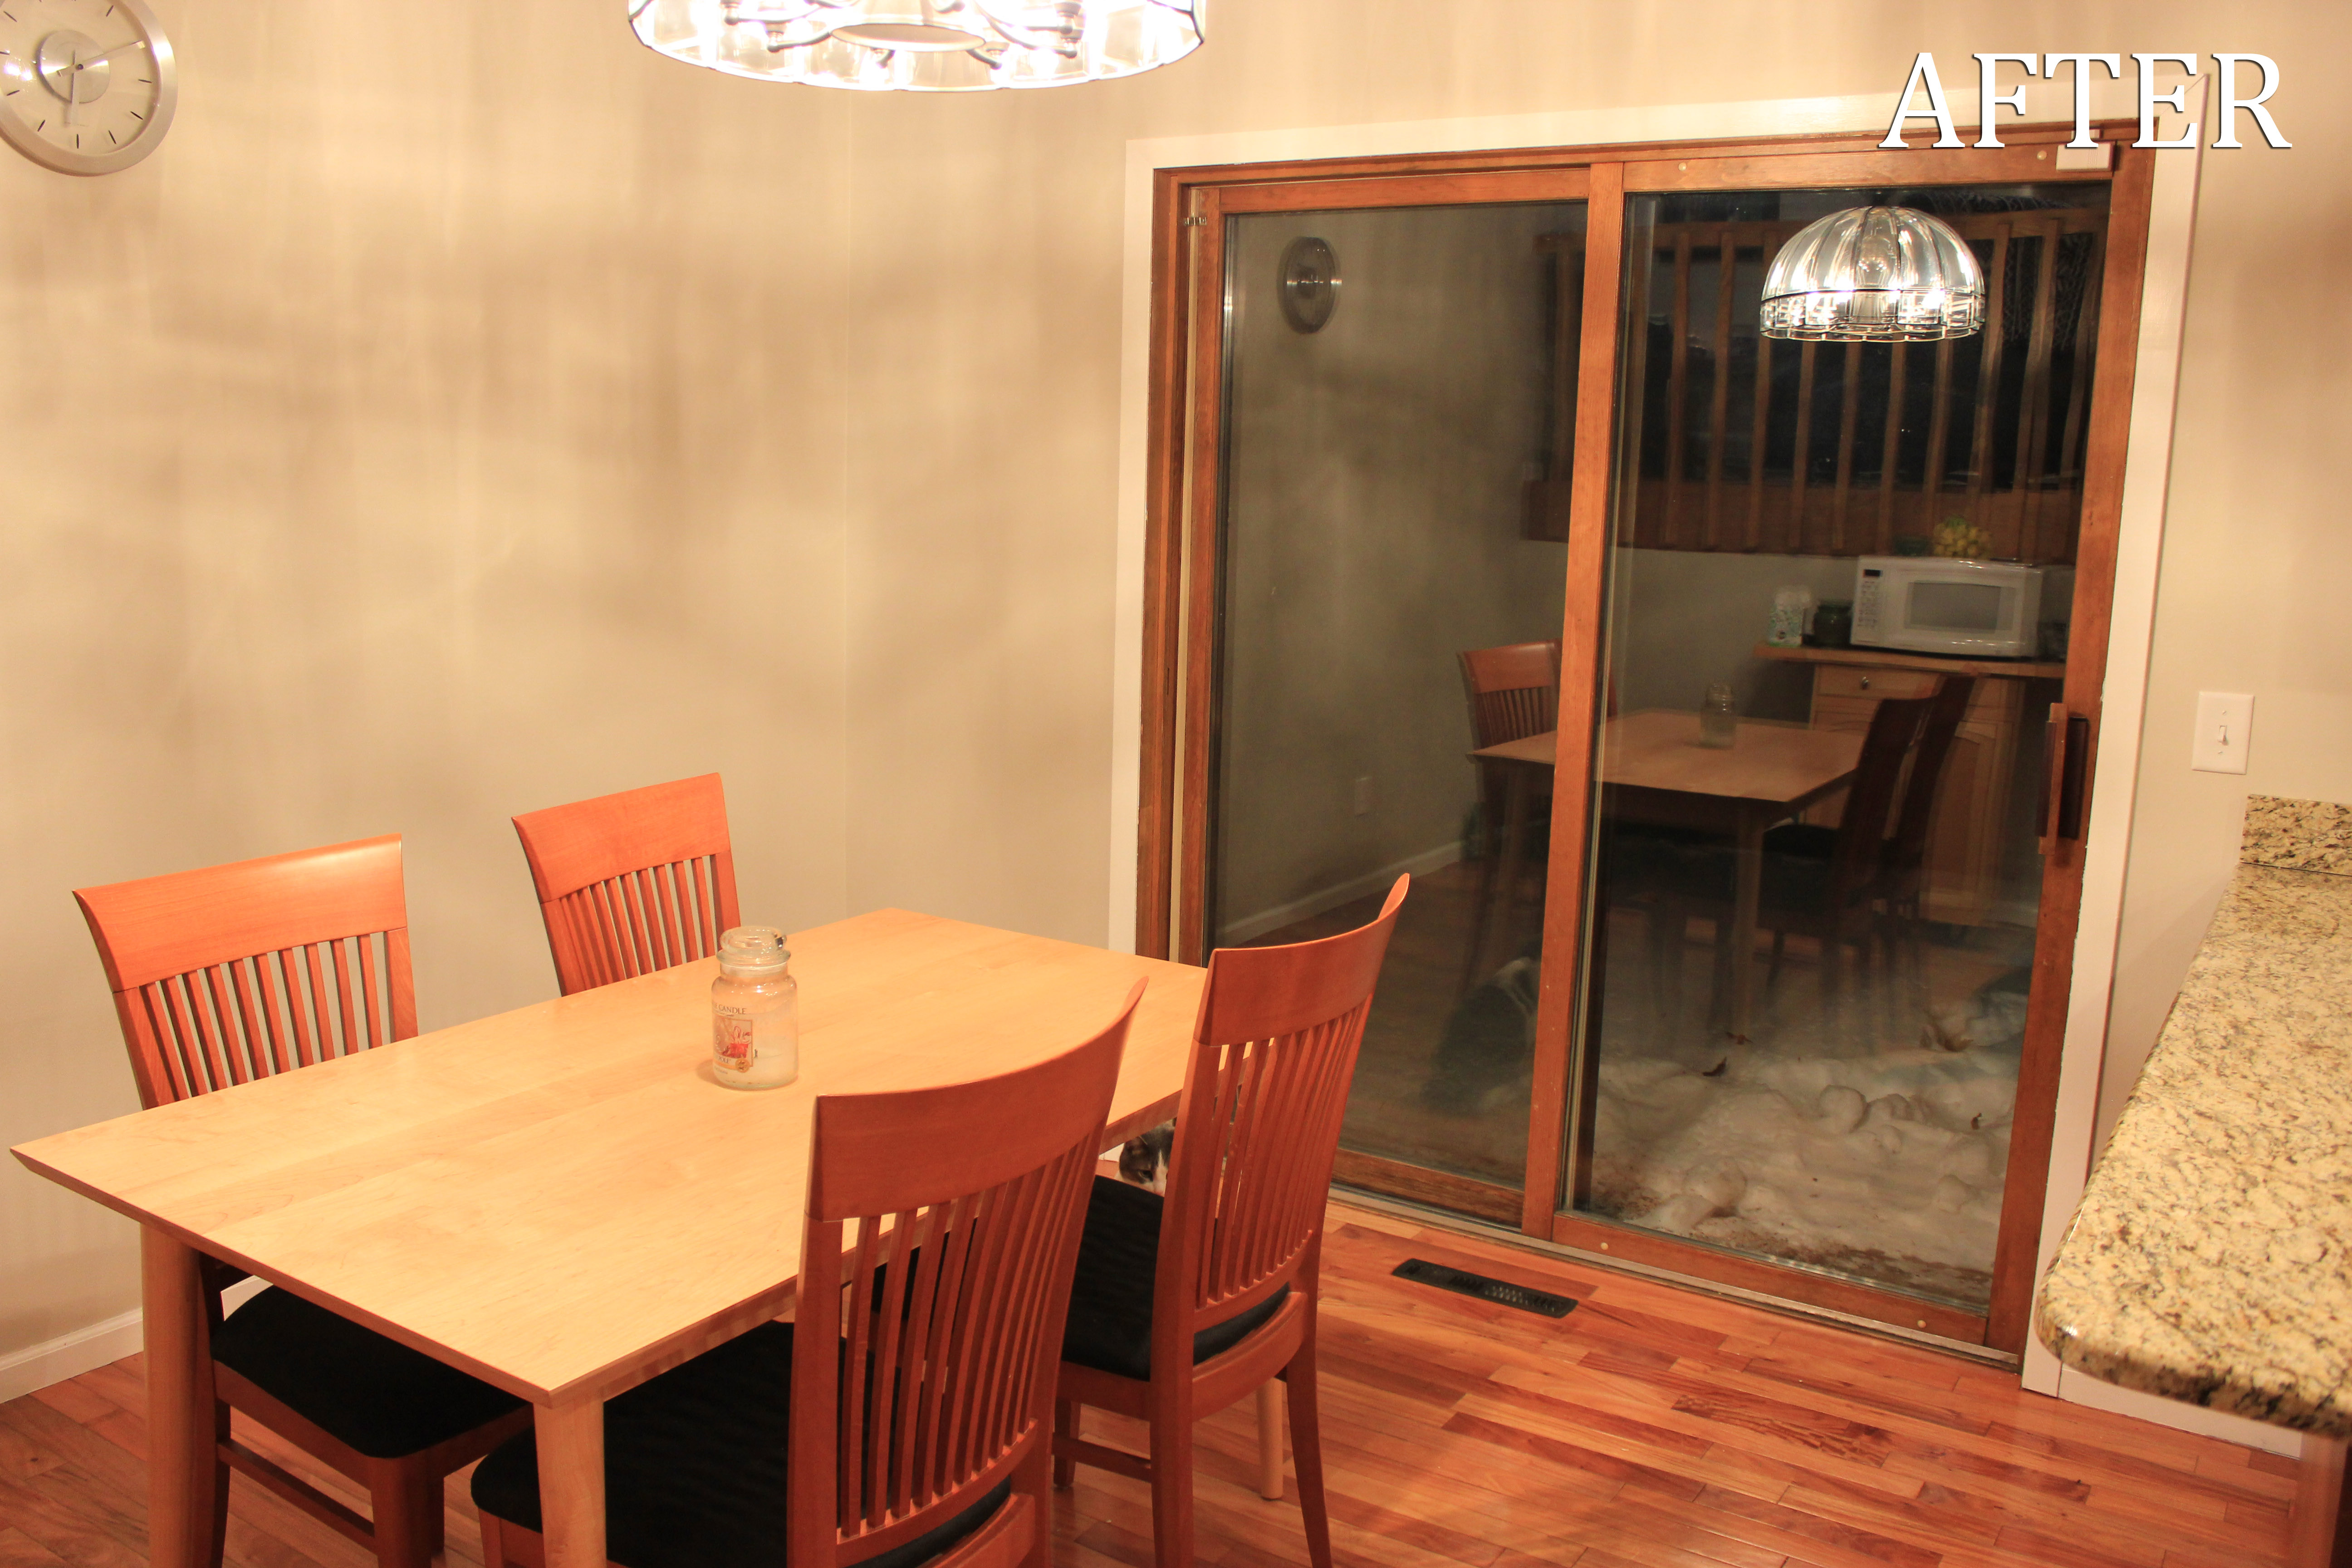
Again, not a great option, this is actually an Ikea desk that we’ve been using as a dining table since we snagged it from a friend for a great price.

So, the struggle continued, until we finally started searching for better options for the space. Finally a photo on Houzz delivered inspiration.

dream

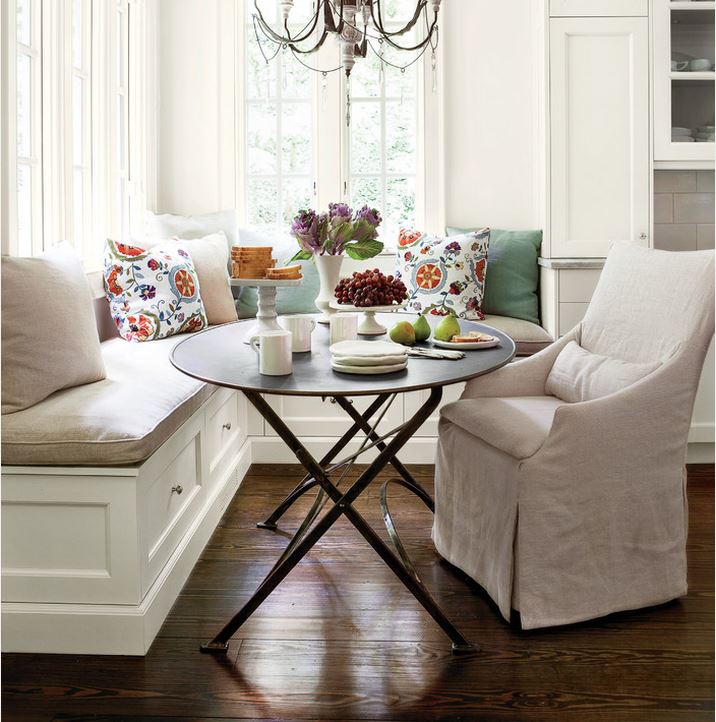
Ah the dream! Unattainable kitchens all seem to contain white linen and beautiful silk pillows.

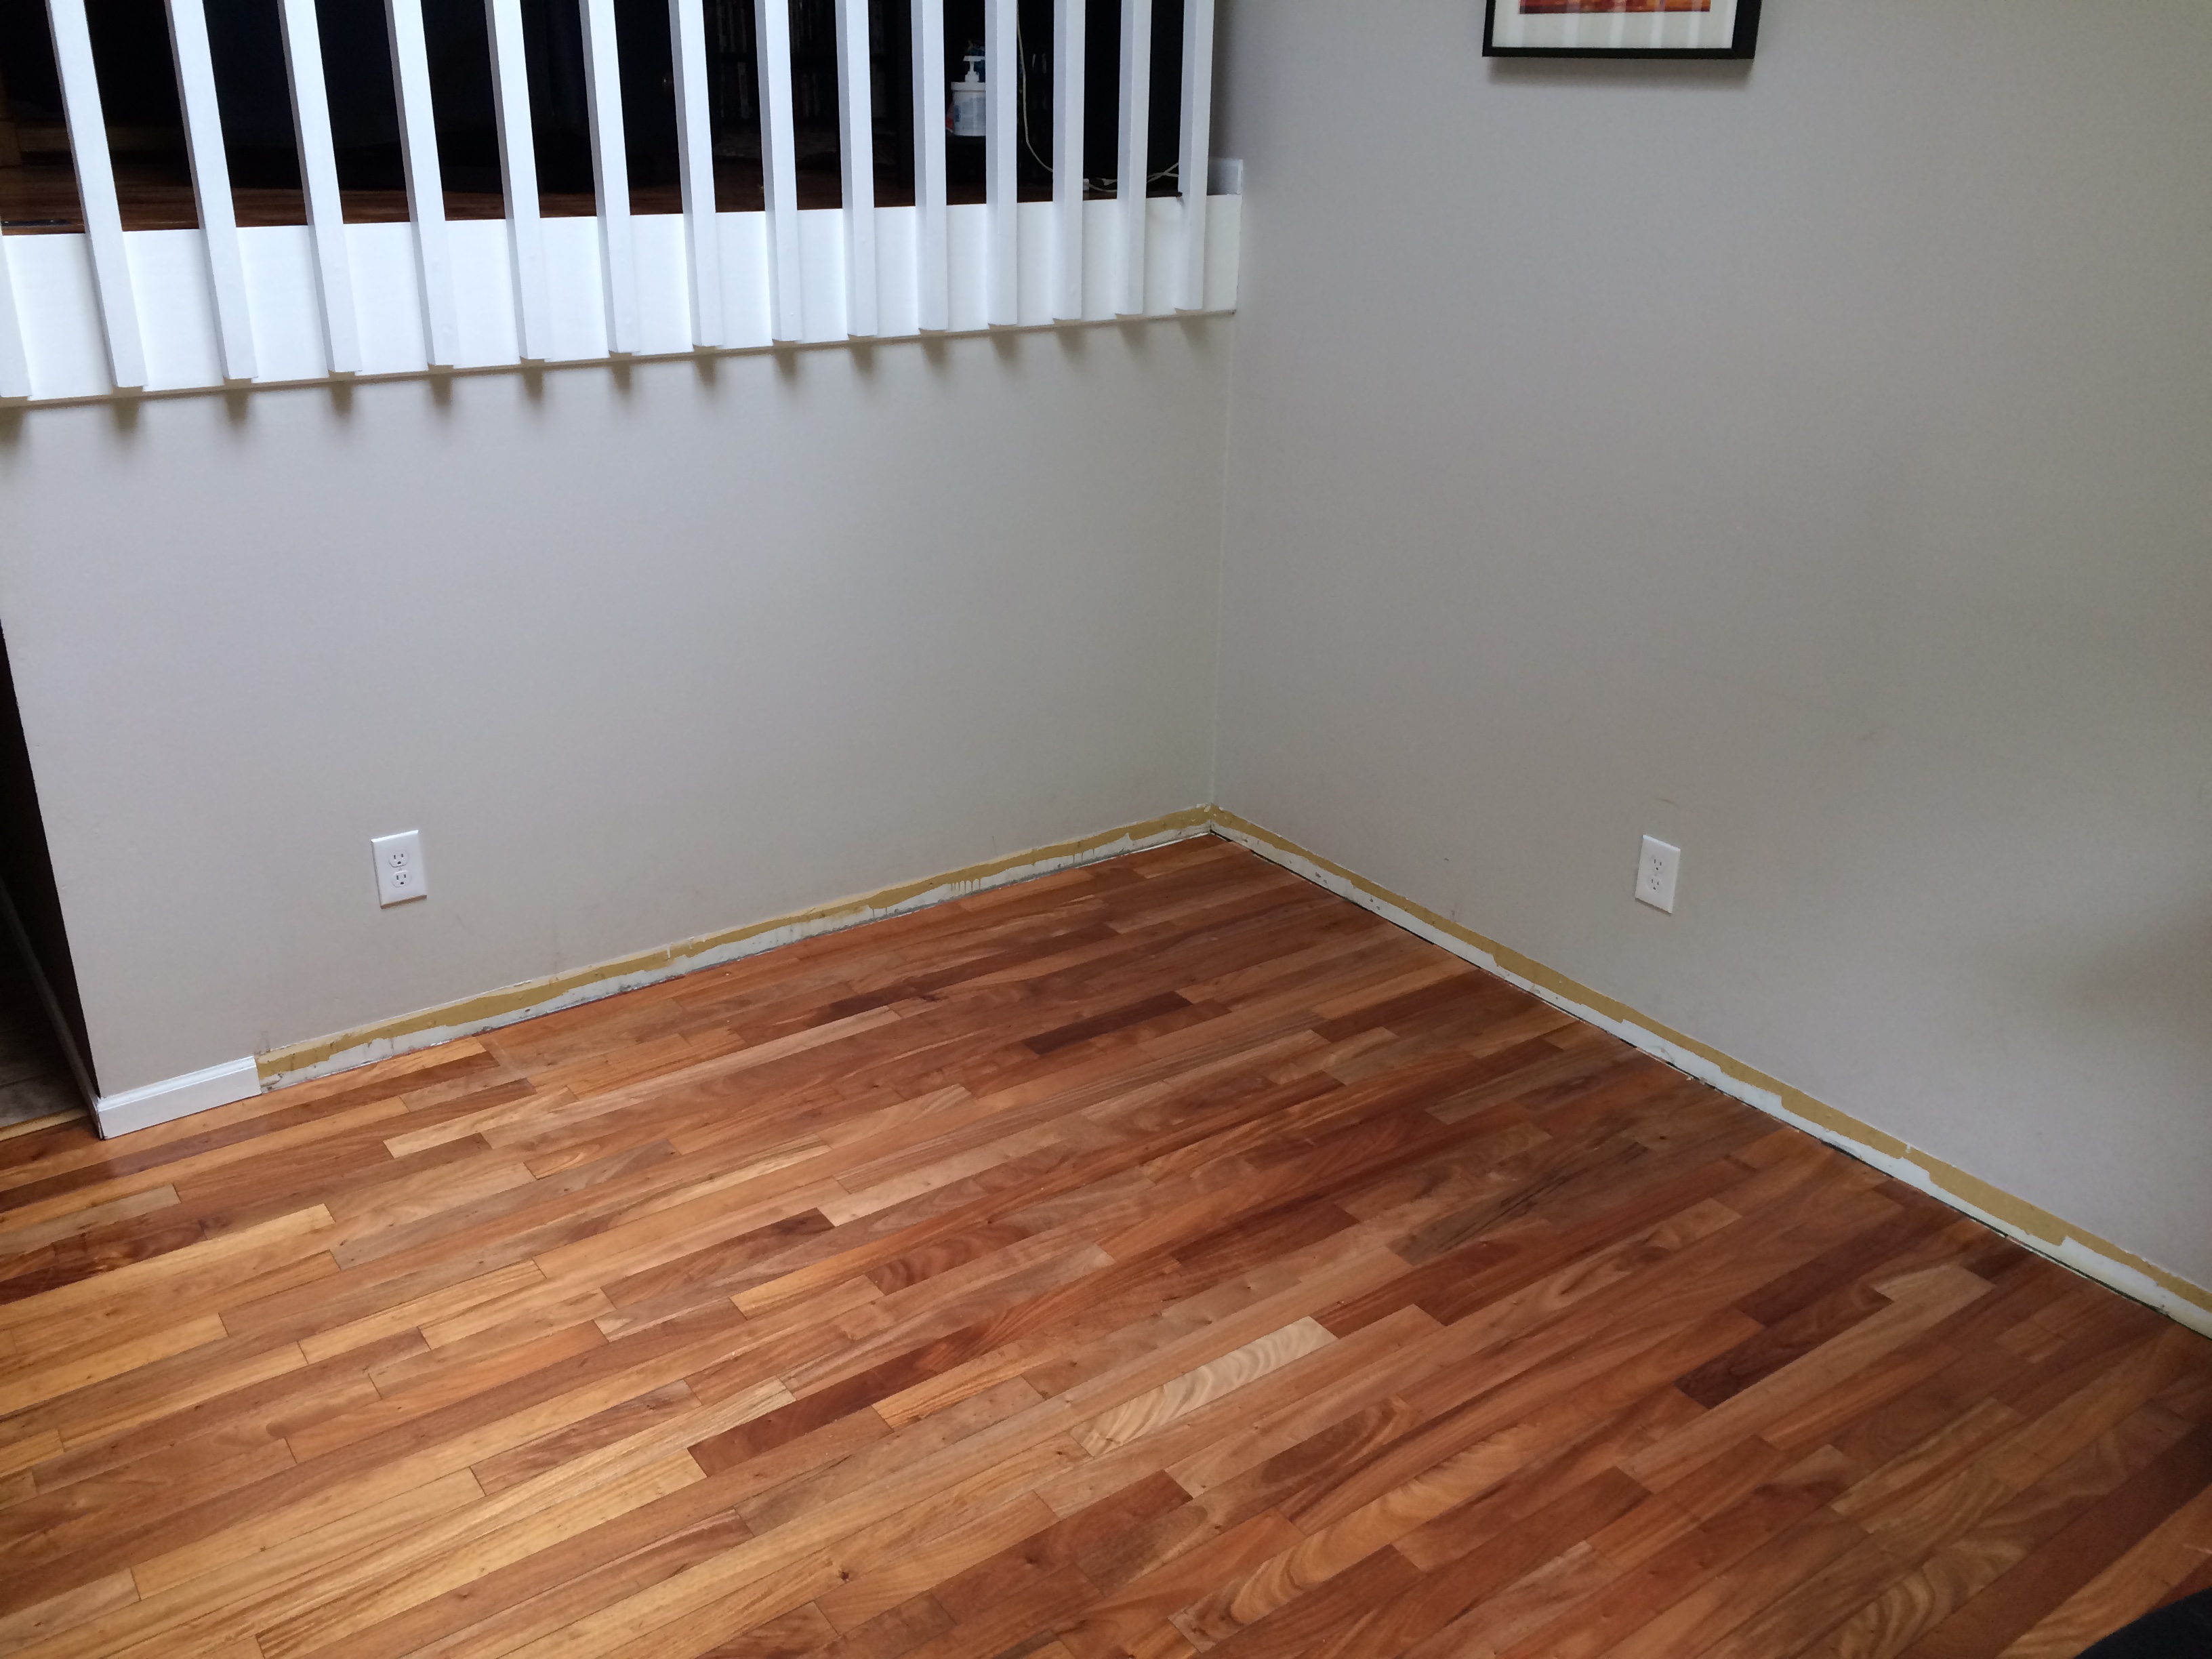
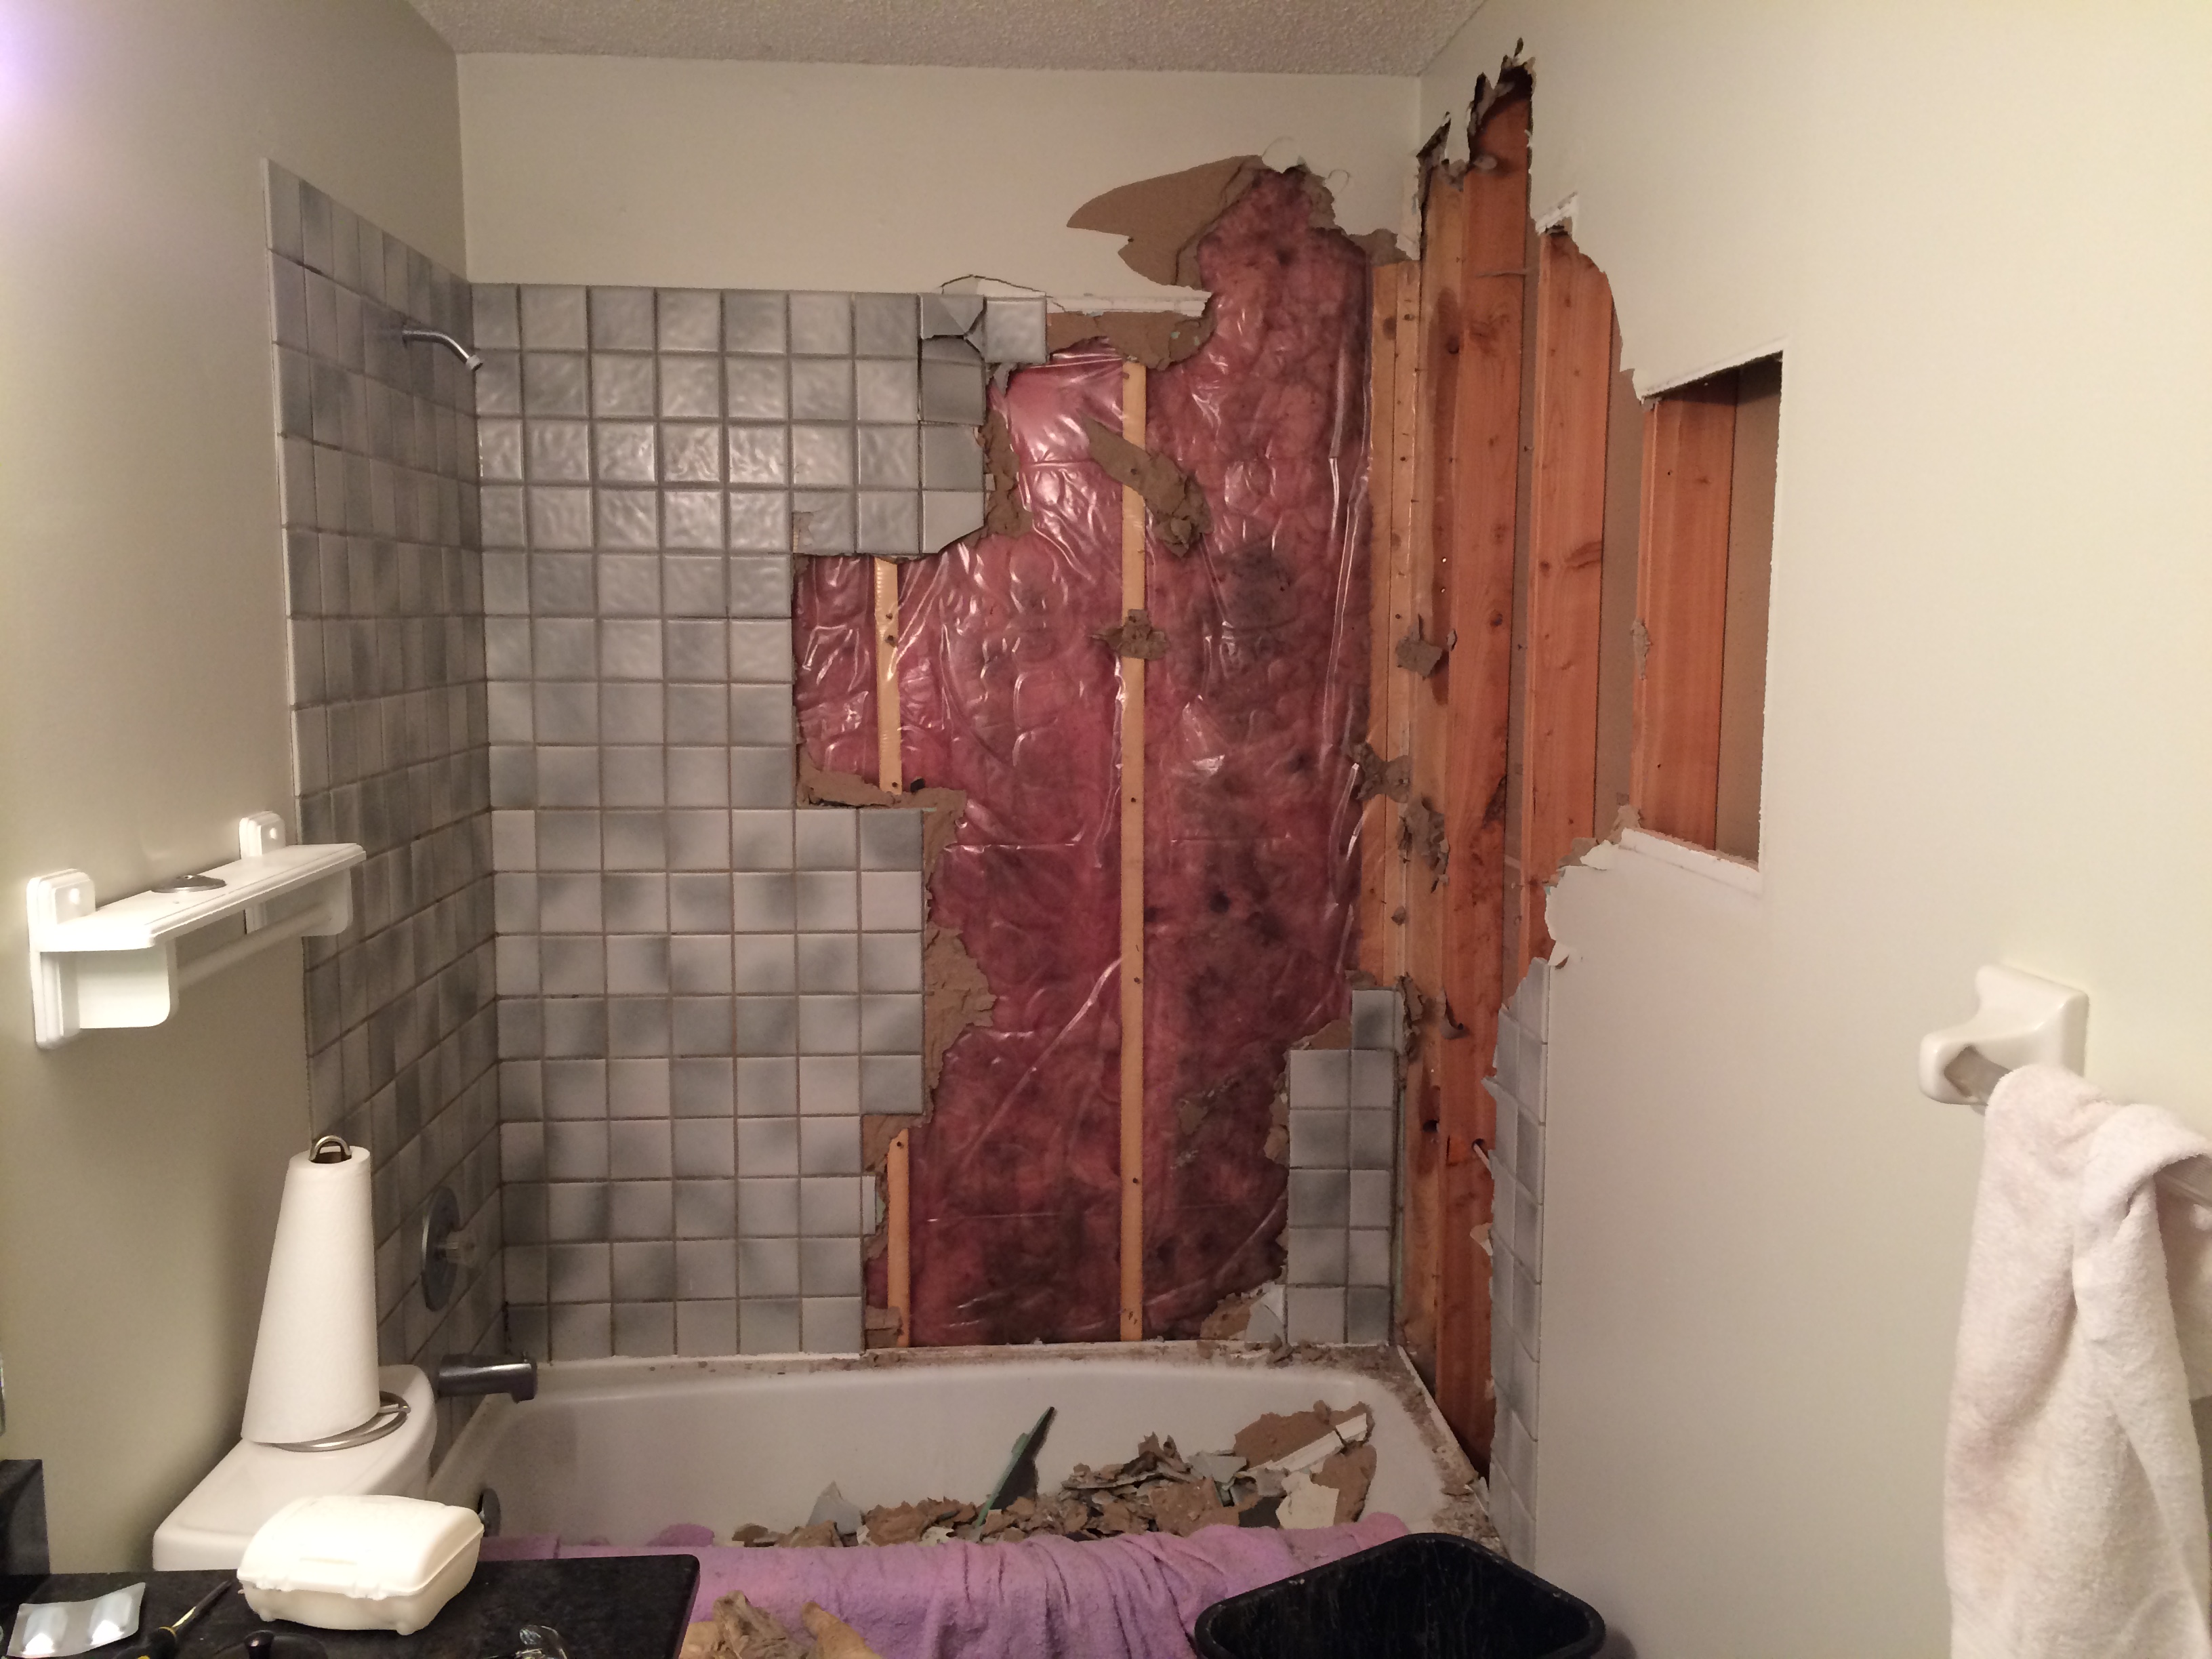
After assessing our space we stared the build by taking off the baseboards.

IMG_2126

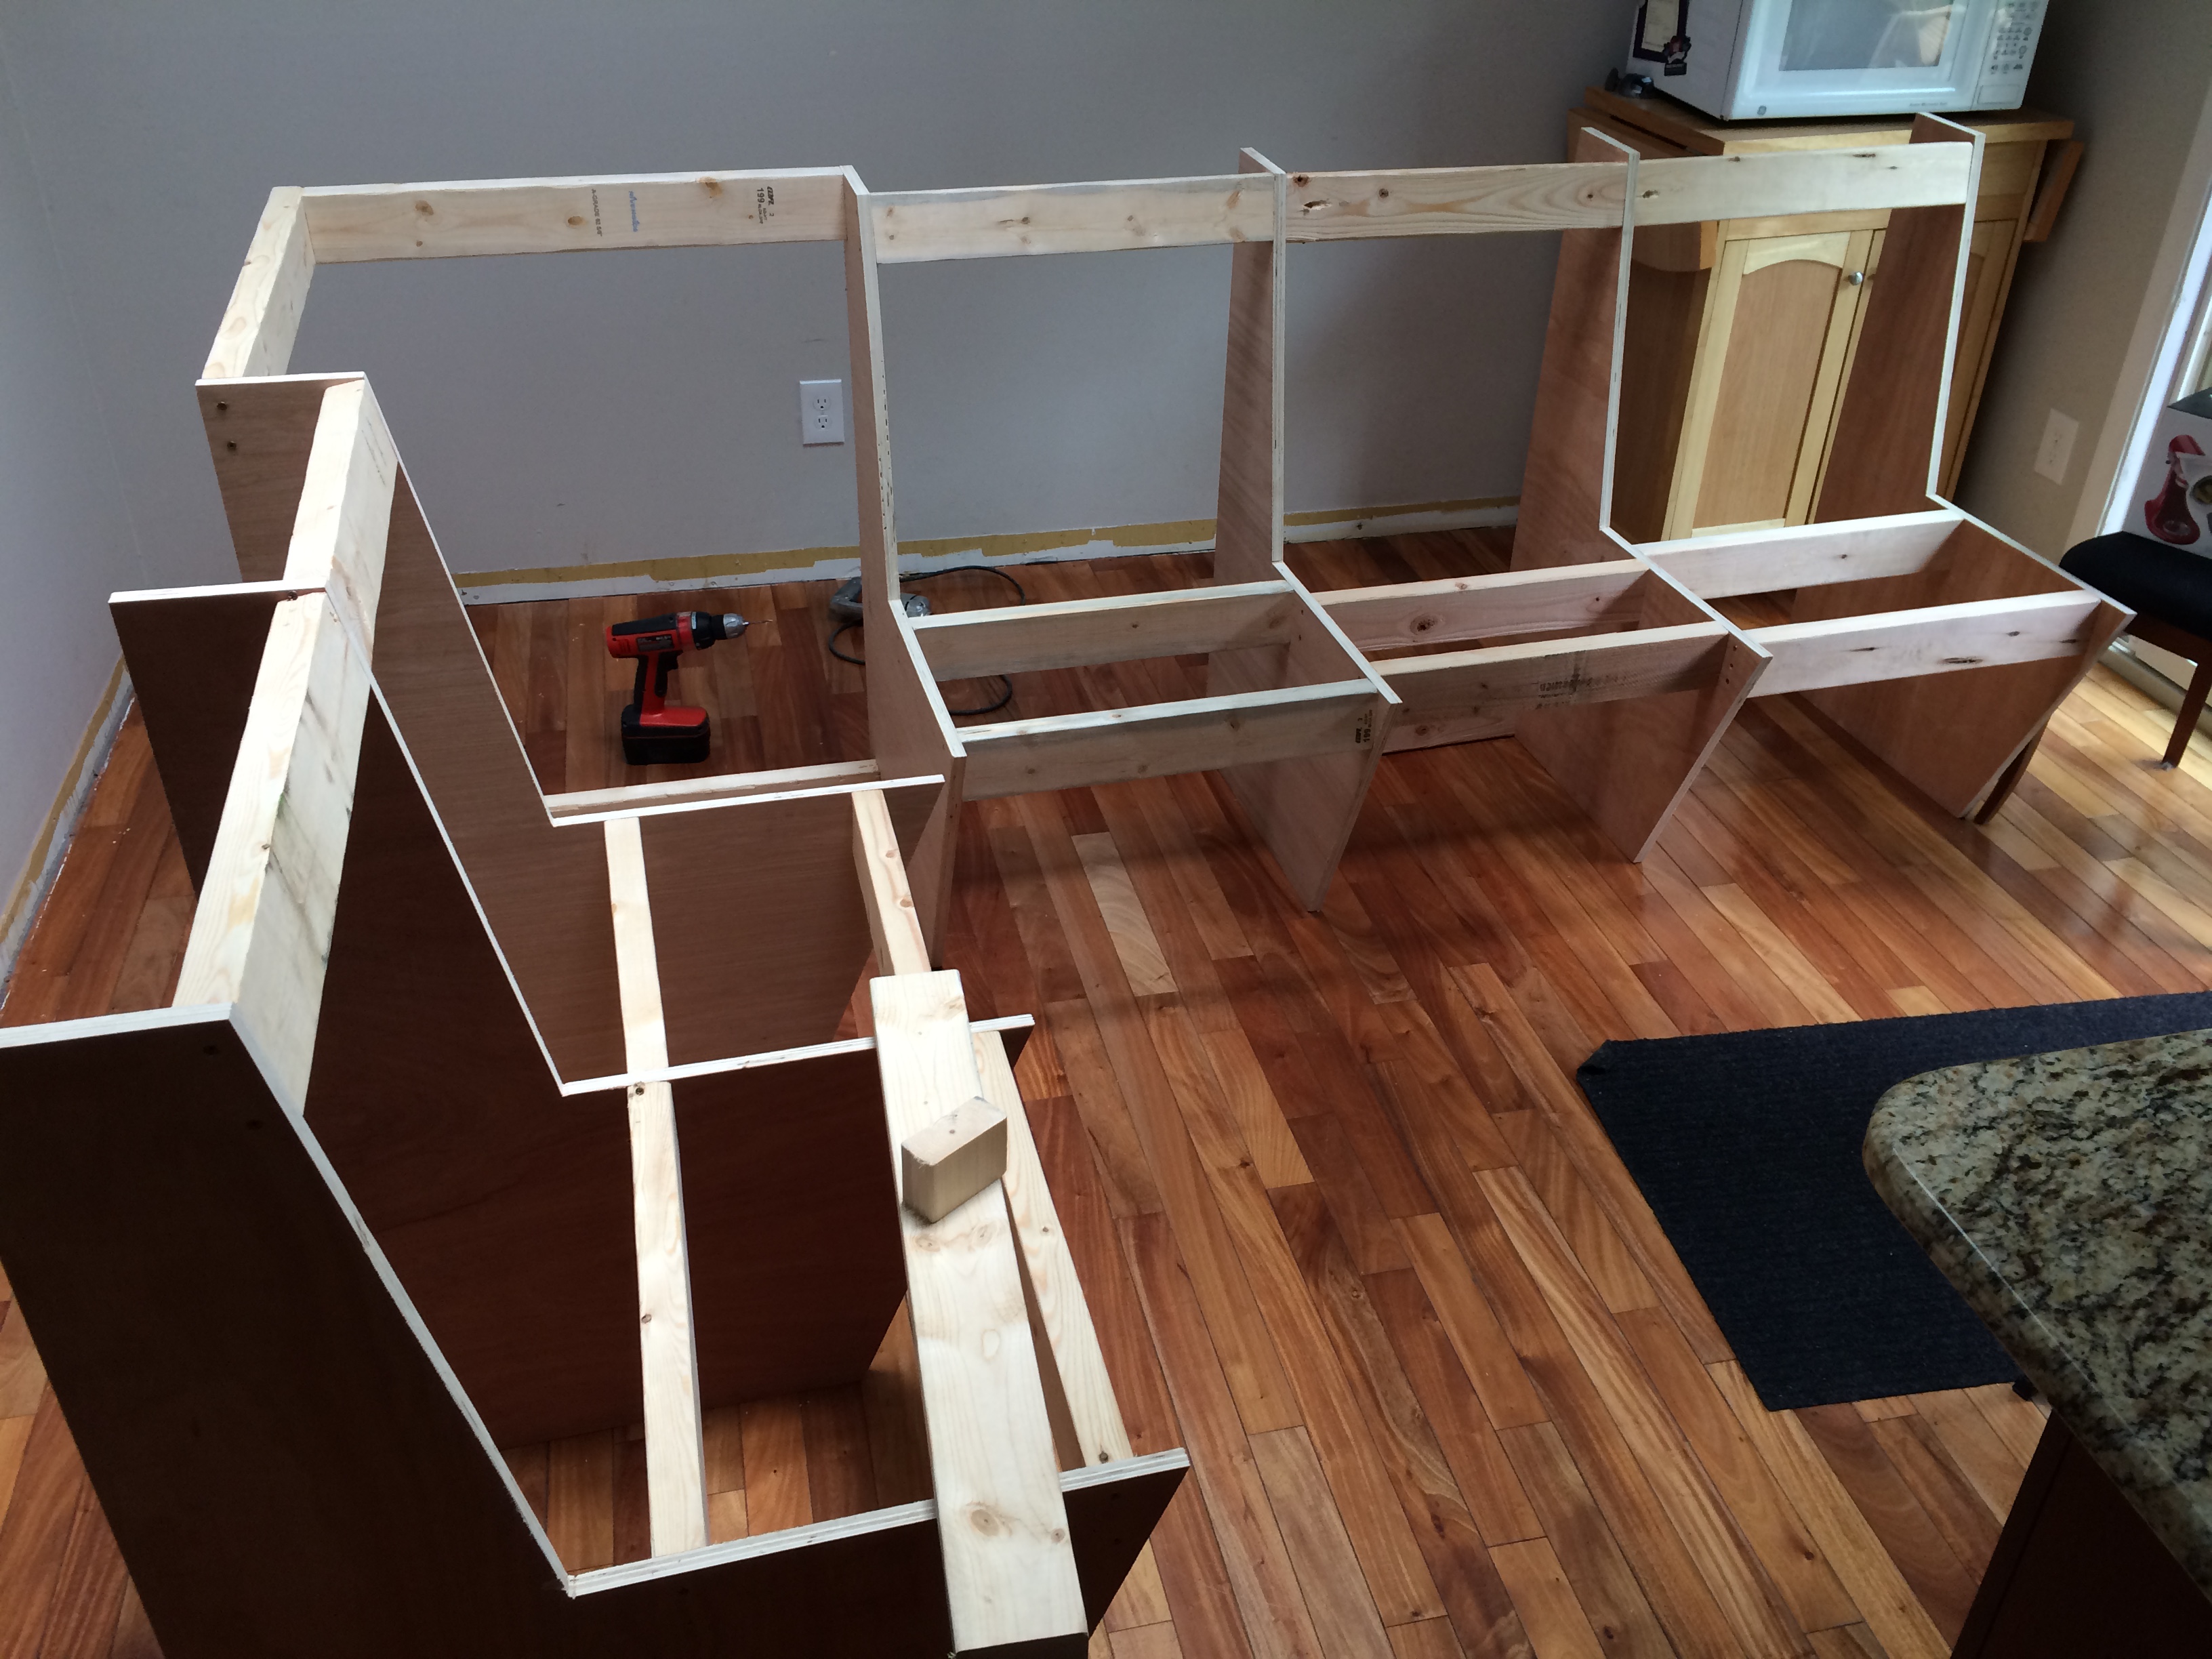
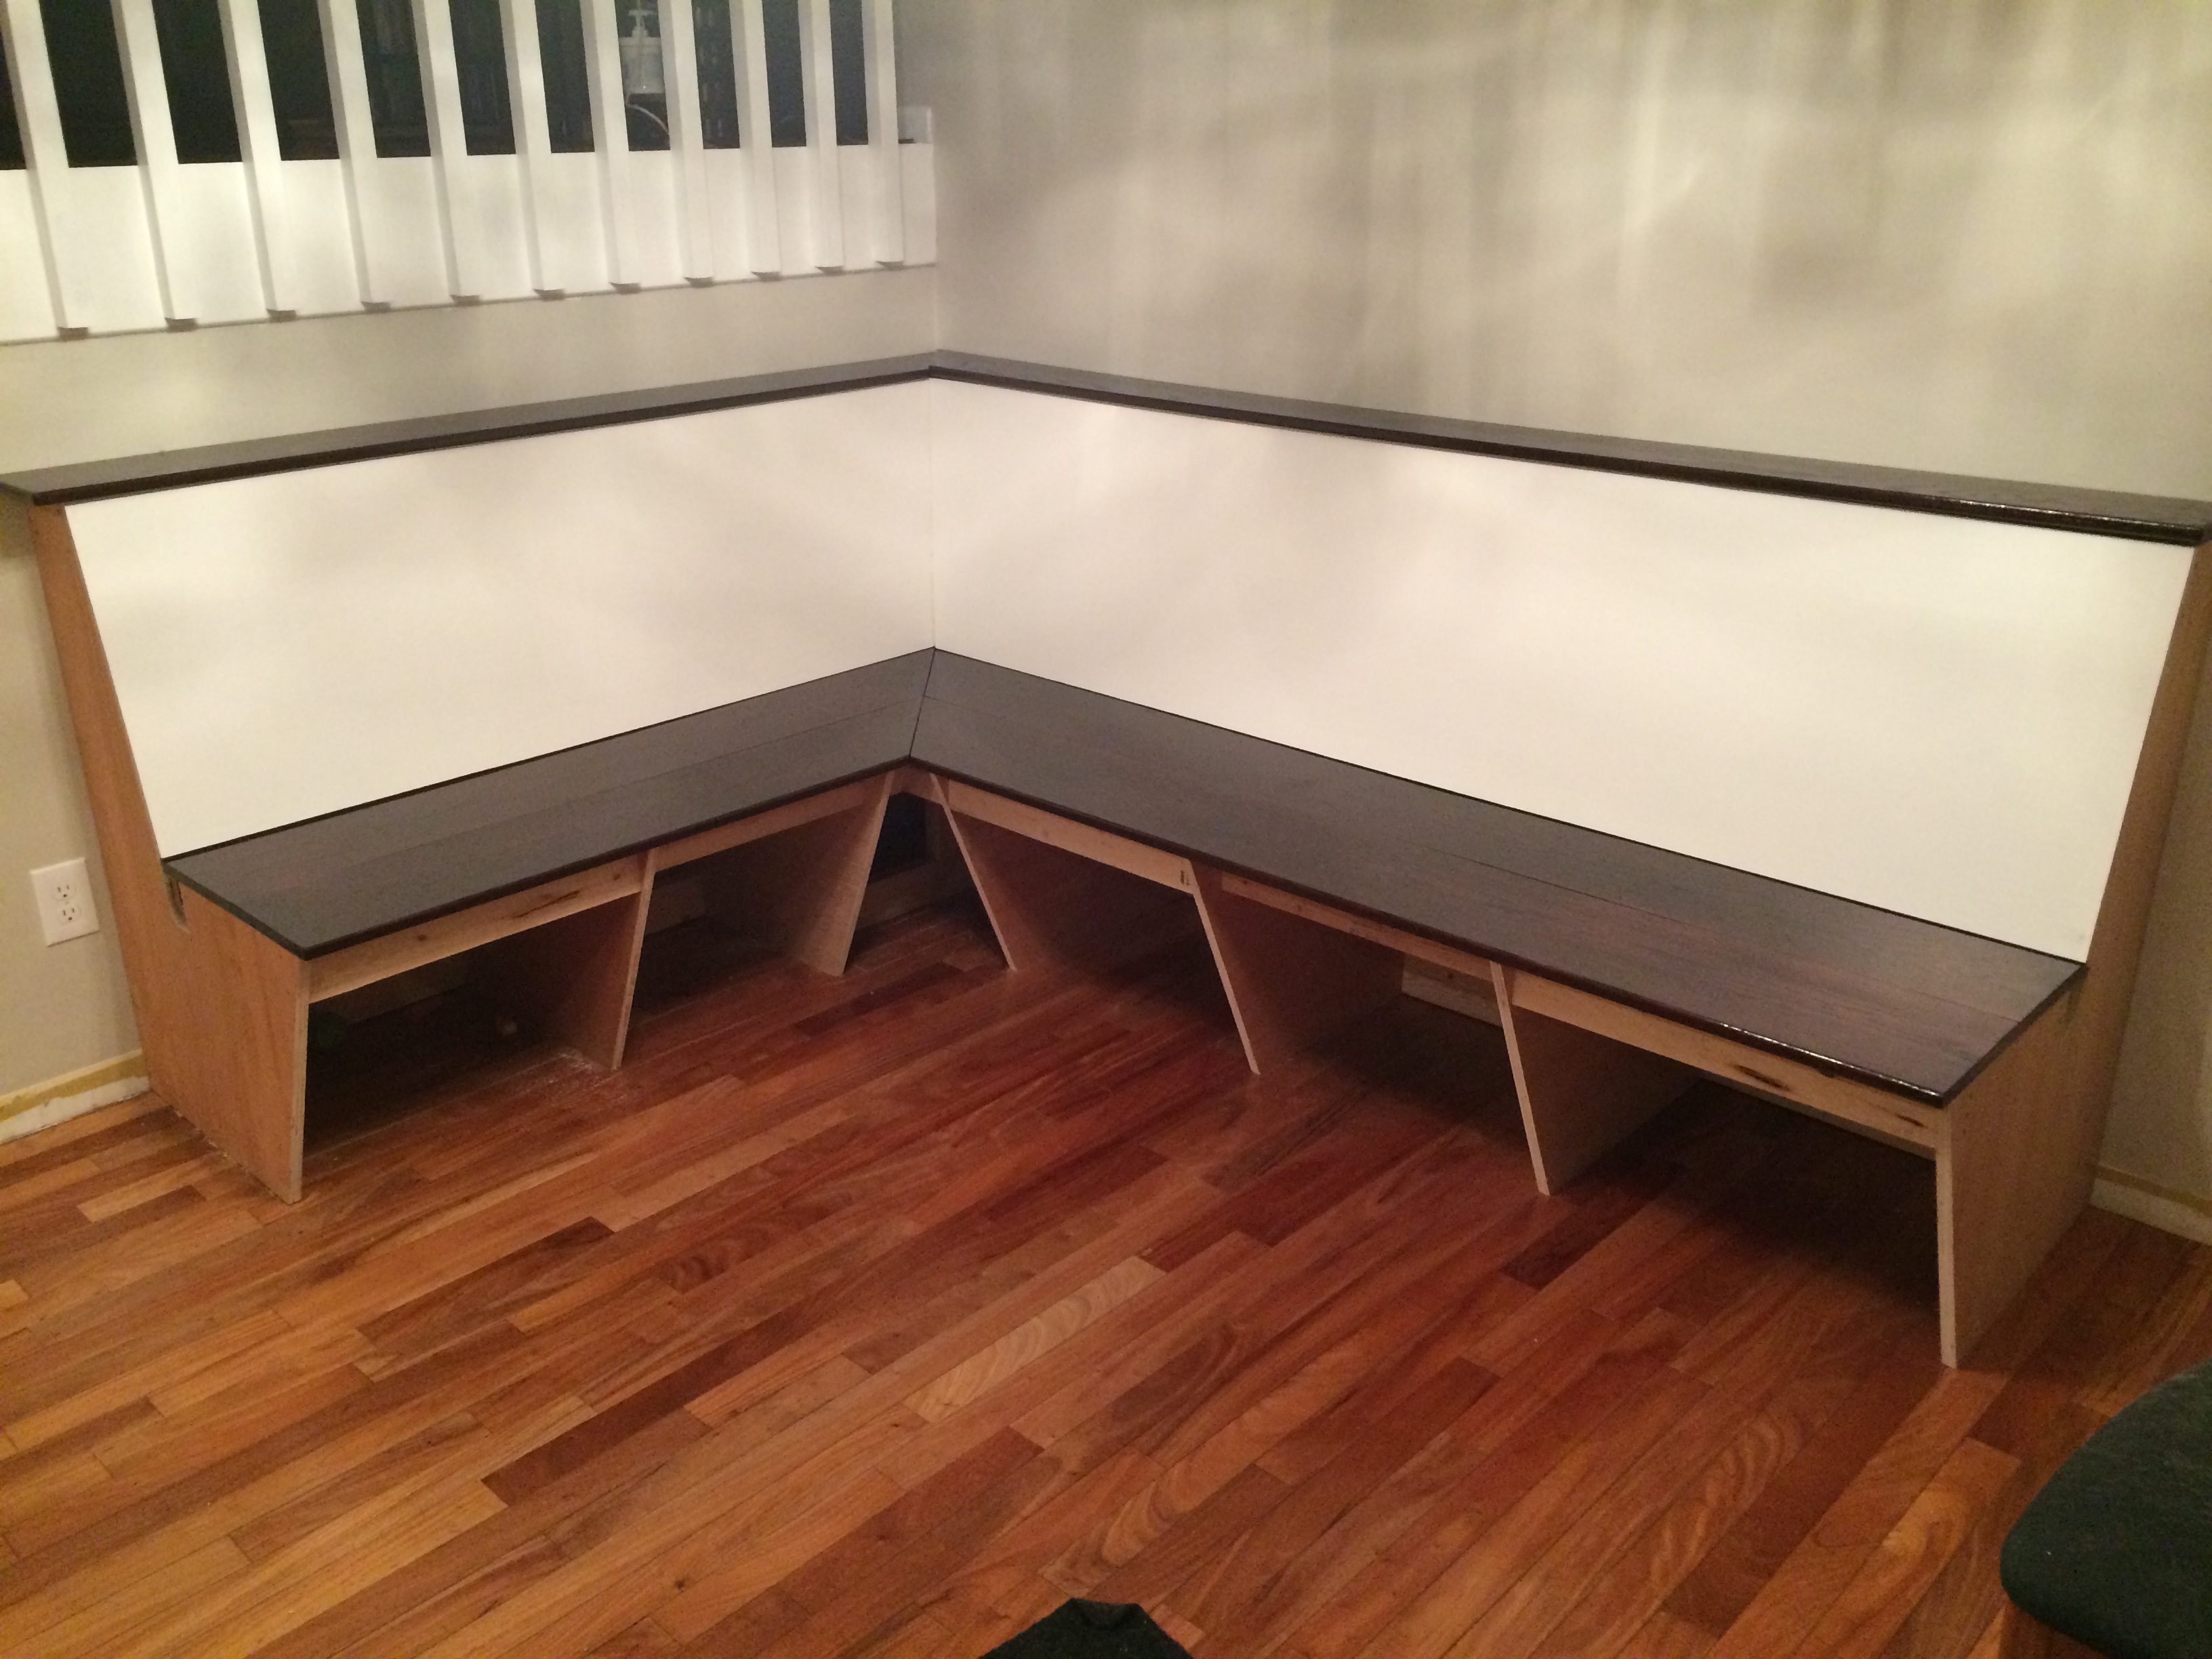
Mike then started building the frame and supports for an idea of how much of the space we wanted the banquette to take. He started by cutting 3/4″ plywood for what would become the major support structures in the banquette.
IMG_2117

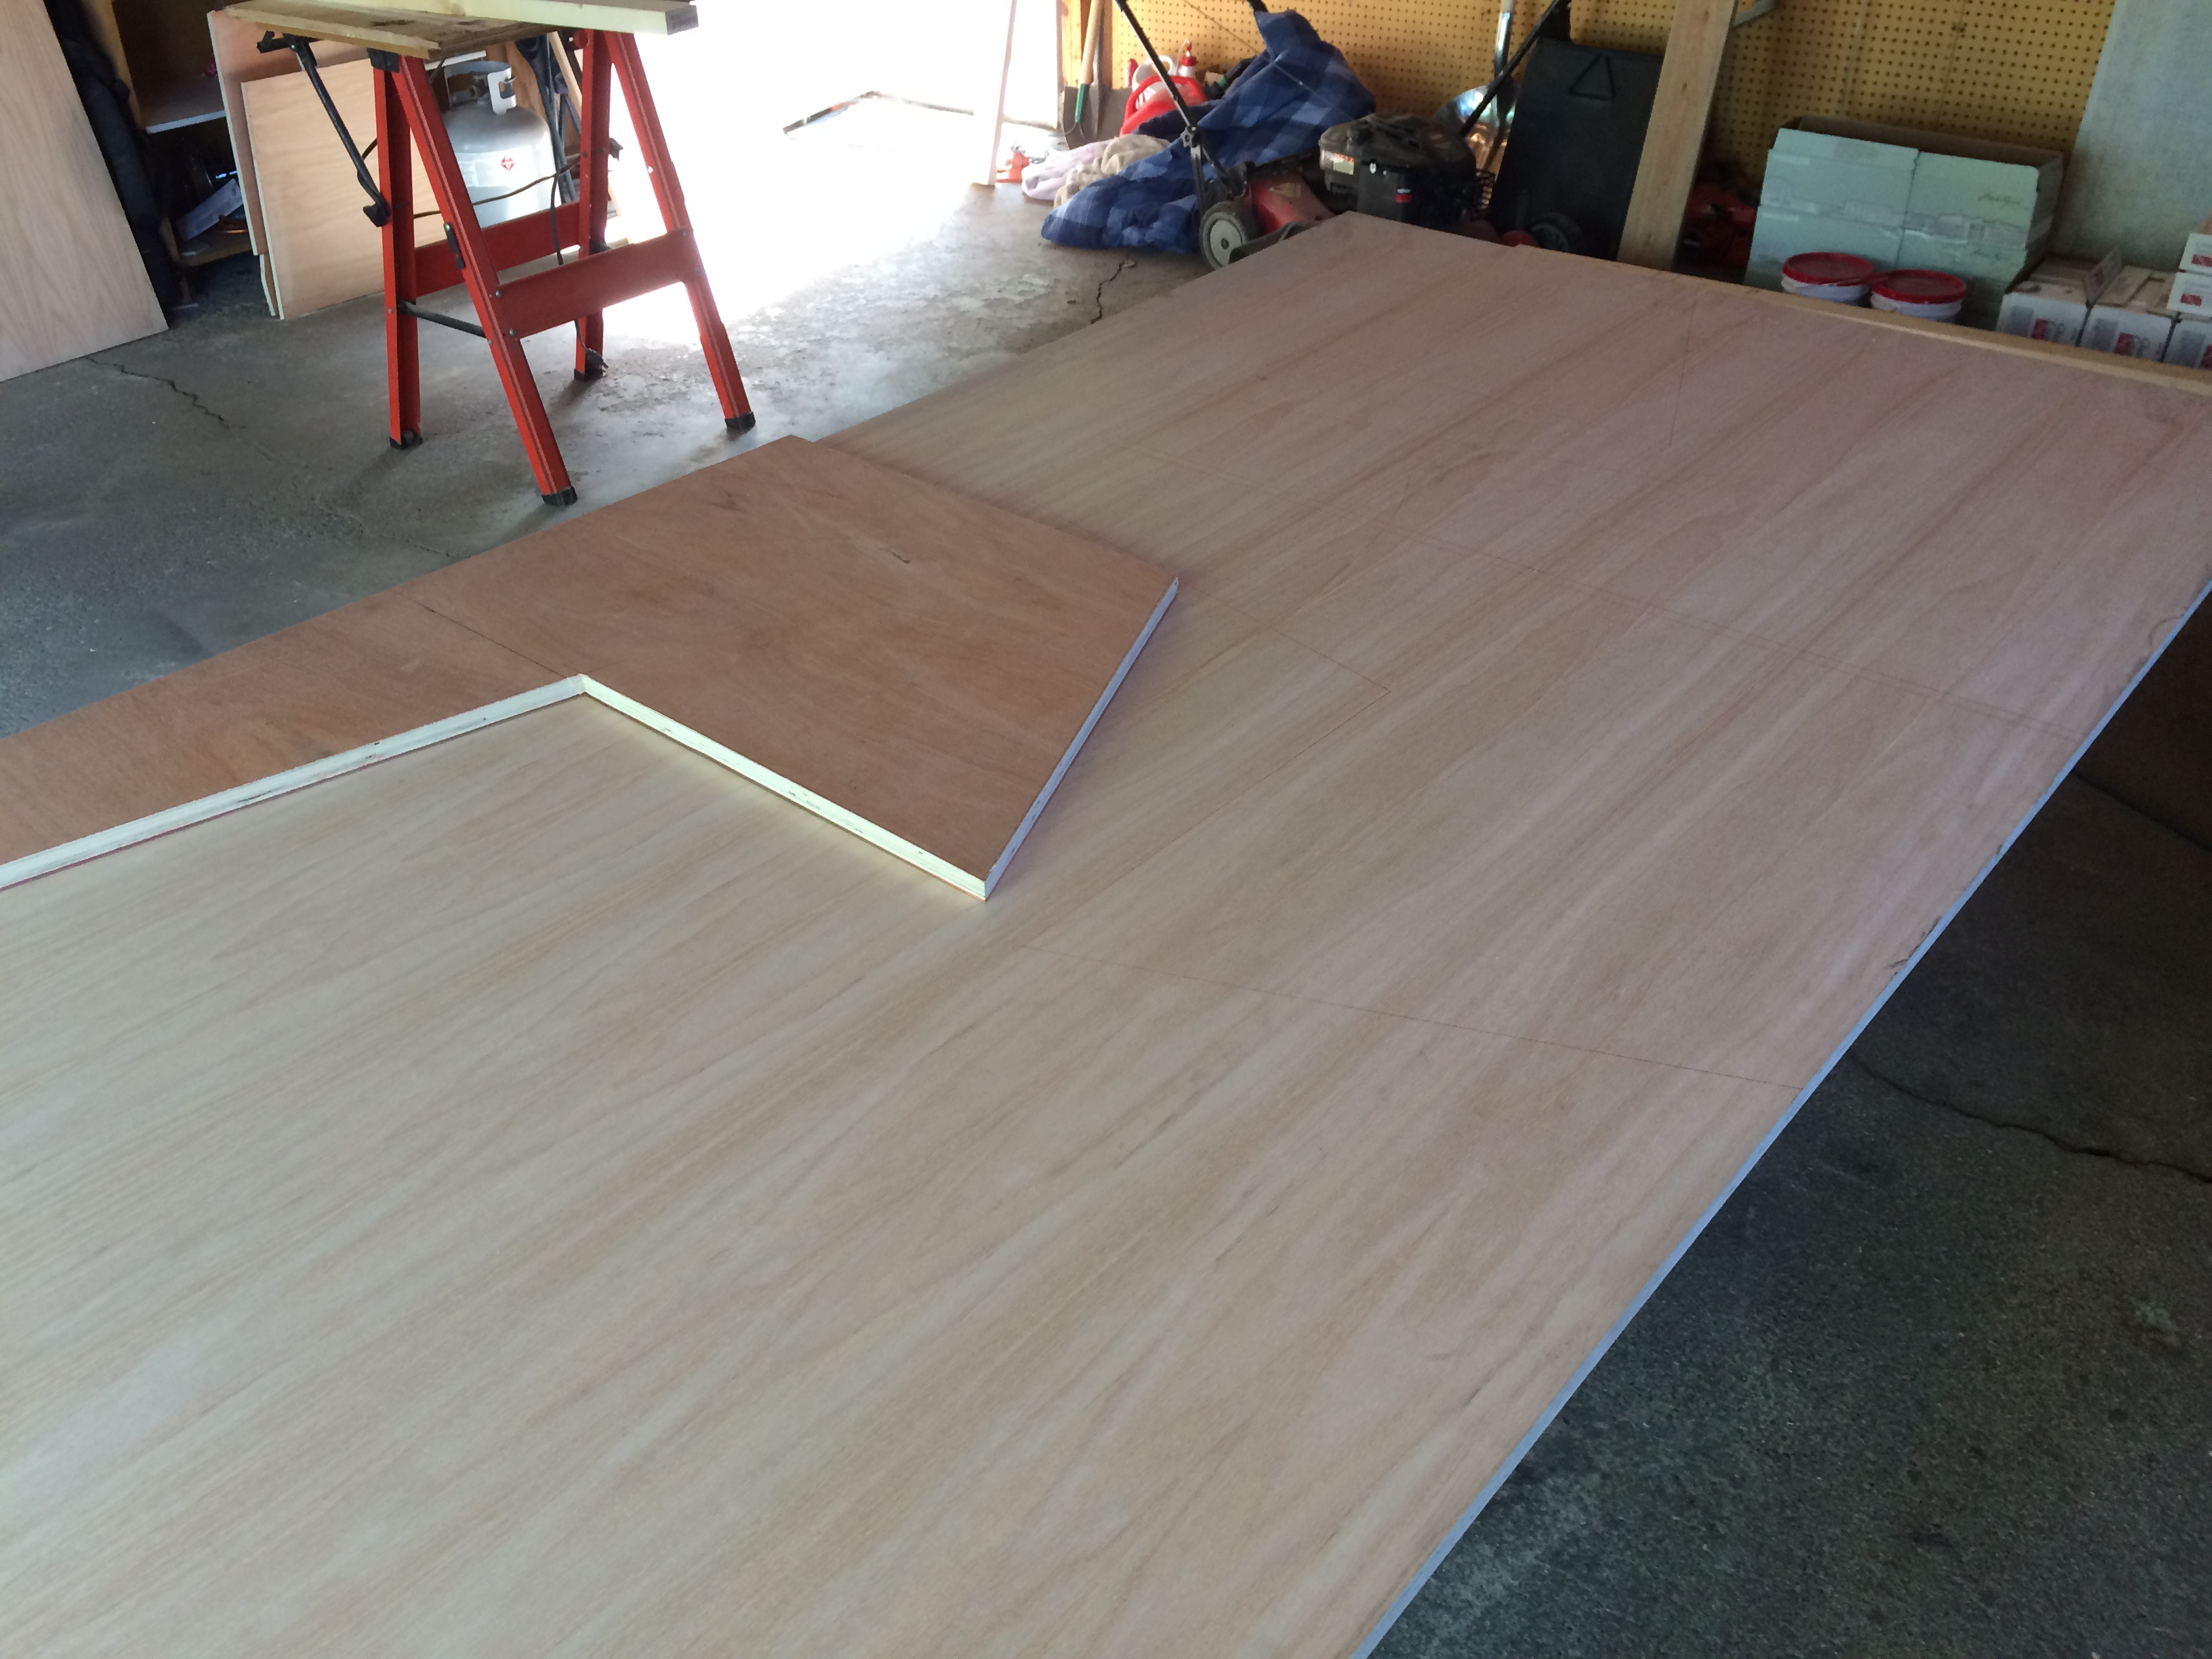
After cutting seven pieces, Mike lined them up and clamped them together.  Using a belt sander, we made sure they were all the same shape.
IMG_2118

The first segment was a bit of an experiment.  We needed to find a way to use as few 2x4s as possible so that we would have as much interior storage space as possible remain for multiple kitchen uses. We also had to keep the frame sturdy enough for multiple butts and think about what would need to be attached to the seat in later steps (hinges, etc).IMG_2119

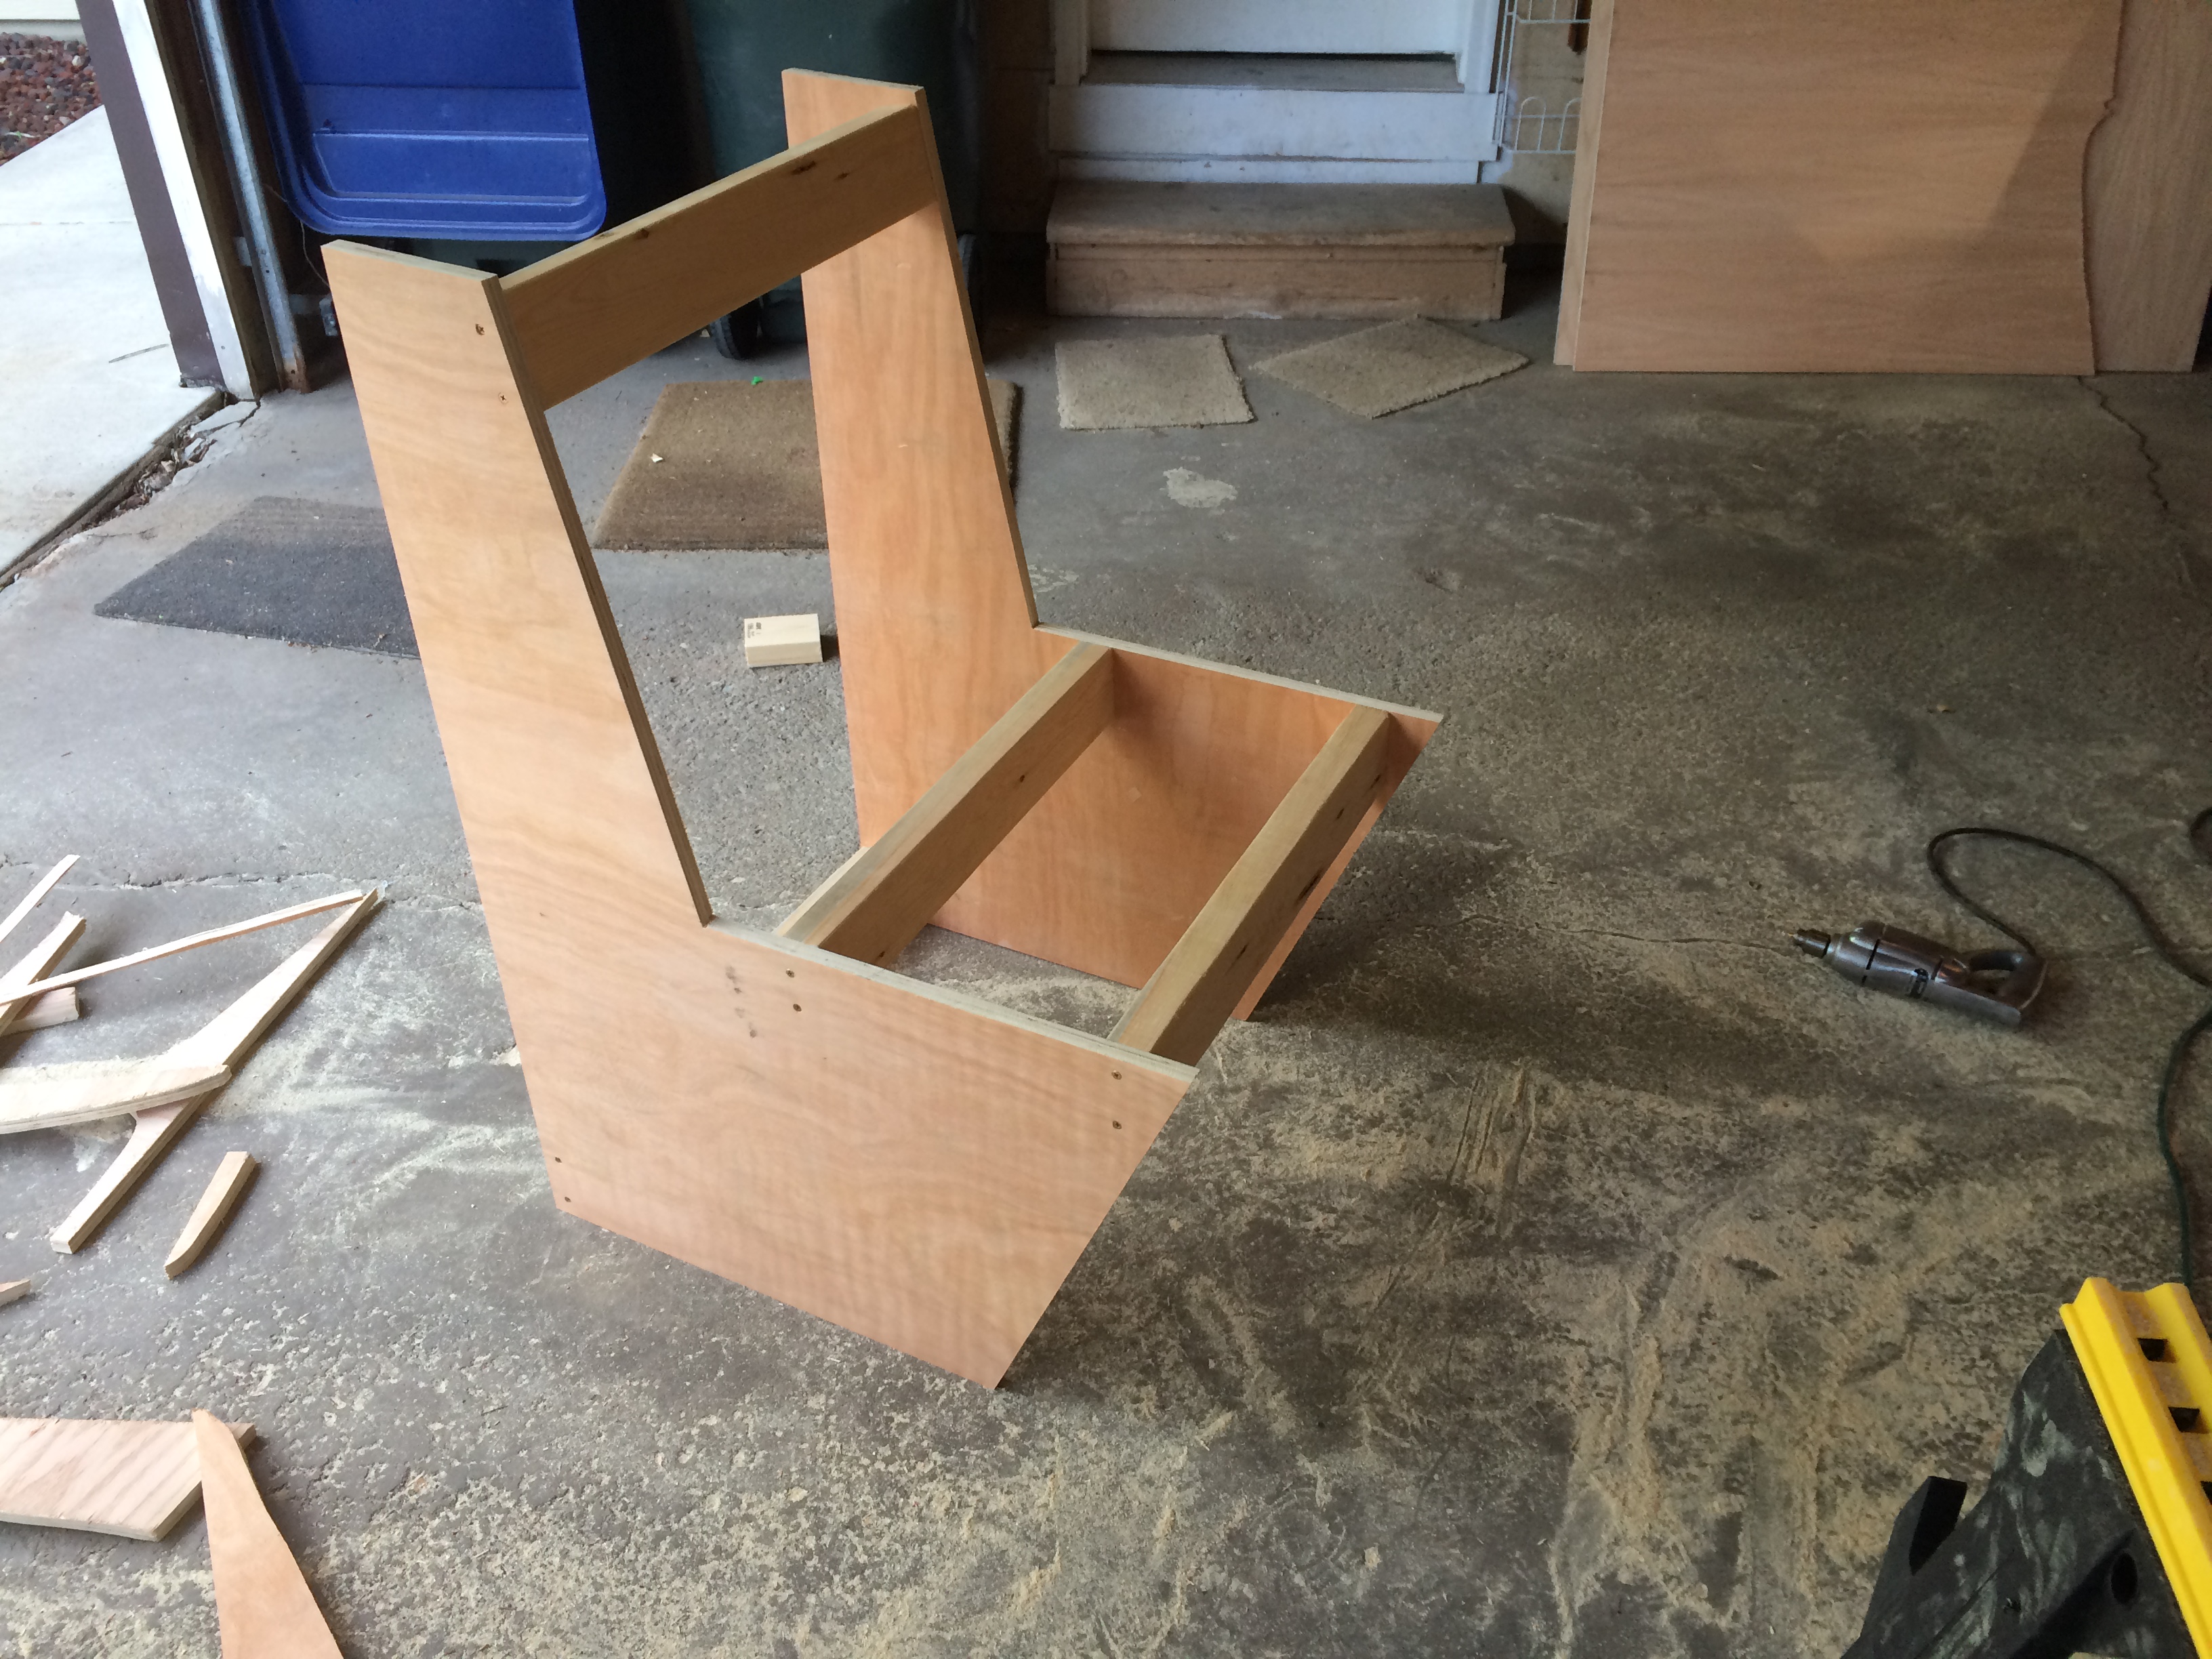
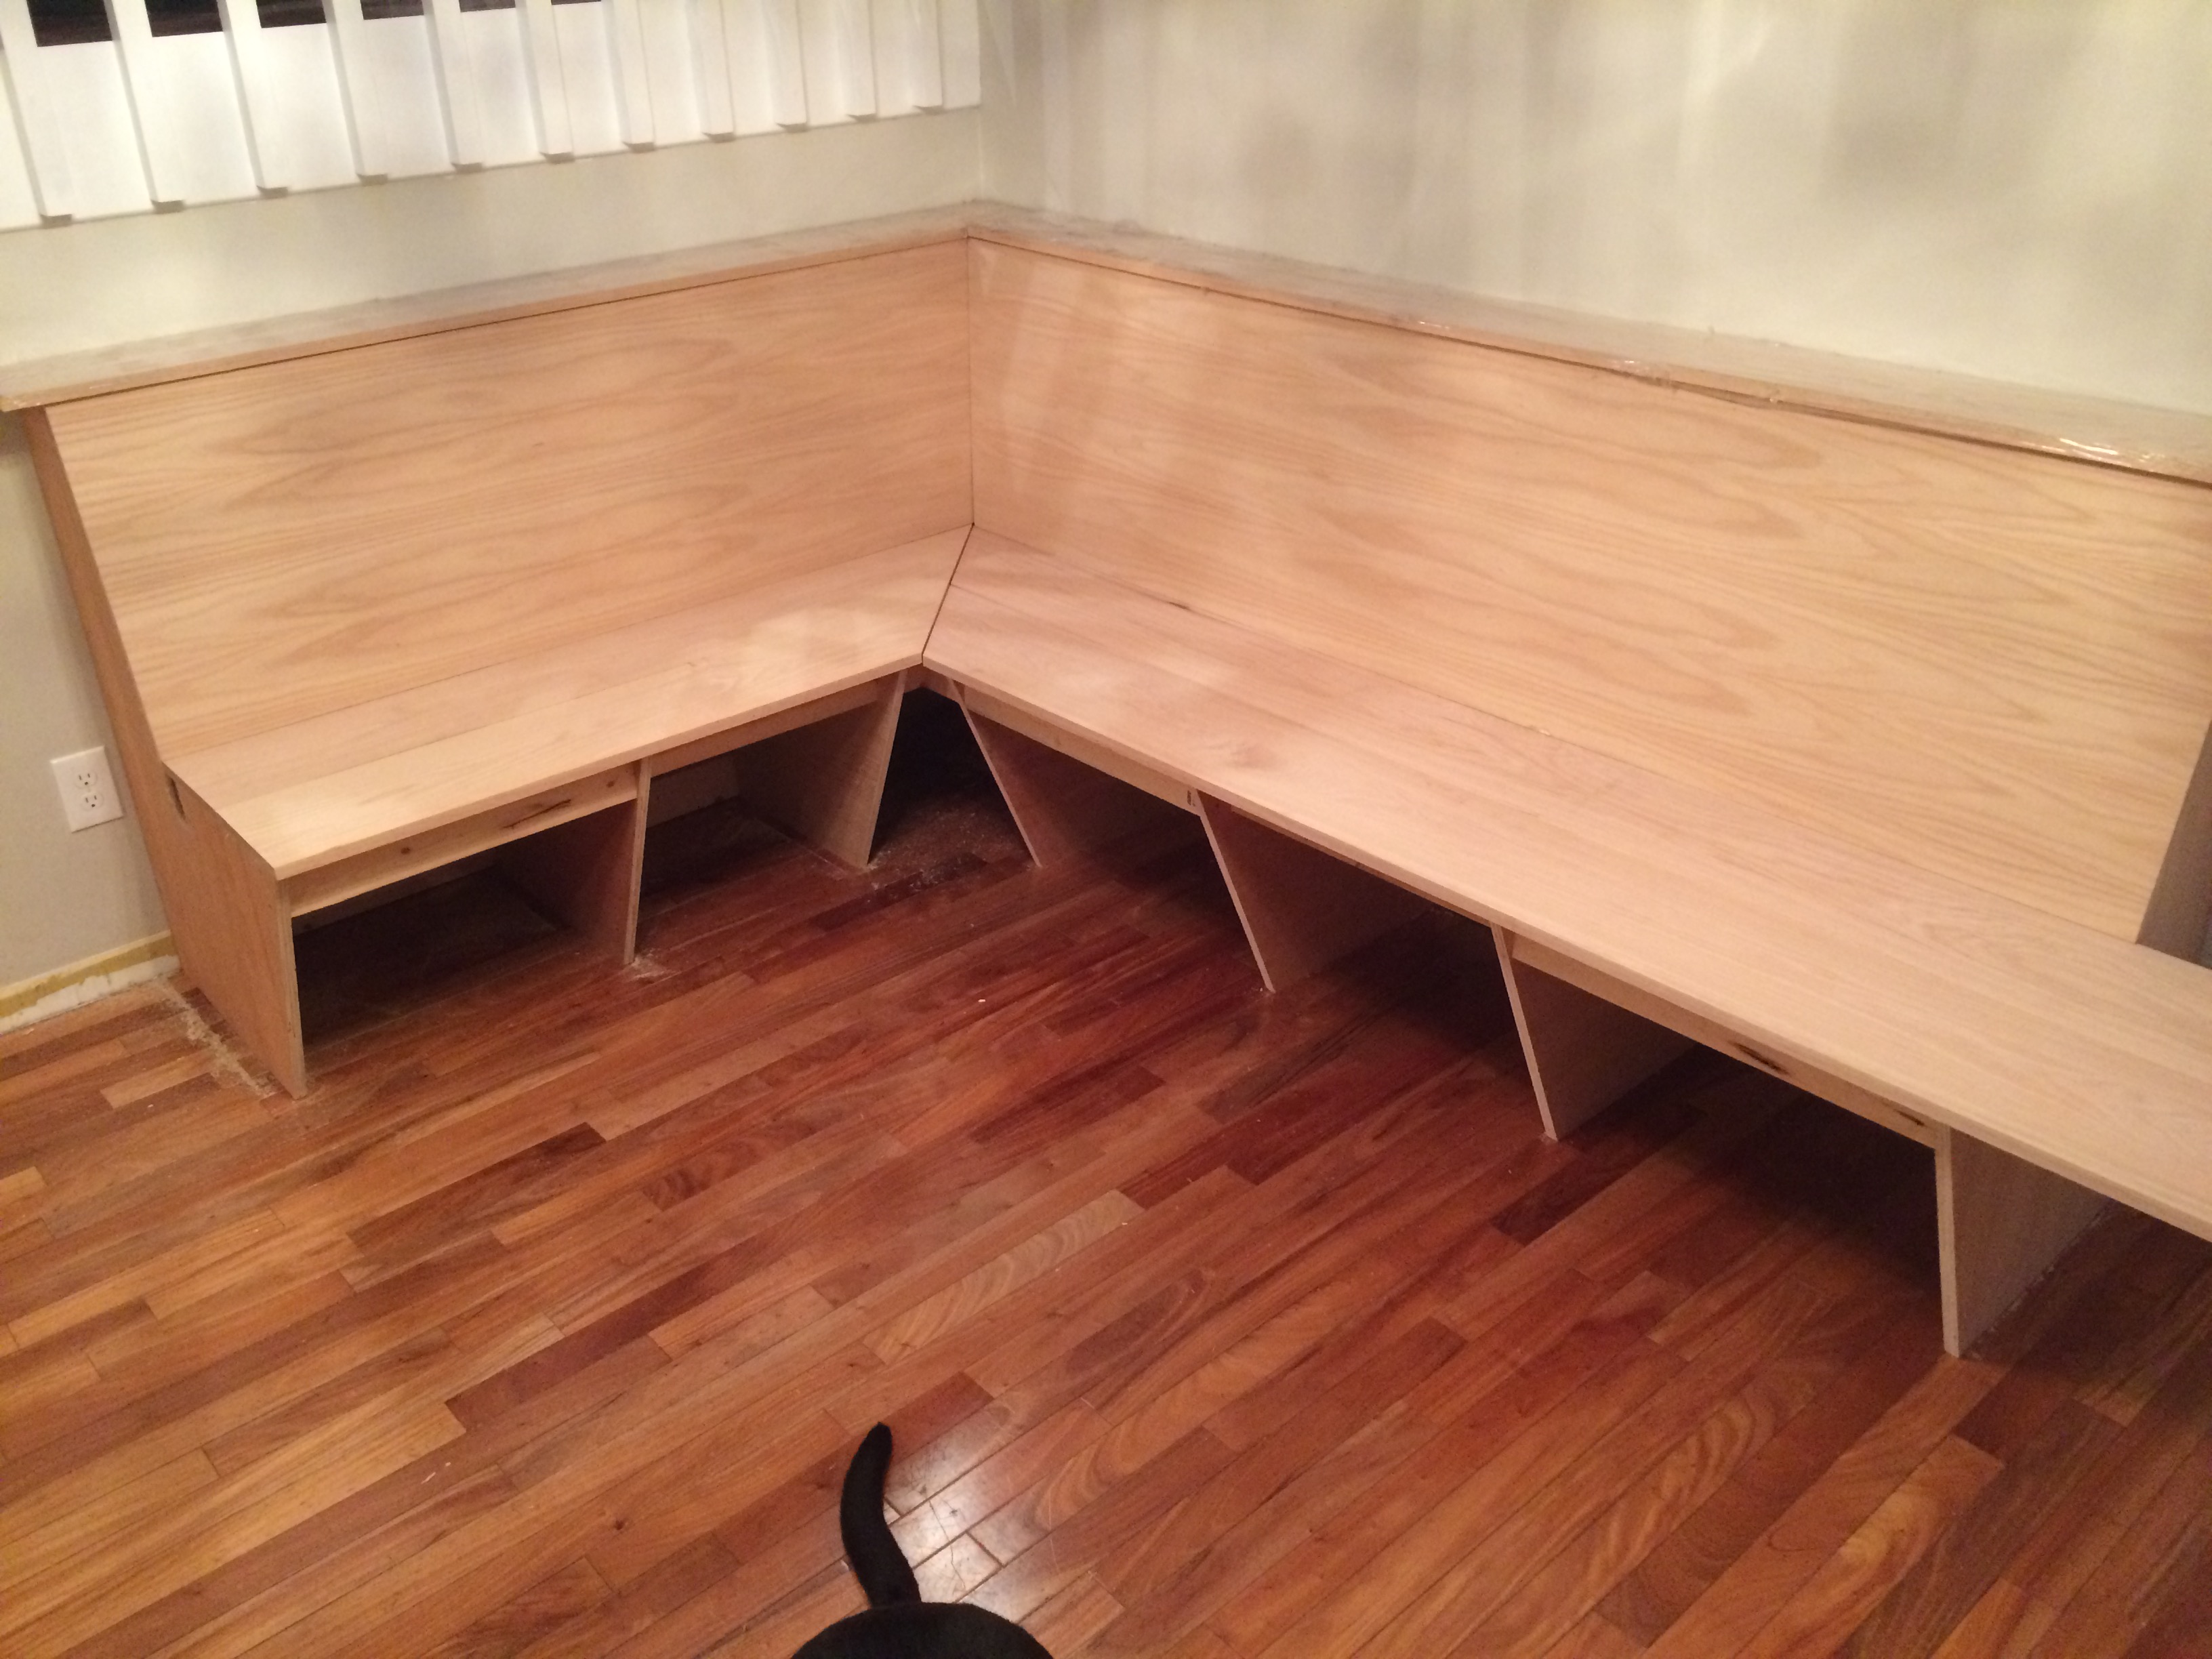
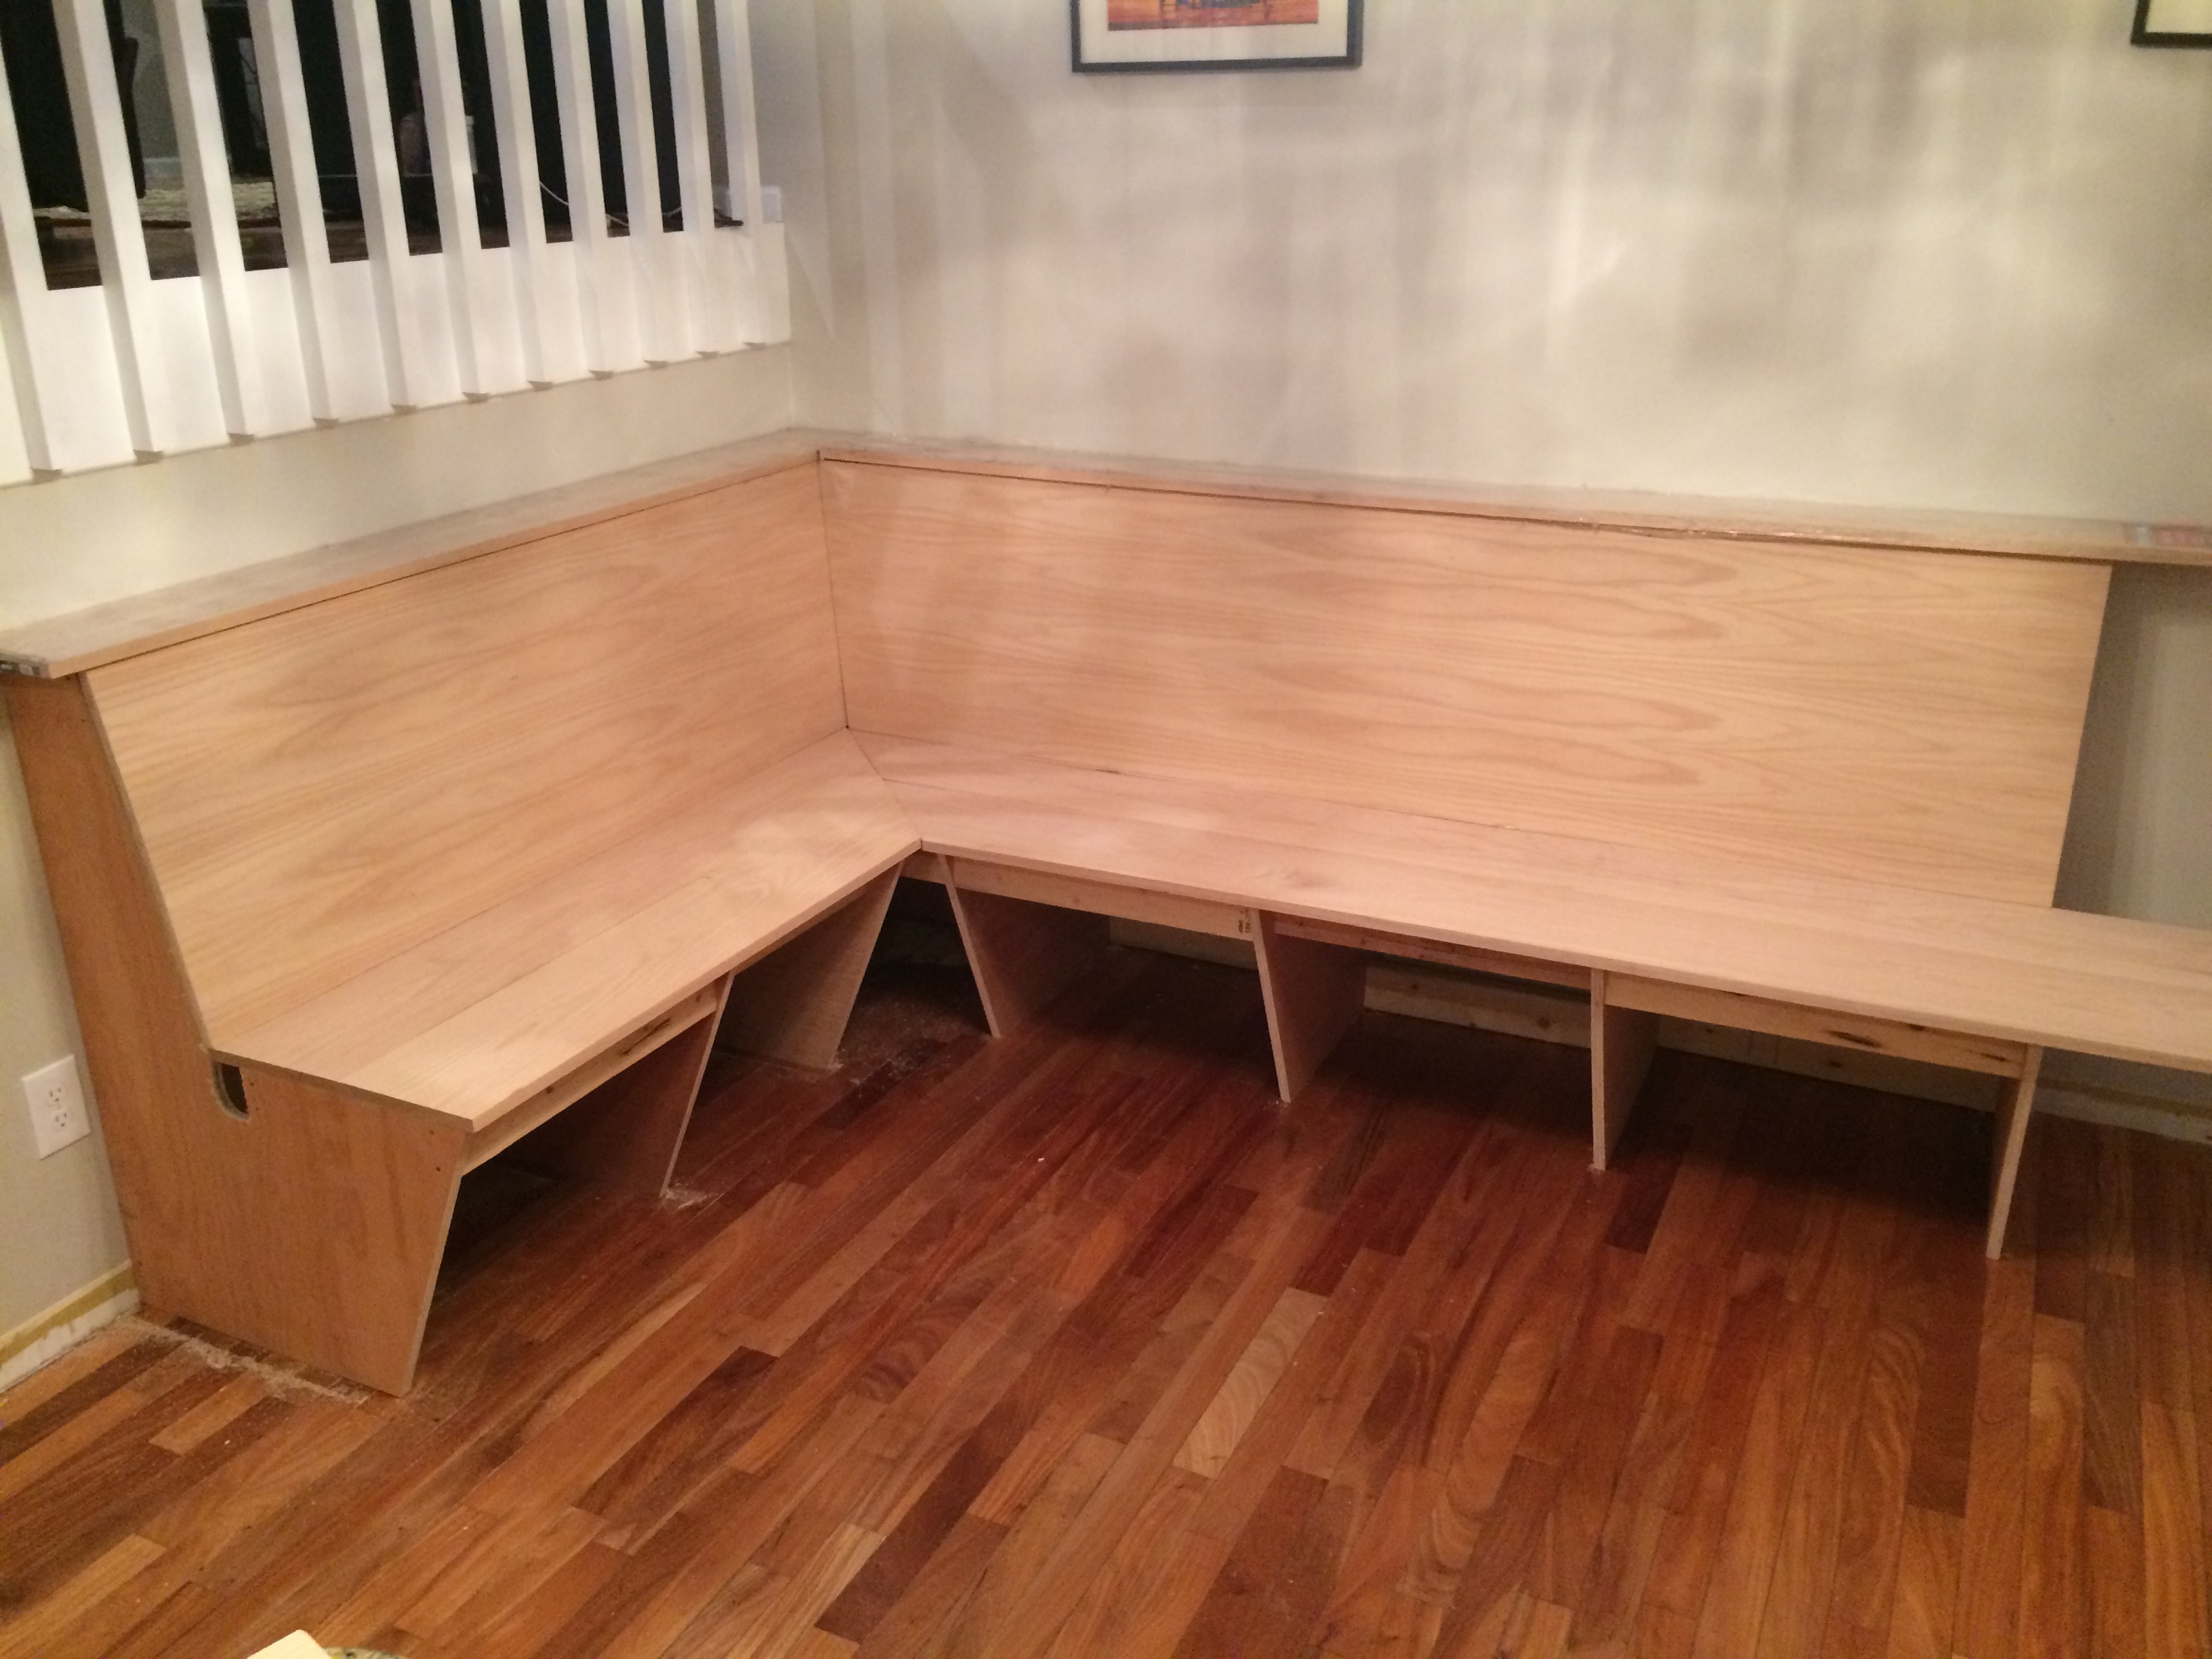
Here you see the skeleton of the banquette starting to take shape in the dining room.

IMG_2125

“How’m I lookin’?”

IMG_2128

Yeah geometry!

Added 2×4 supports to connect the corners together.

IMG_2129

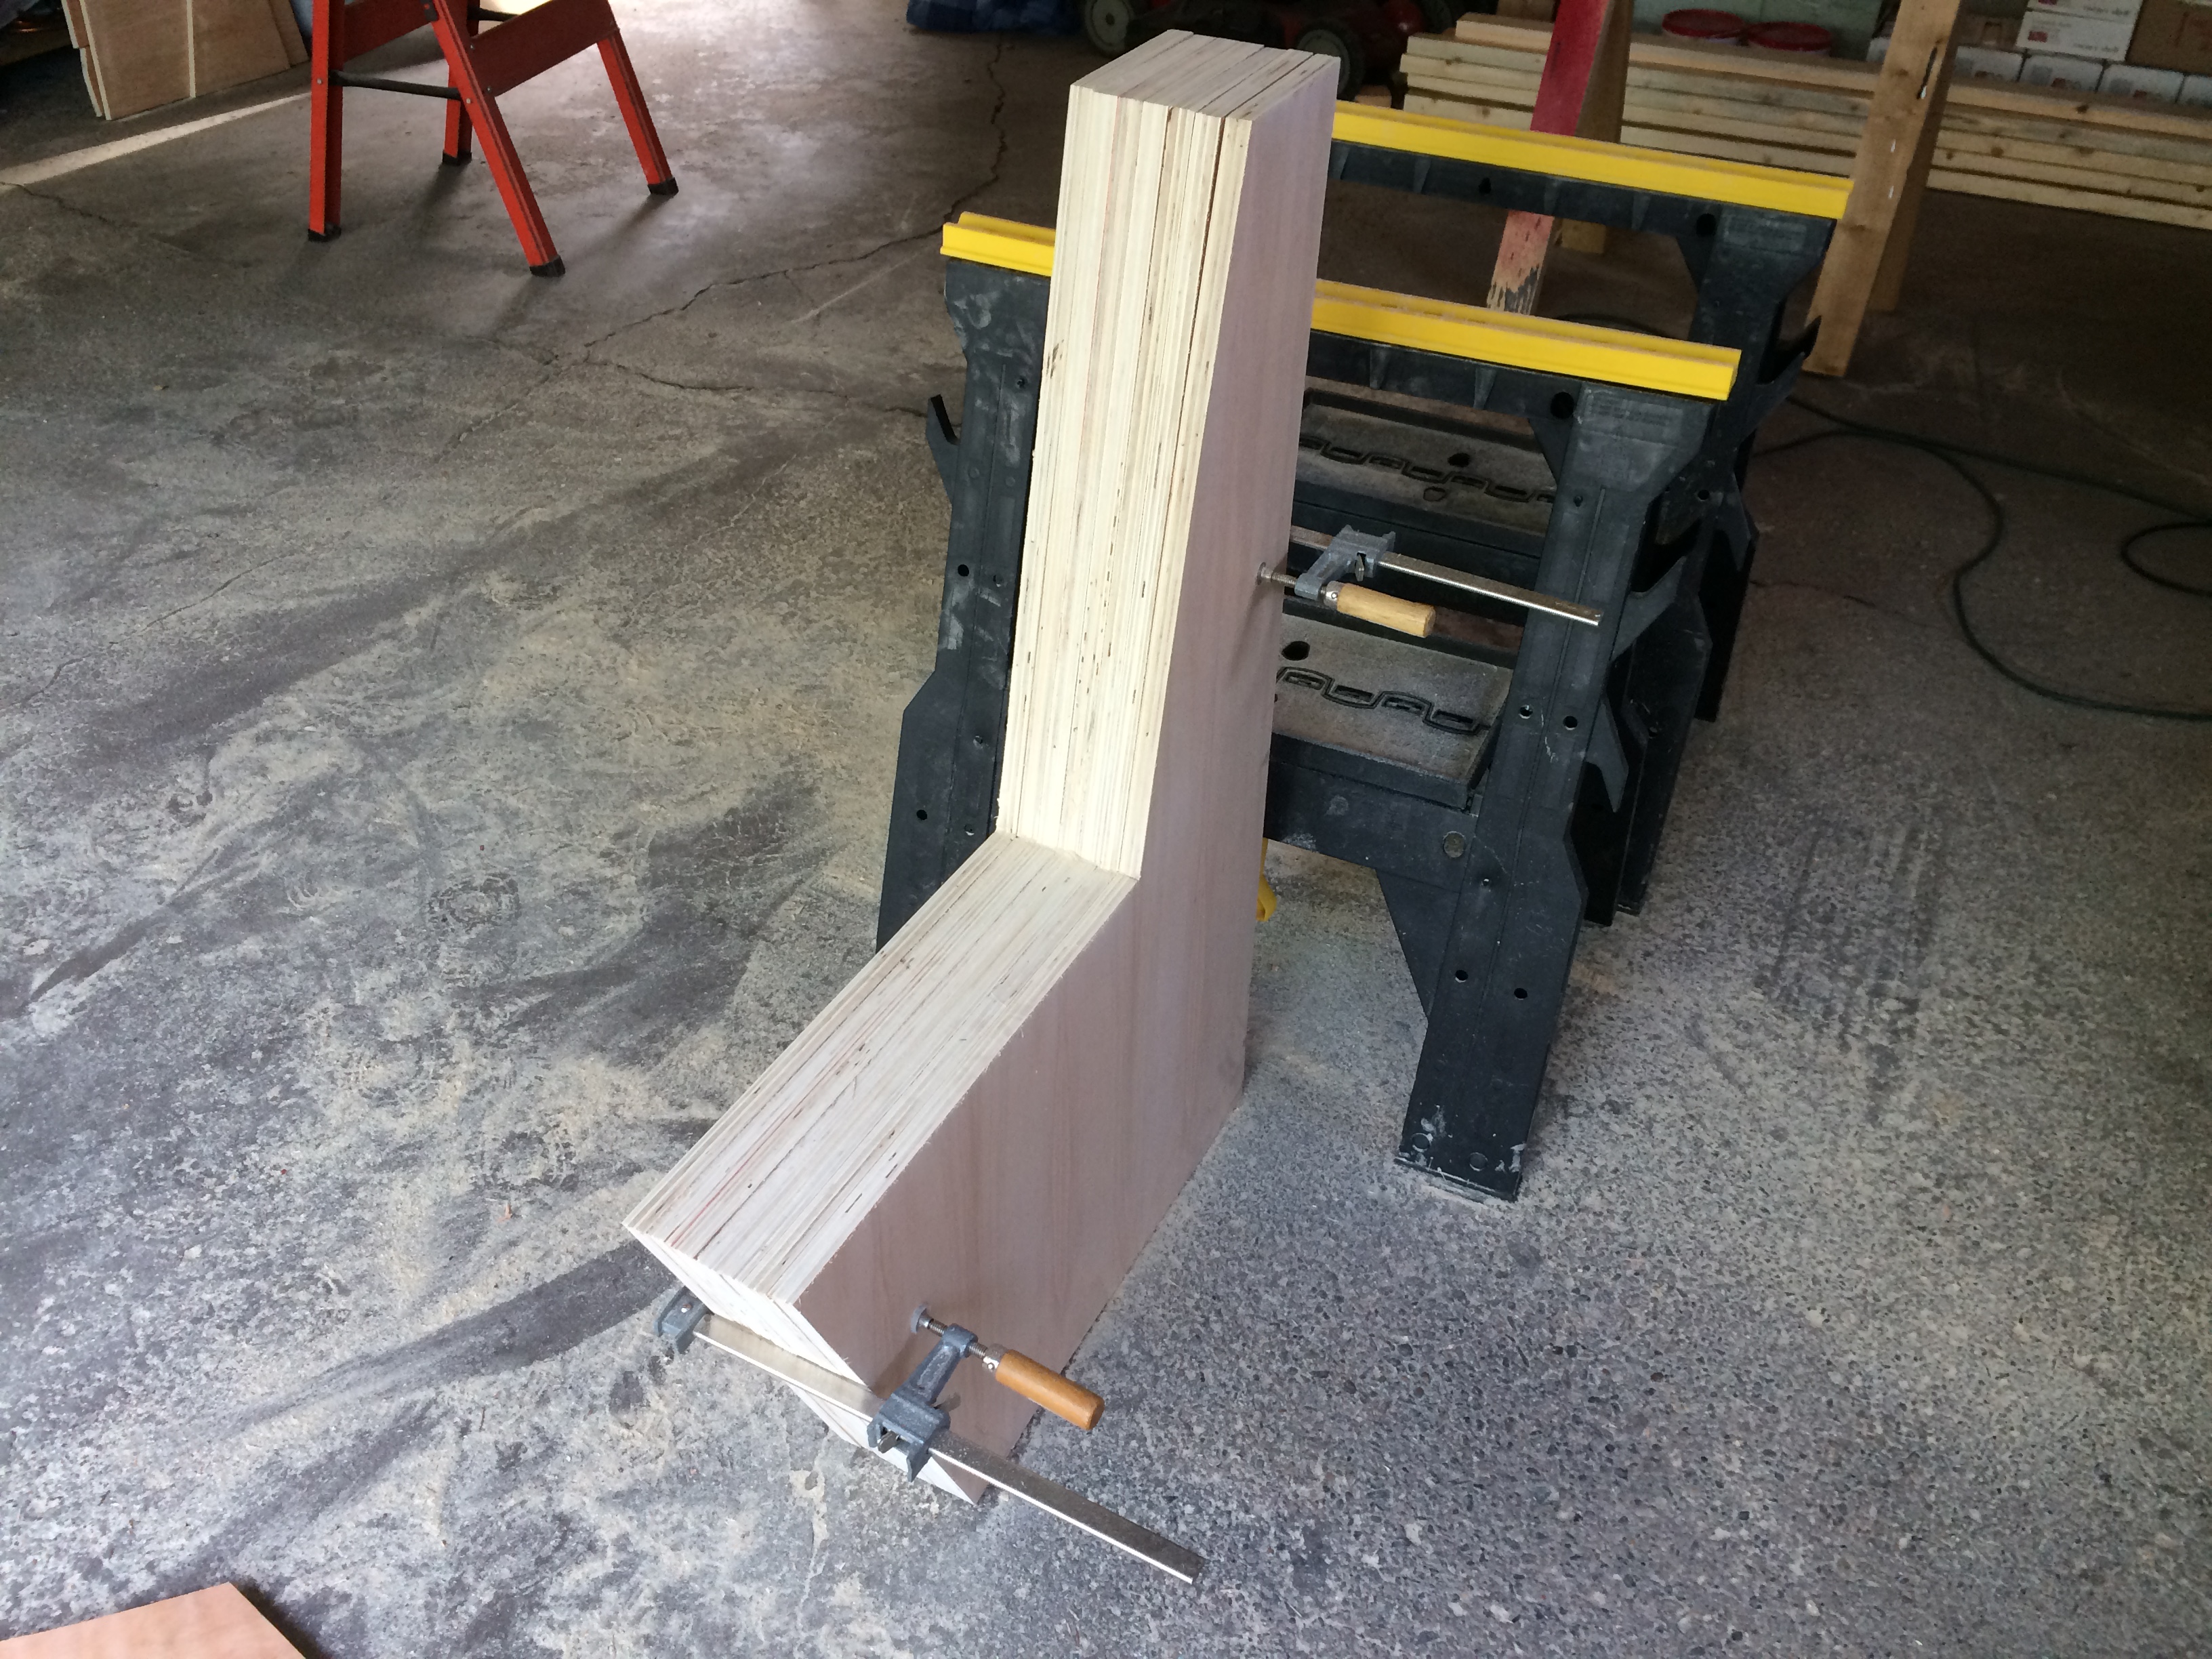
The first compound miter cut! 11 degrees one direction and 11 degrees the other direction. It’s simple over short distance like a 2×4, but wait to see the head-scratcher I was about to run into.

The corner needed angled supports for the seat backs to rest against. IMG_2130

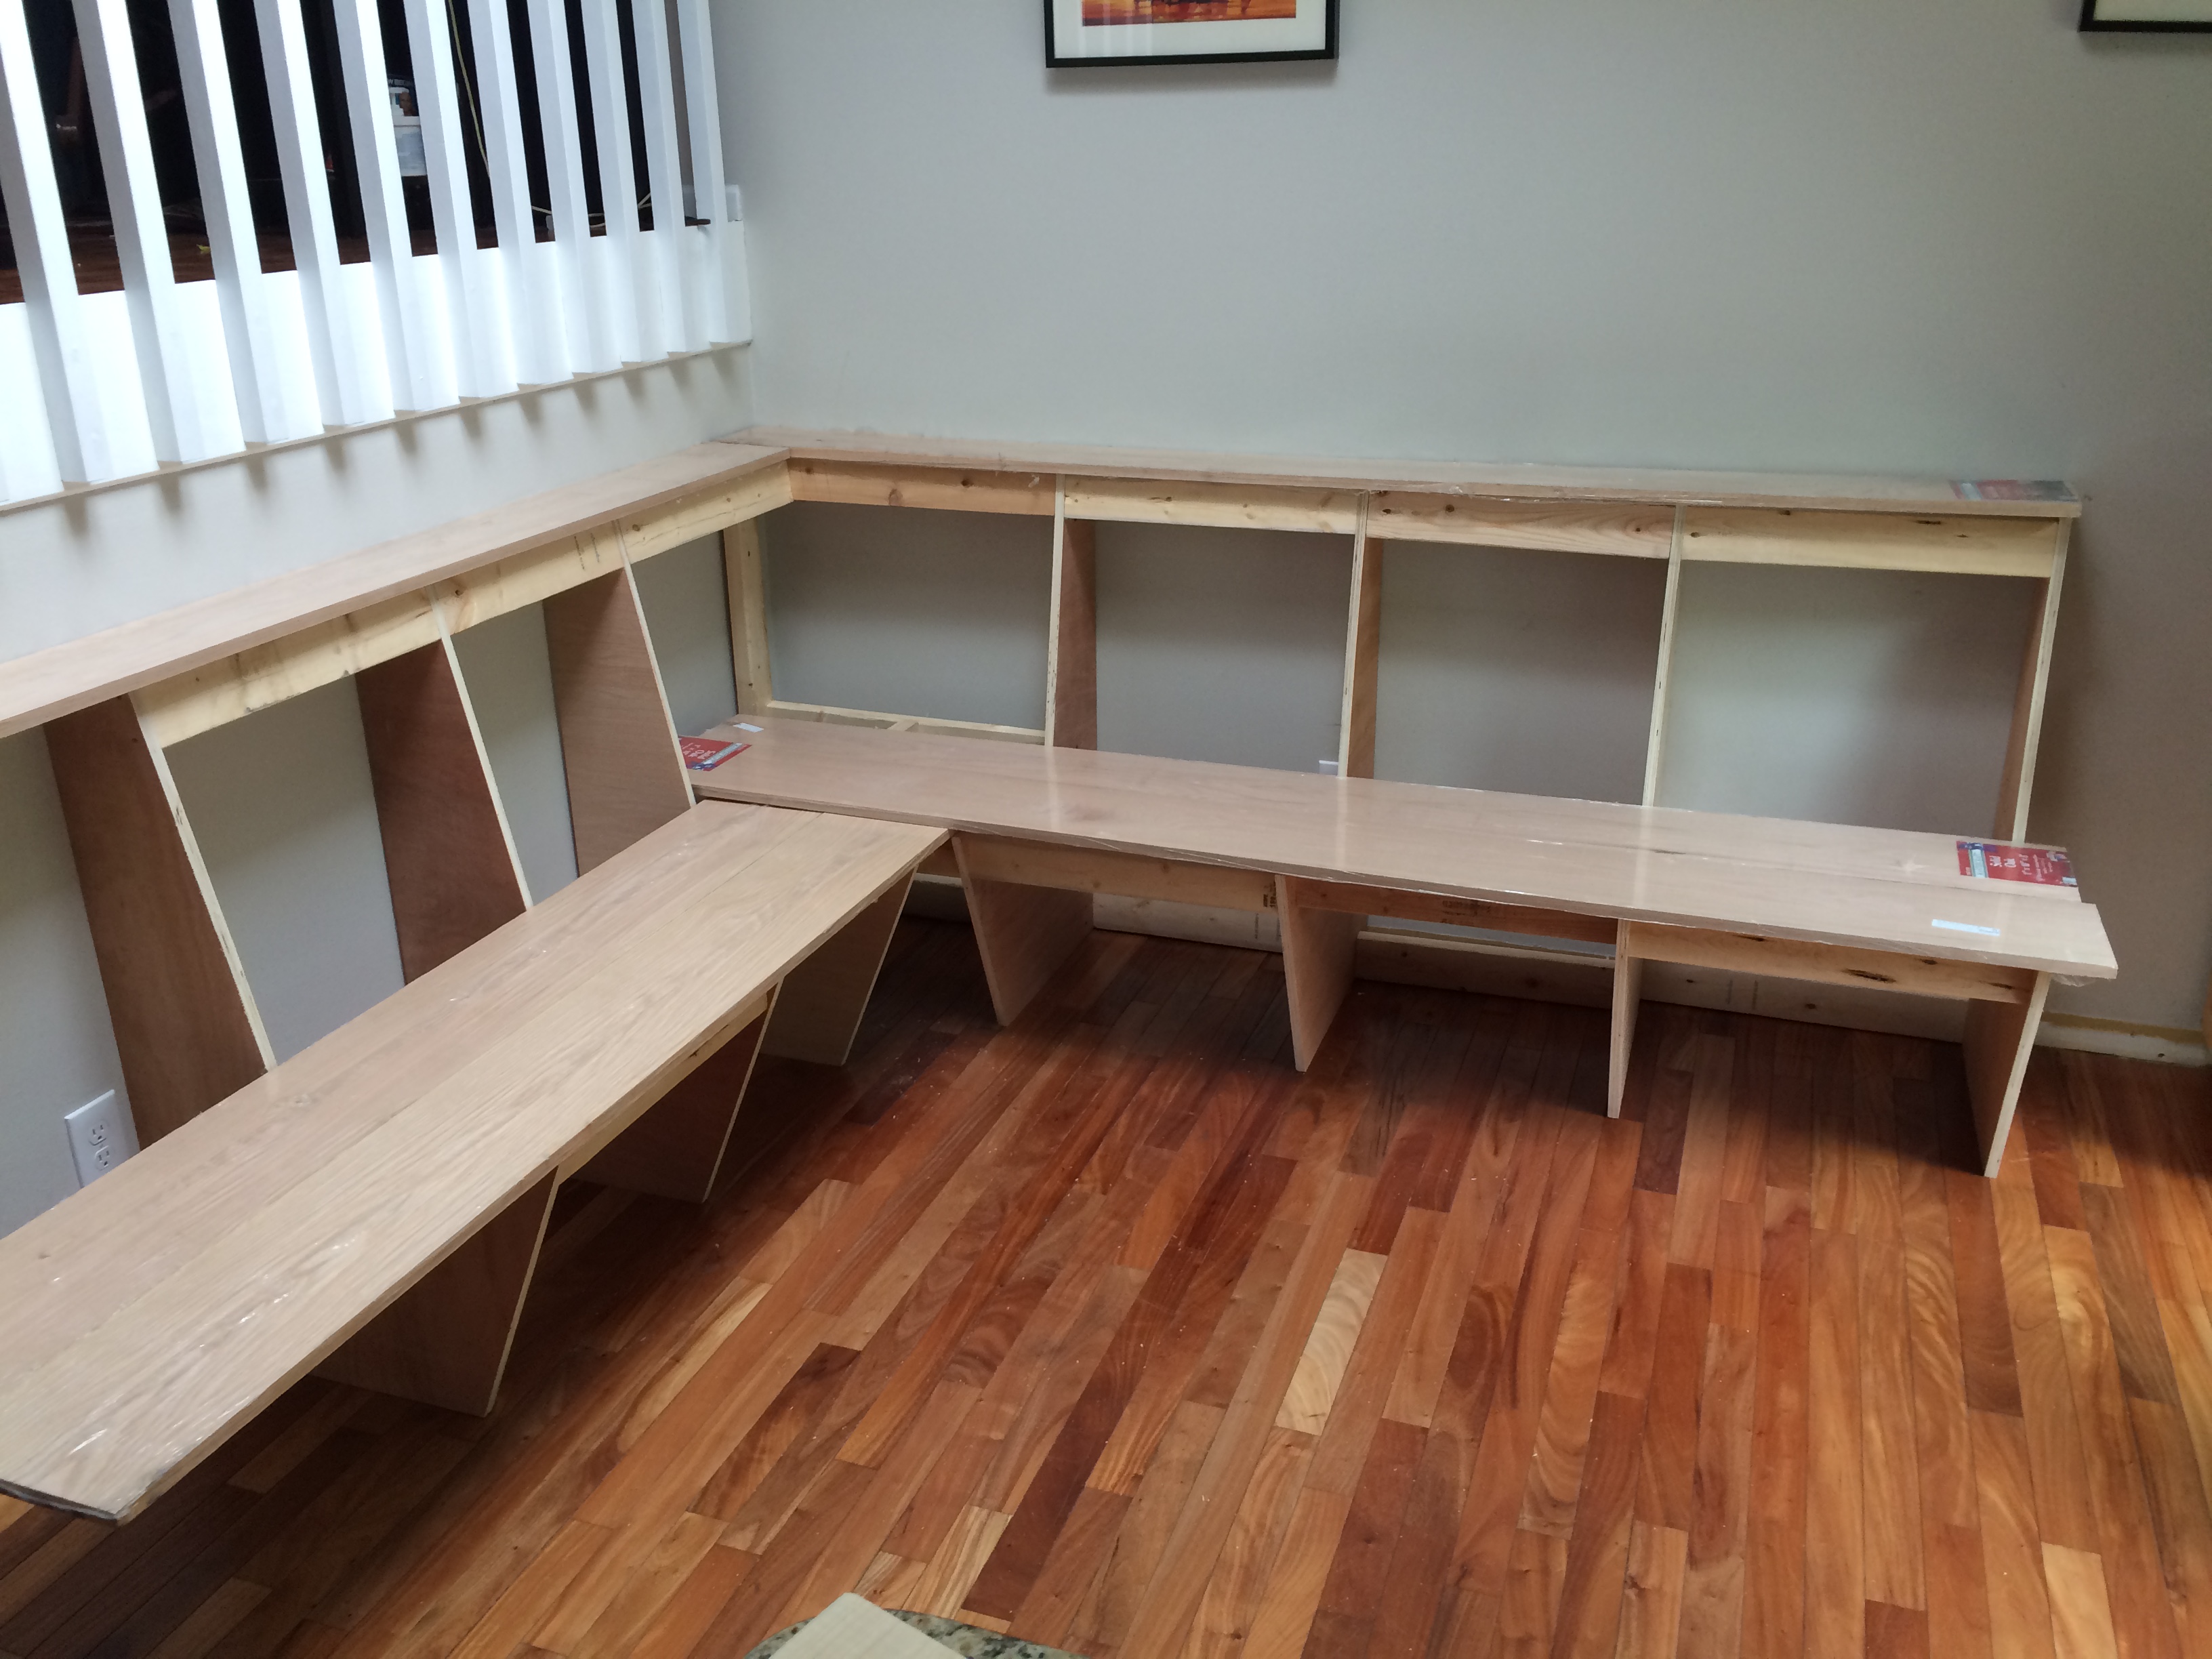
OK, the next series of photos will be dealing with the technical details of how to angle a seating area into an imperfect corner. We understand if you want to jump ahead and just look at the progress photos below (I know I would).

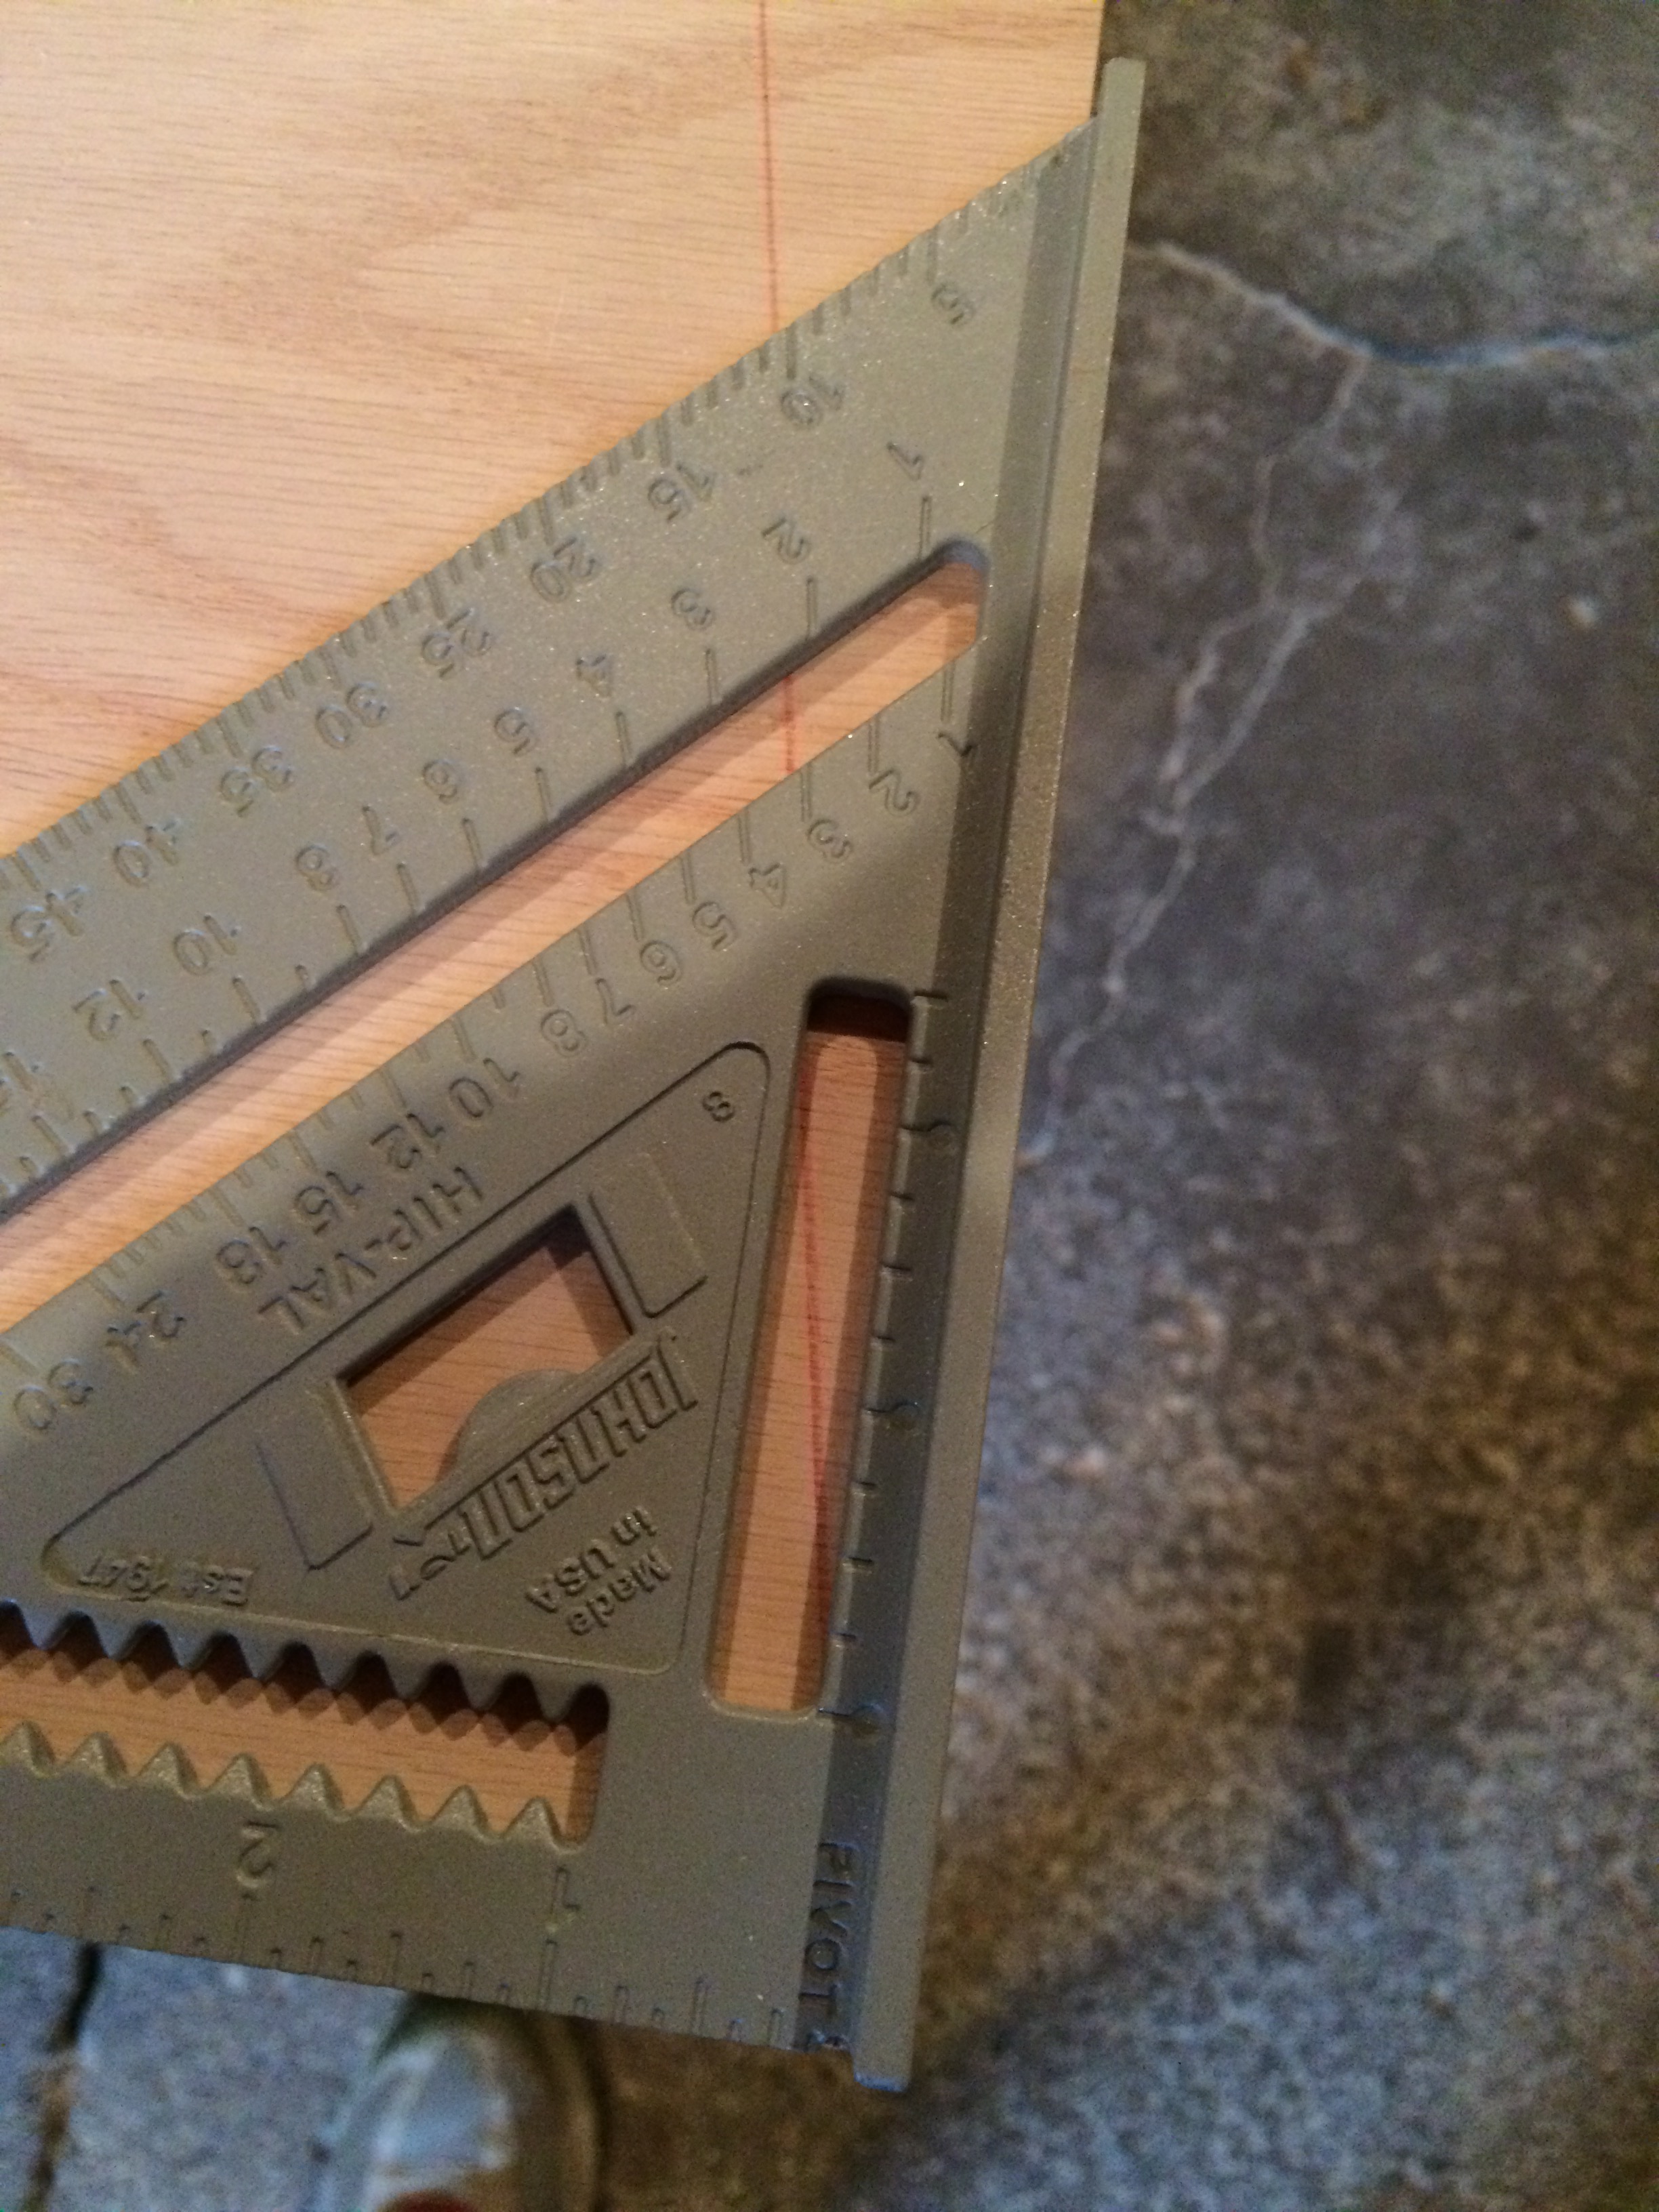
Before you read the following details, please keep in mind that I was a “C” student in math growing up (Sara has no comment regarding her Math grades). You know how when you’re in high school math, and you joke with all you friends, “When will we ever use this information?” the answer is: after you buy a 30 year old home and decide to build a series of things that attach to the settled warped walls (except for proofs – you will never in your life need to write a Geometry proof again after 10th grade, that shit is useless).  For this project, I needed to accurately calculate and mark lines to make compound miter cuts (more than one angle at one time).  The biggest cut was going to be in the corner where the seat backs met together.  I needed to take into consideration the angle that the seat on the left would bend back, and also the angle of the seat on the right for how the two pieces fit together.  I first held an angle tool up to the bench and saw that it bent back at an angle of roughly 10.5 degrees.  I marked the board using that information:

IMG_2134

Also, these photos have been brought to you by Excedrin Migraine, “Excedrin, the headache medicine.”

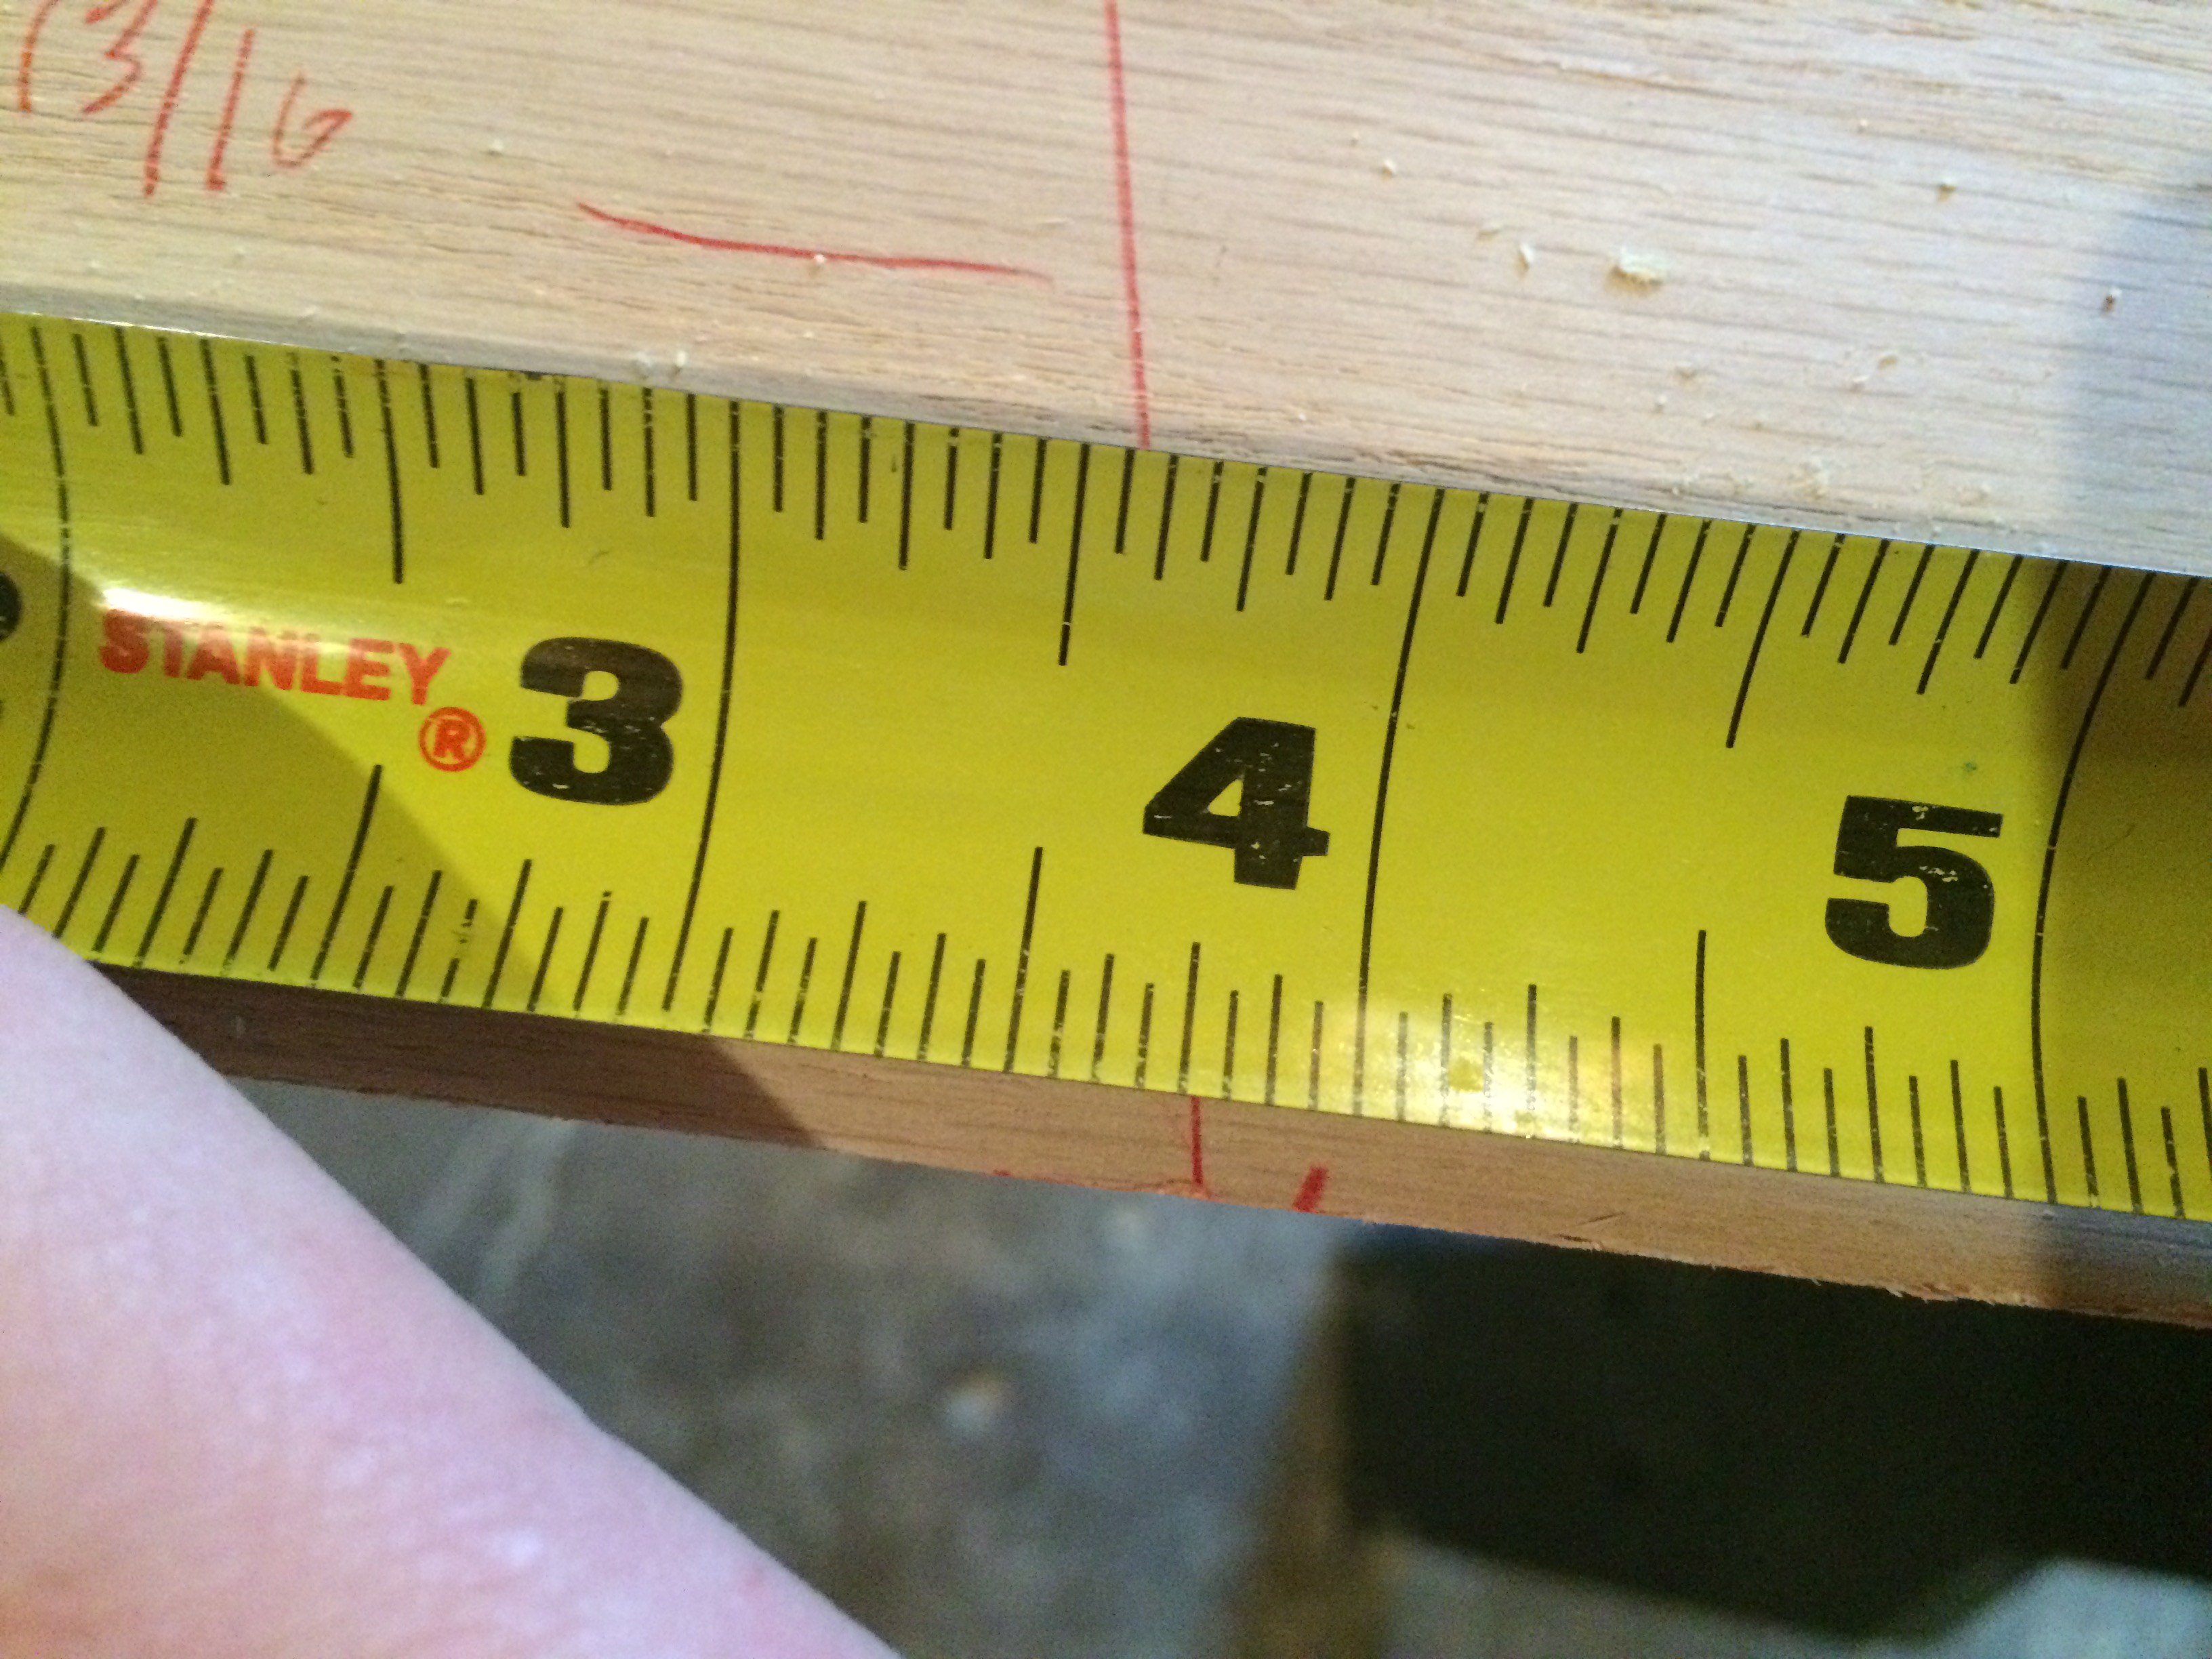
The red line on the board below shows where the cut would have been made if I didn’t take time to measure a second way.  Over such a large distance, I minor miscalculation could have devastating results and ruin a fairly pricey piece of oak plywood.IMG_2135

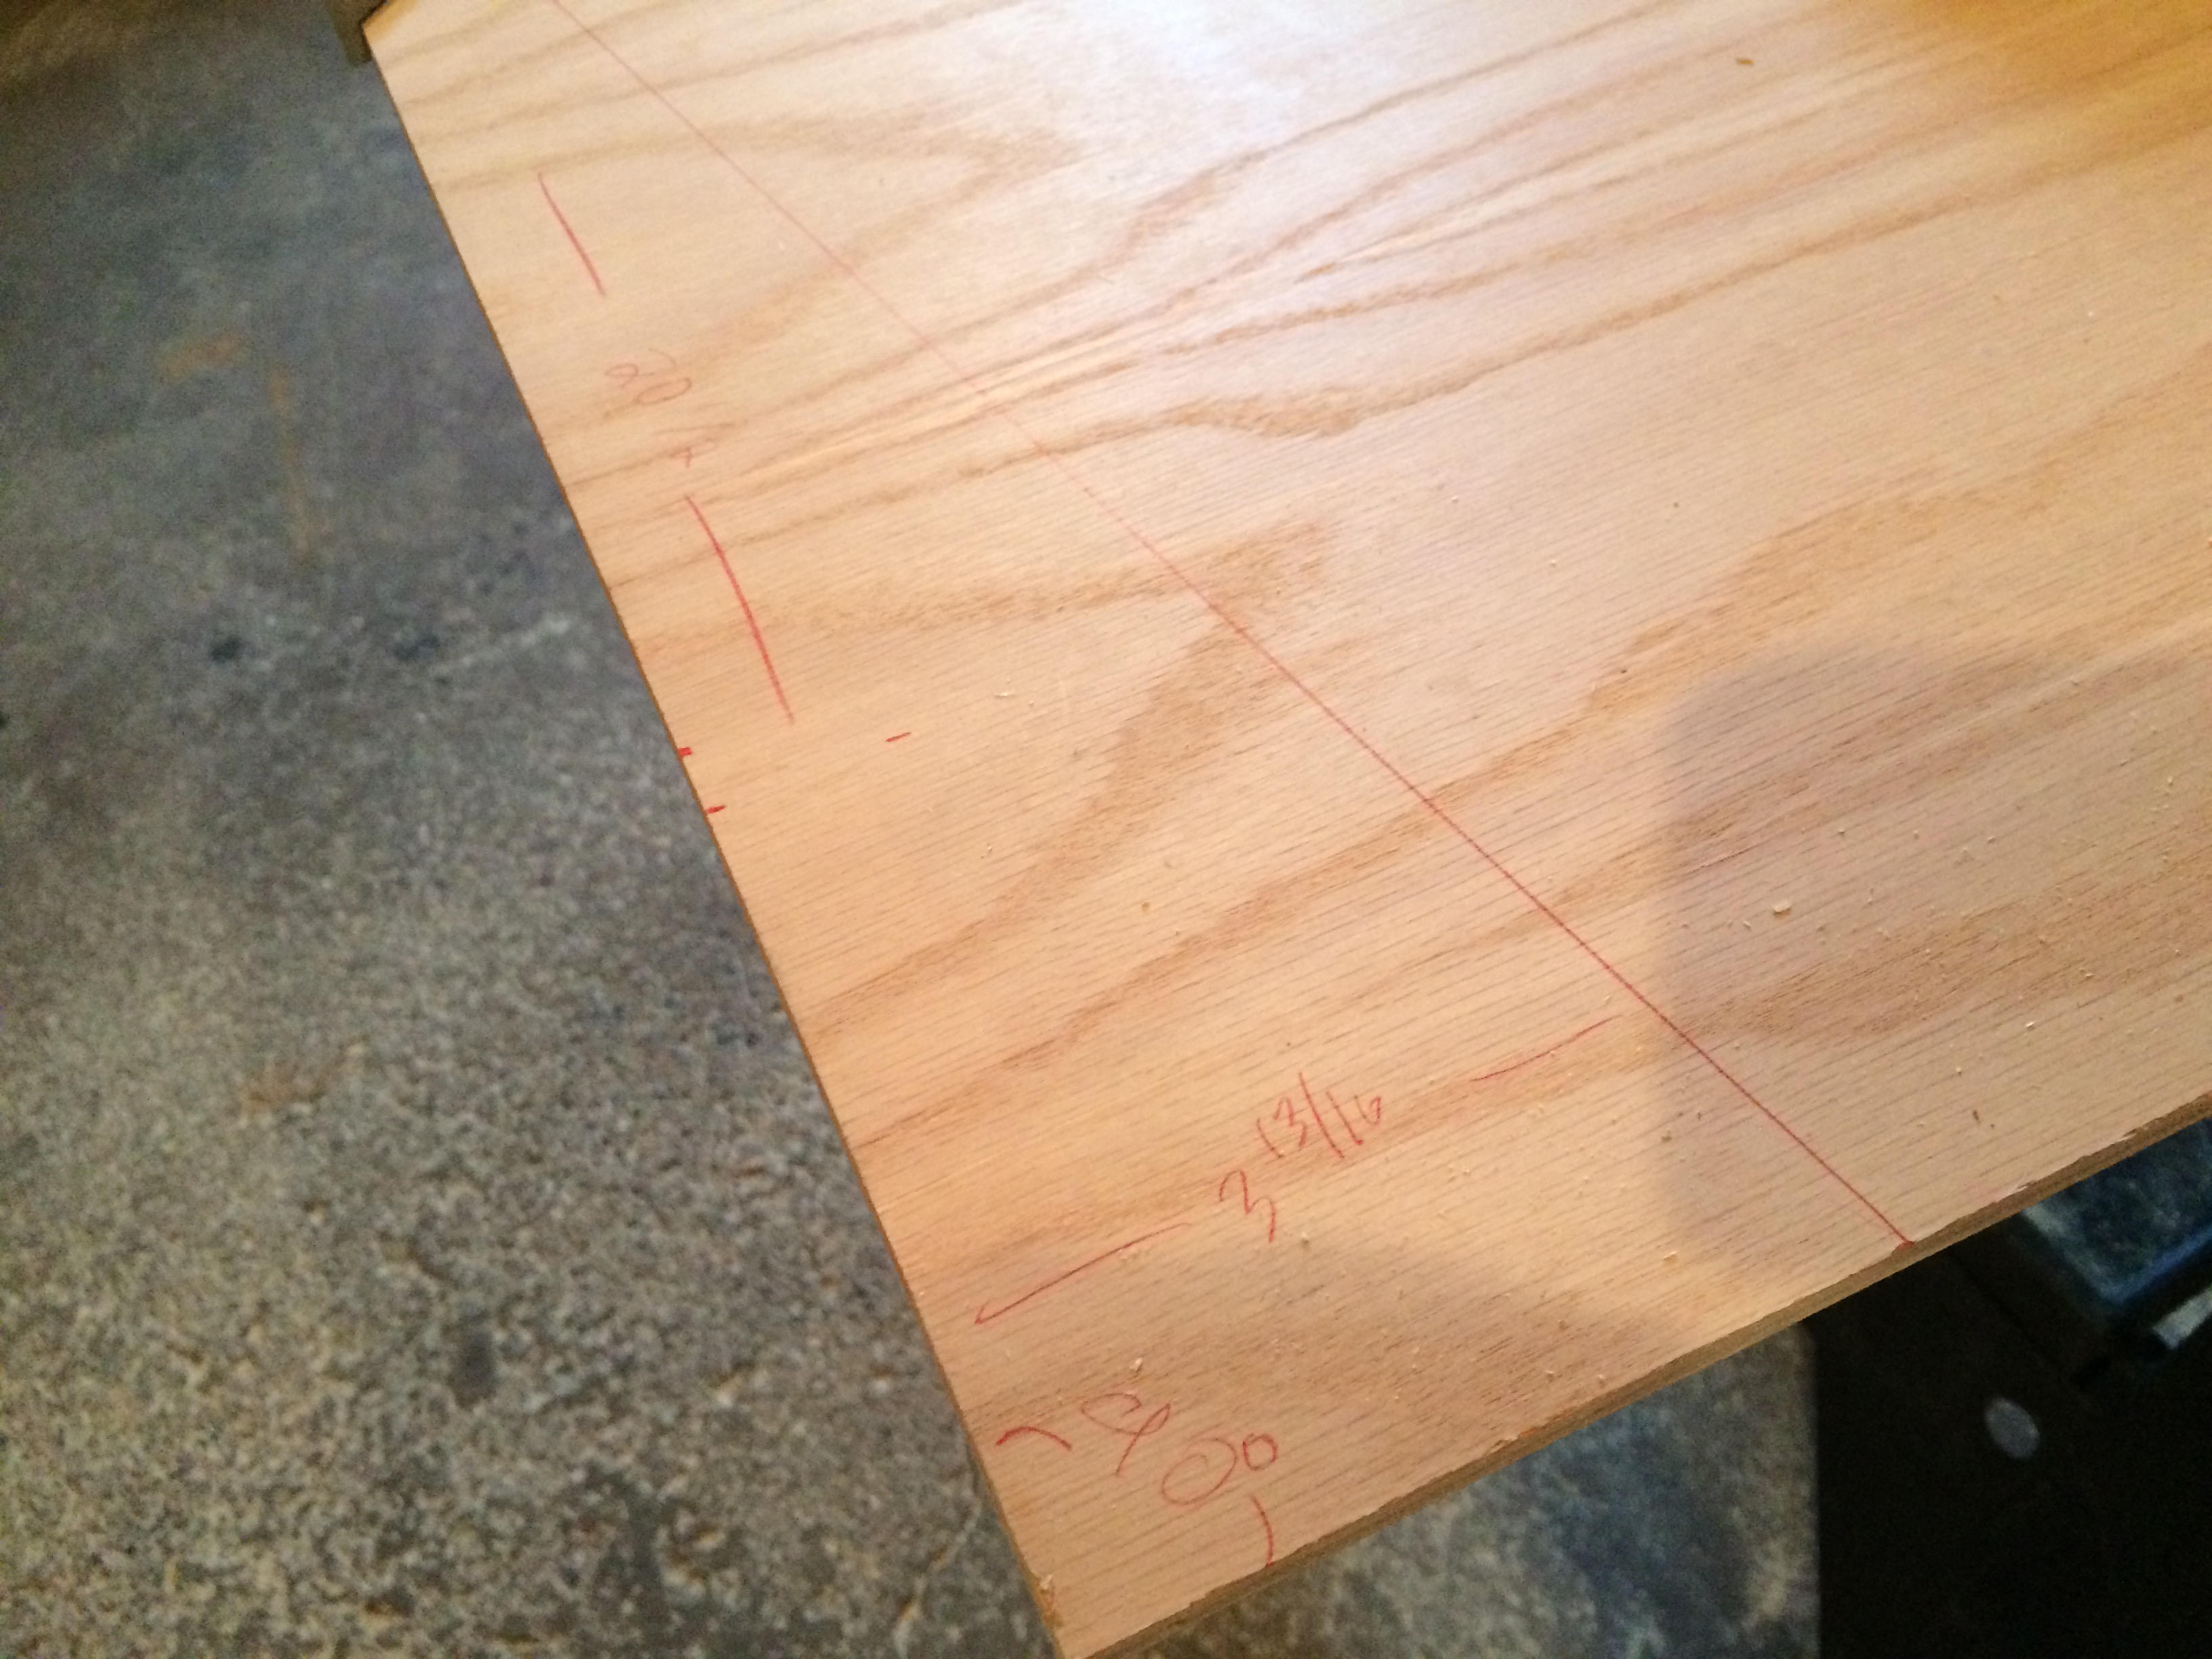
In the original plan, the seats bent back 11 degrees, which is why I was confused when the angle tool told me otherwise.  Using a tape measure, I double checked the height and width of the boards I had already cut in the dining room.  I used an online angle tool to compare the angle of 10.5 degrees I had marked with the original dimensions.  Here’s what I found:

IMG_2136

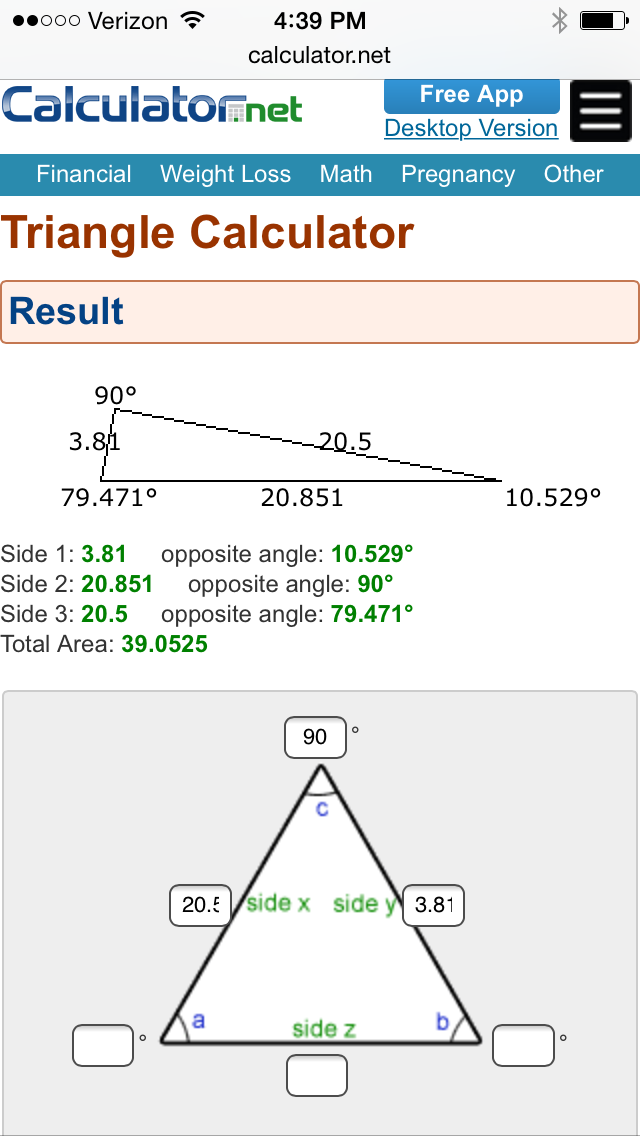
The information I entered in the bottom of this picture shows the distances I measured that would be shaved off if I continued with the 10.5 degree angle that was marked first.

There is the moment I started to scratch my head.  I knew from the original plan that the area I was dealing with had a height of 20.5 inches and a depth of four inches.  Measuring 3.81 after marking the 10.5% angle made me want to re-calculate with an 11 degree angle instead:

IMG_2137

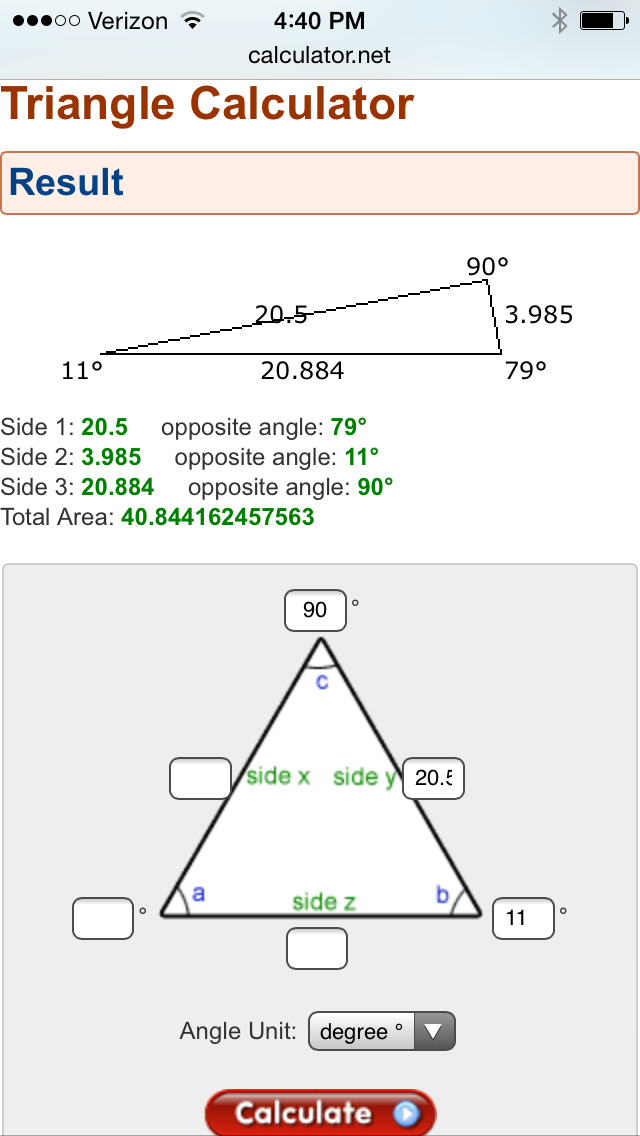
I used the calculator to input angle-side-angle. 90 degrees and a bench length of 20.5 inches, and an 11 degree angle at the top.  Notice at the top of this image, the calculation that shows 3.985.  This is much closer to the original dimensions of 4 inches, so I knew this had to be correct.

Using this different method of measuring the angle, I marked on the board where 3.985 would be.  It was about a quarter inch away from where I marked the other cut.

IMG_2138

Whew!

After I had that angle marked, I simply adjusted my handsaw to 11 degrees and made the cuts.  Then, the fun part.  Piecing them together:

IMG_2139

Winnie decided that her tail needed to be in this picture!

IMG_2140

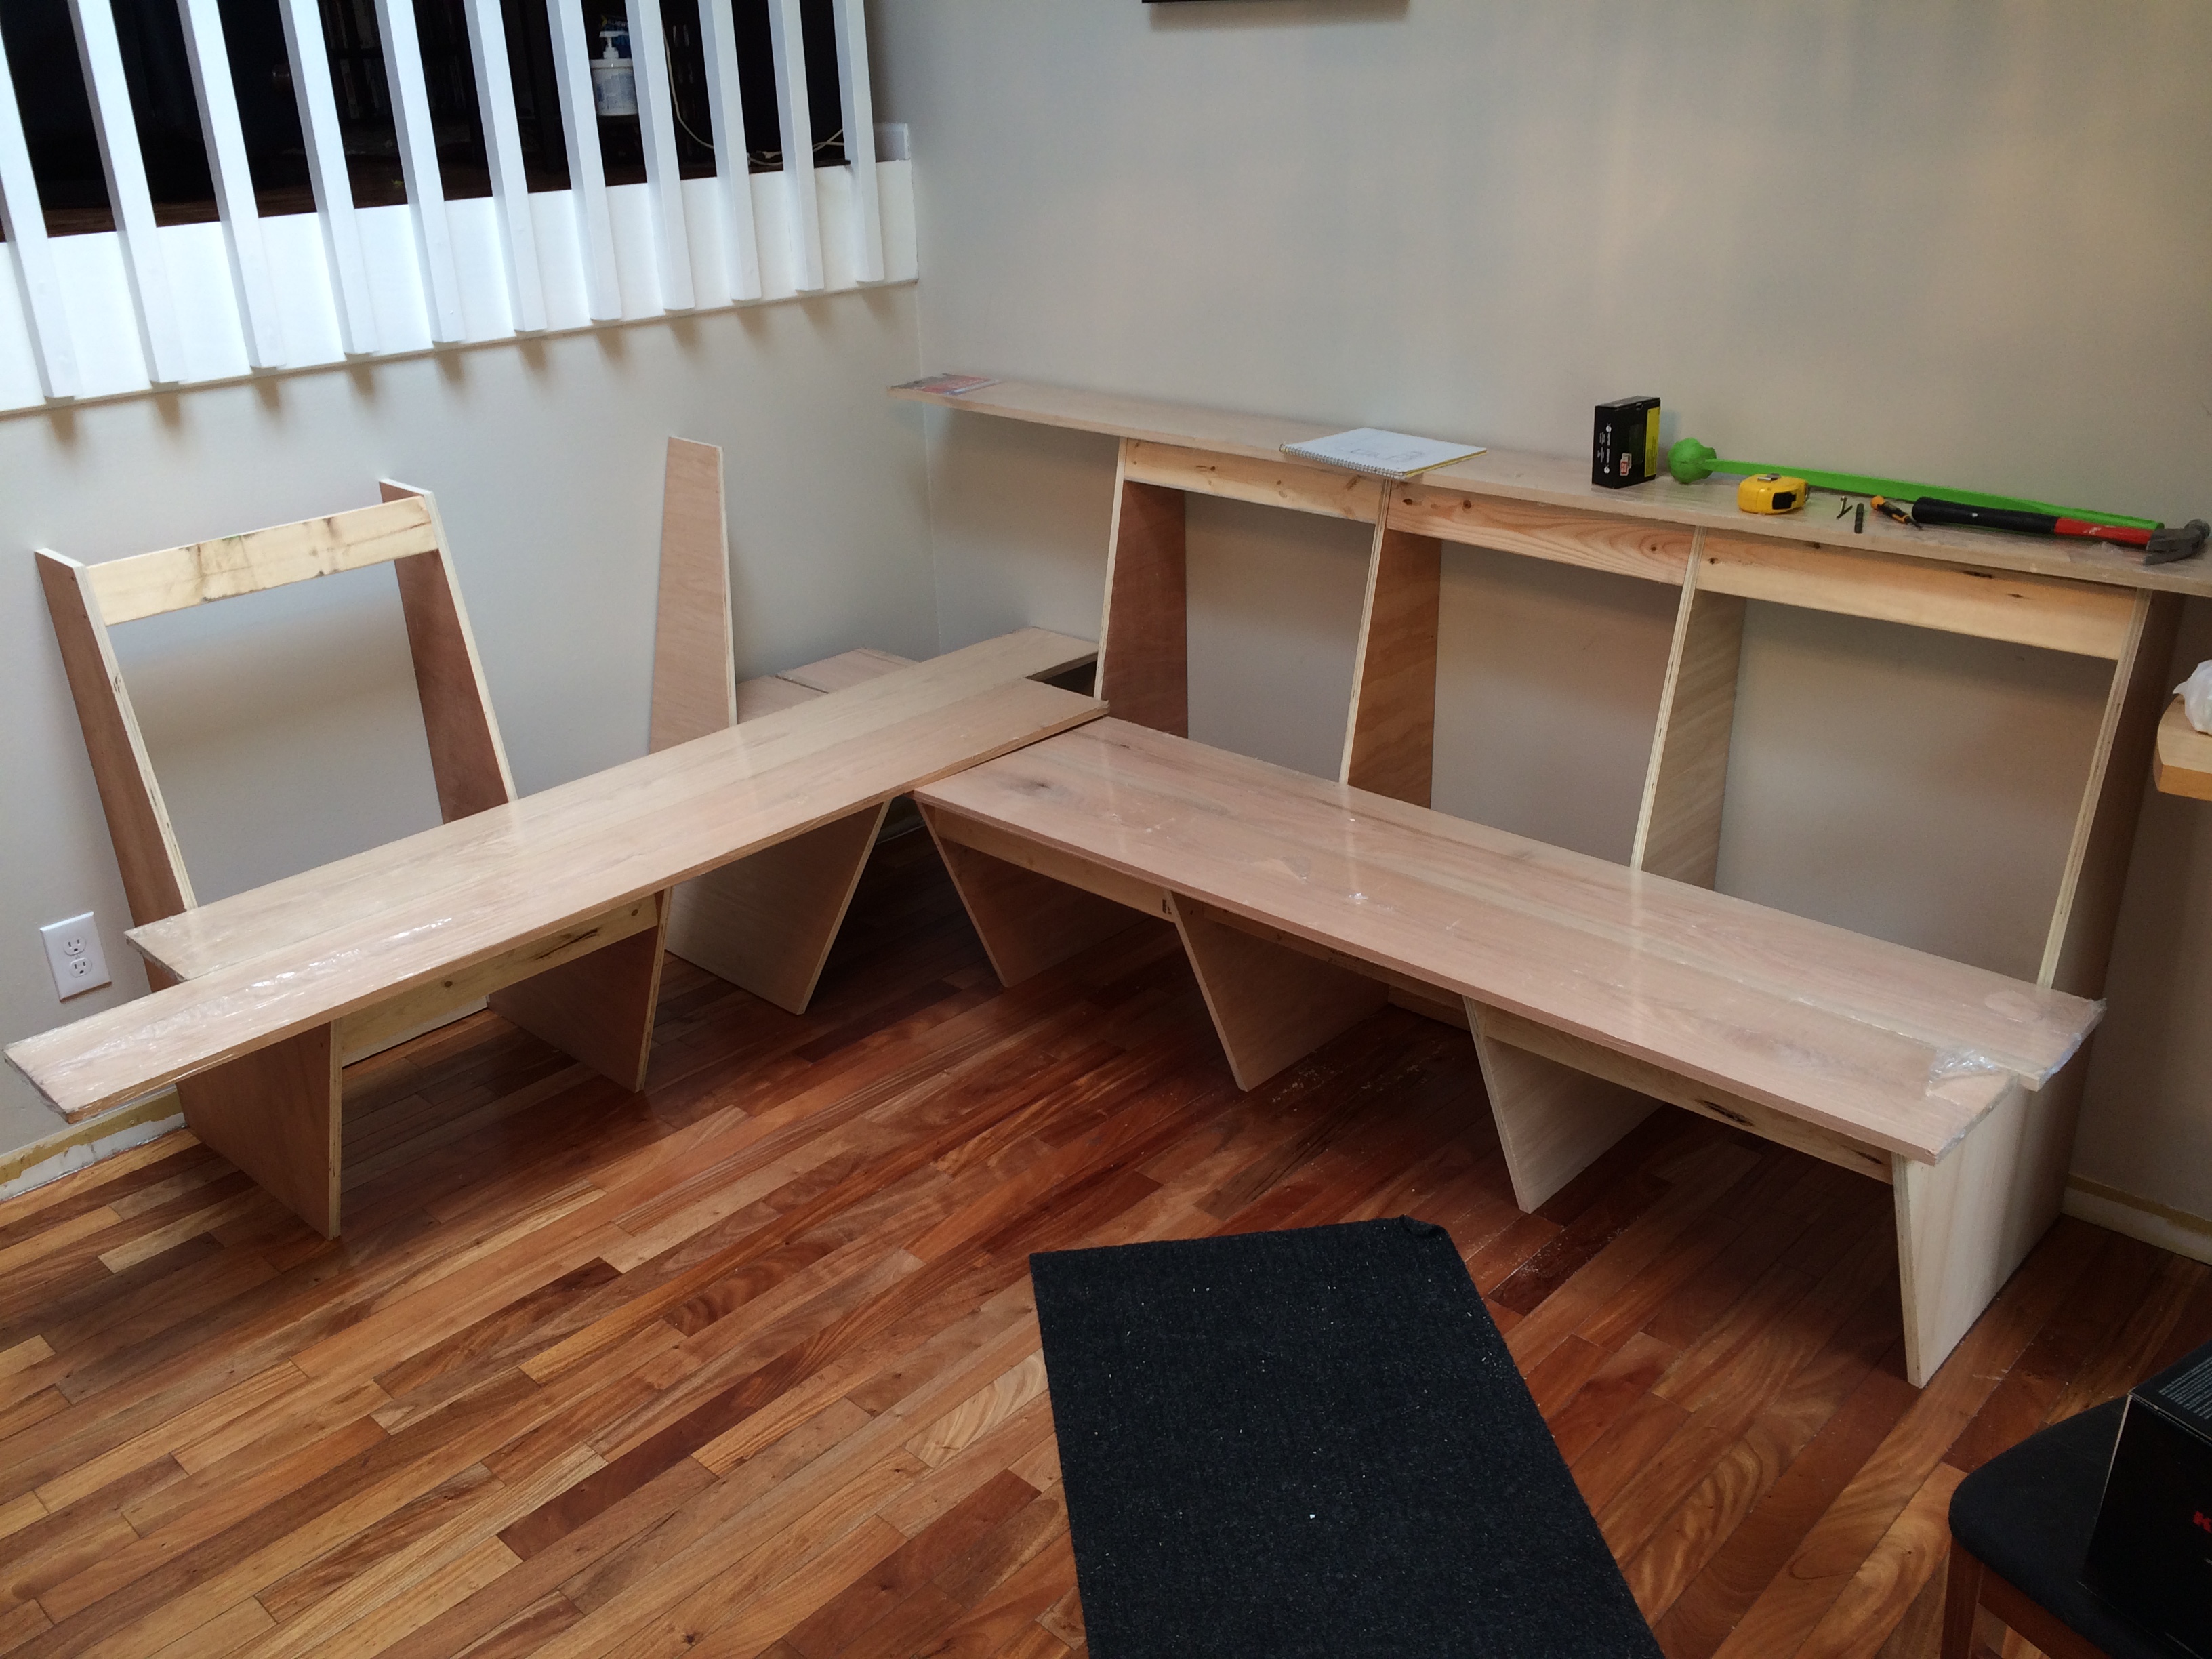
The angles have been cut for the seats.

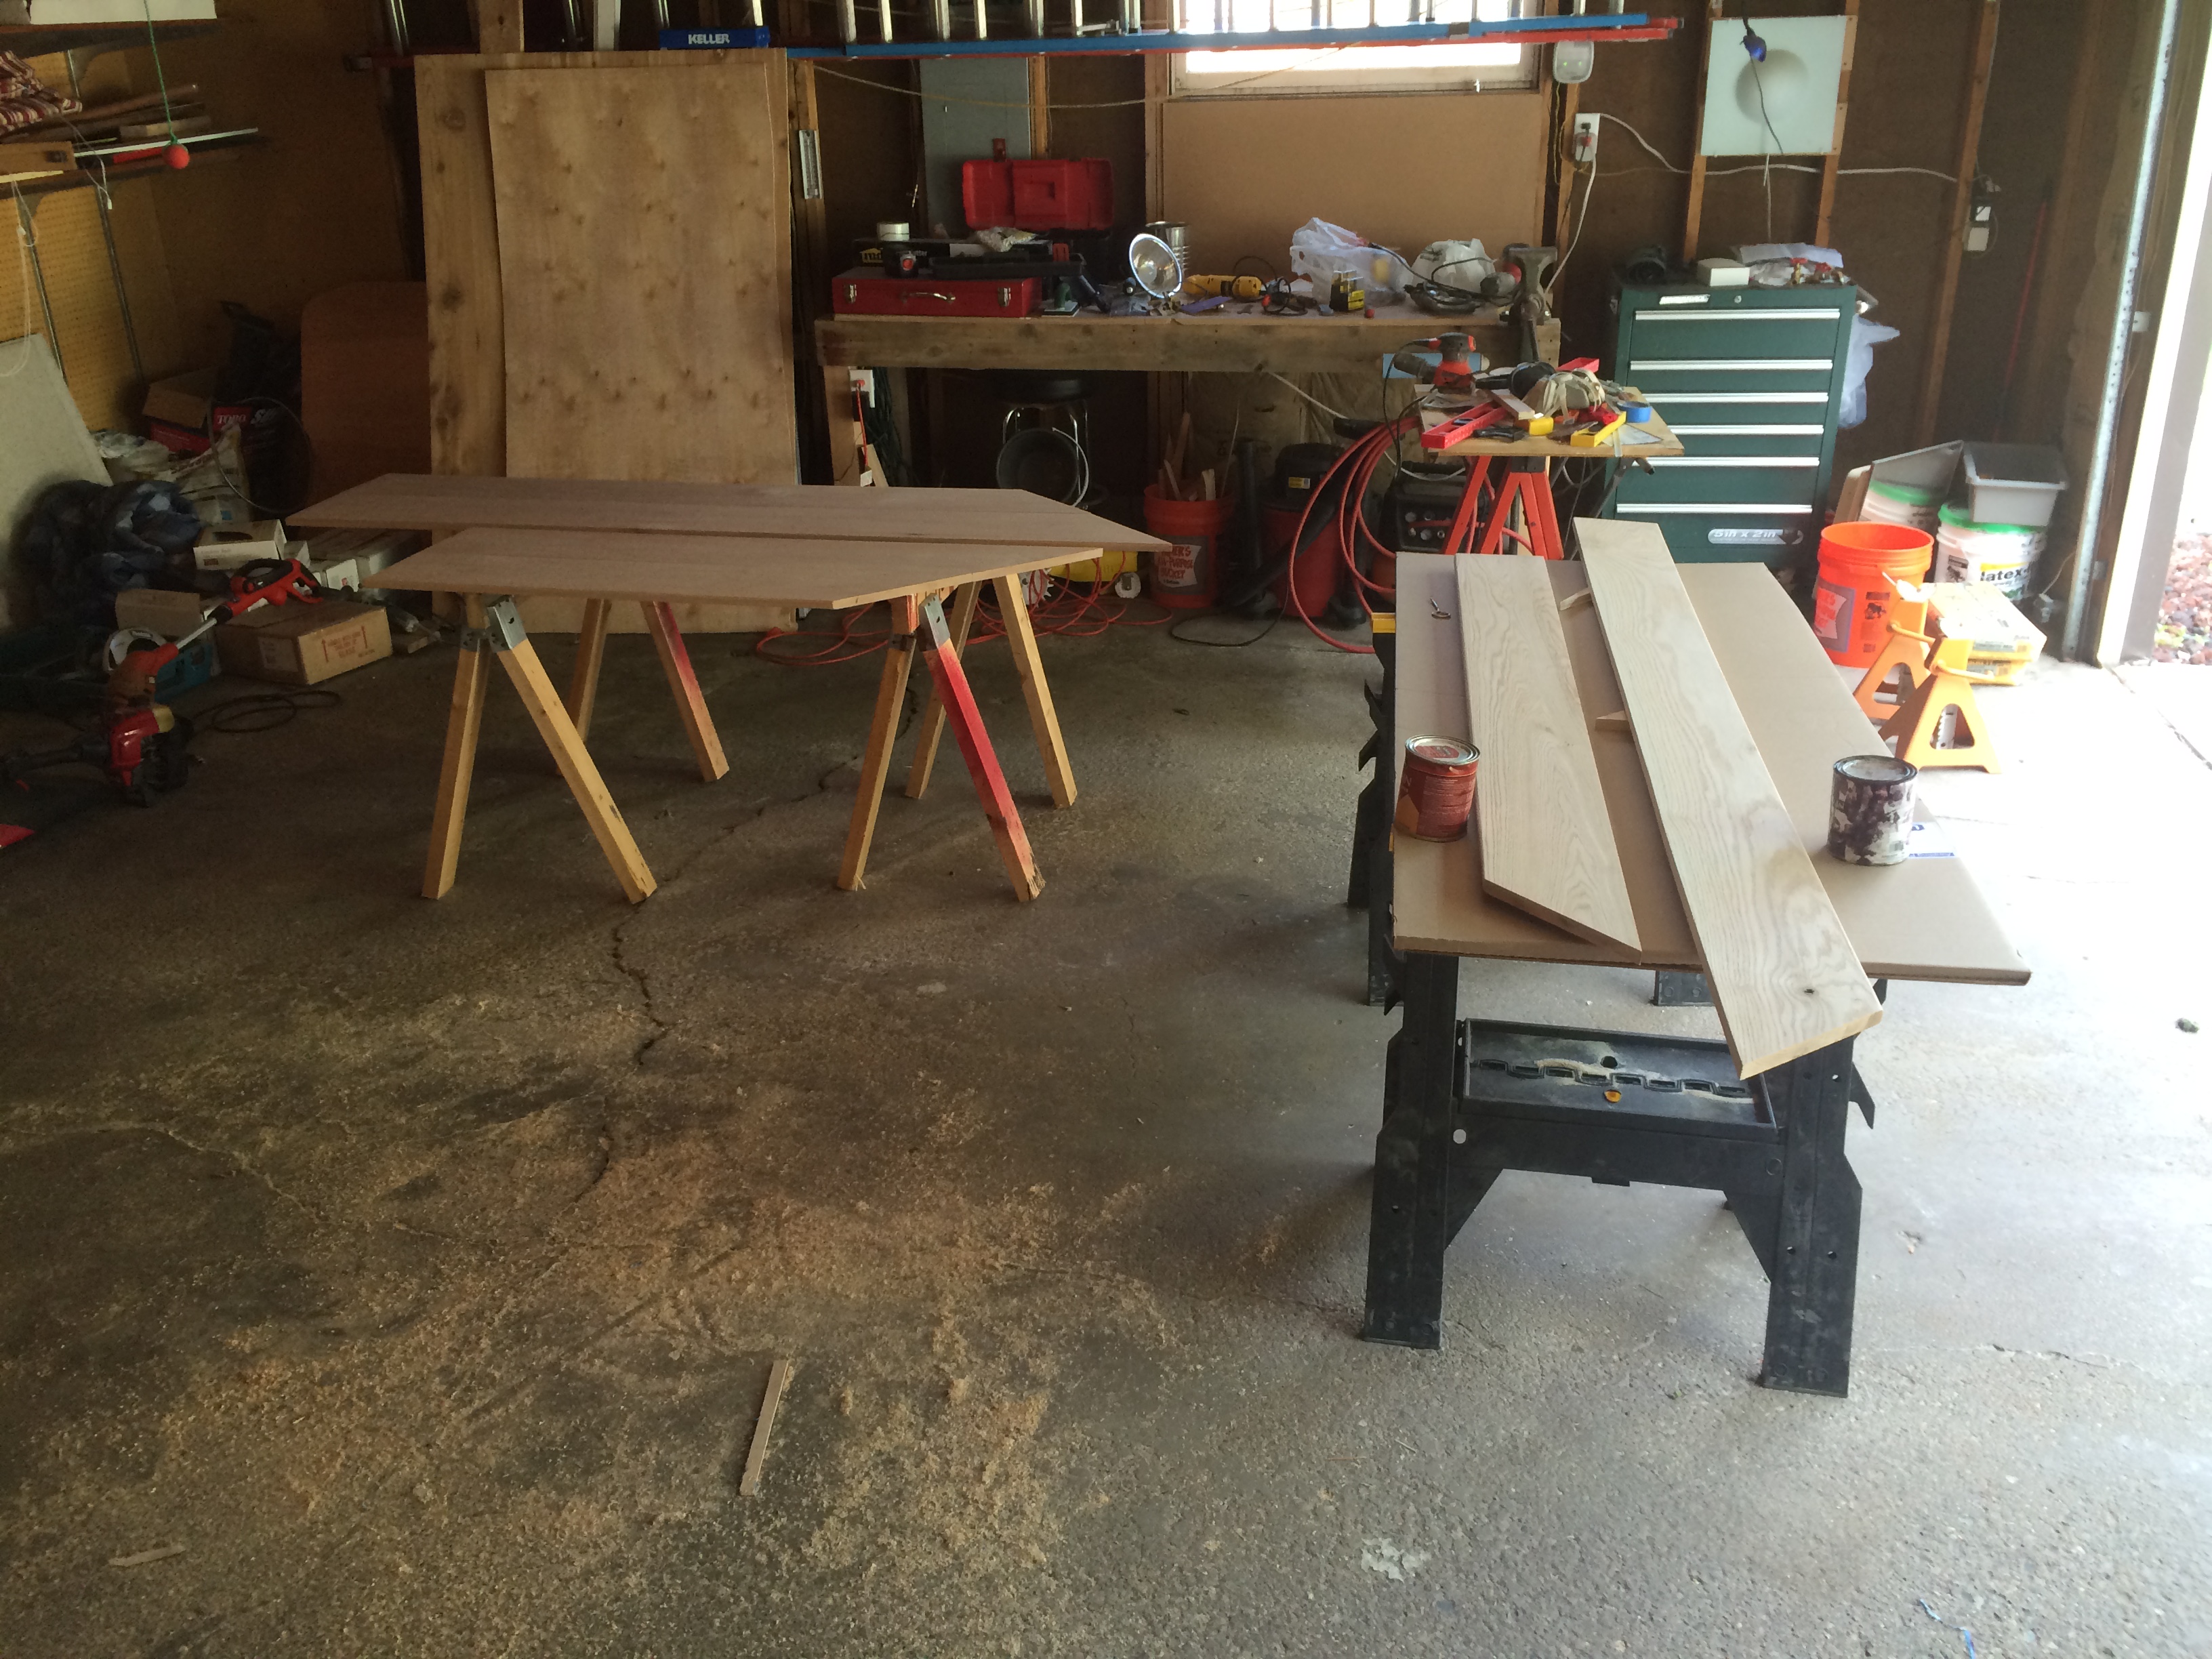
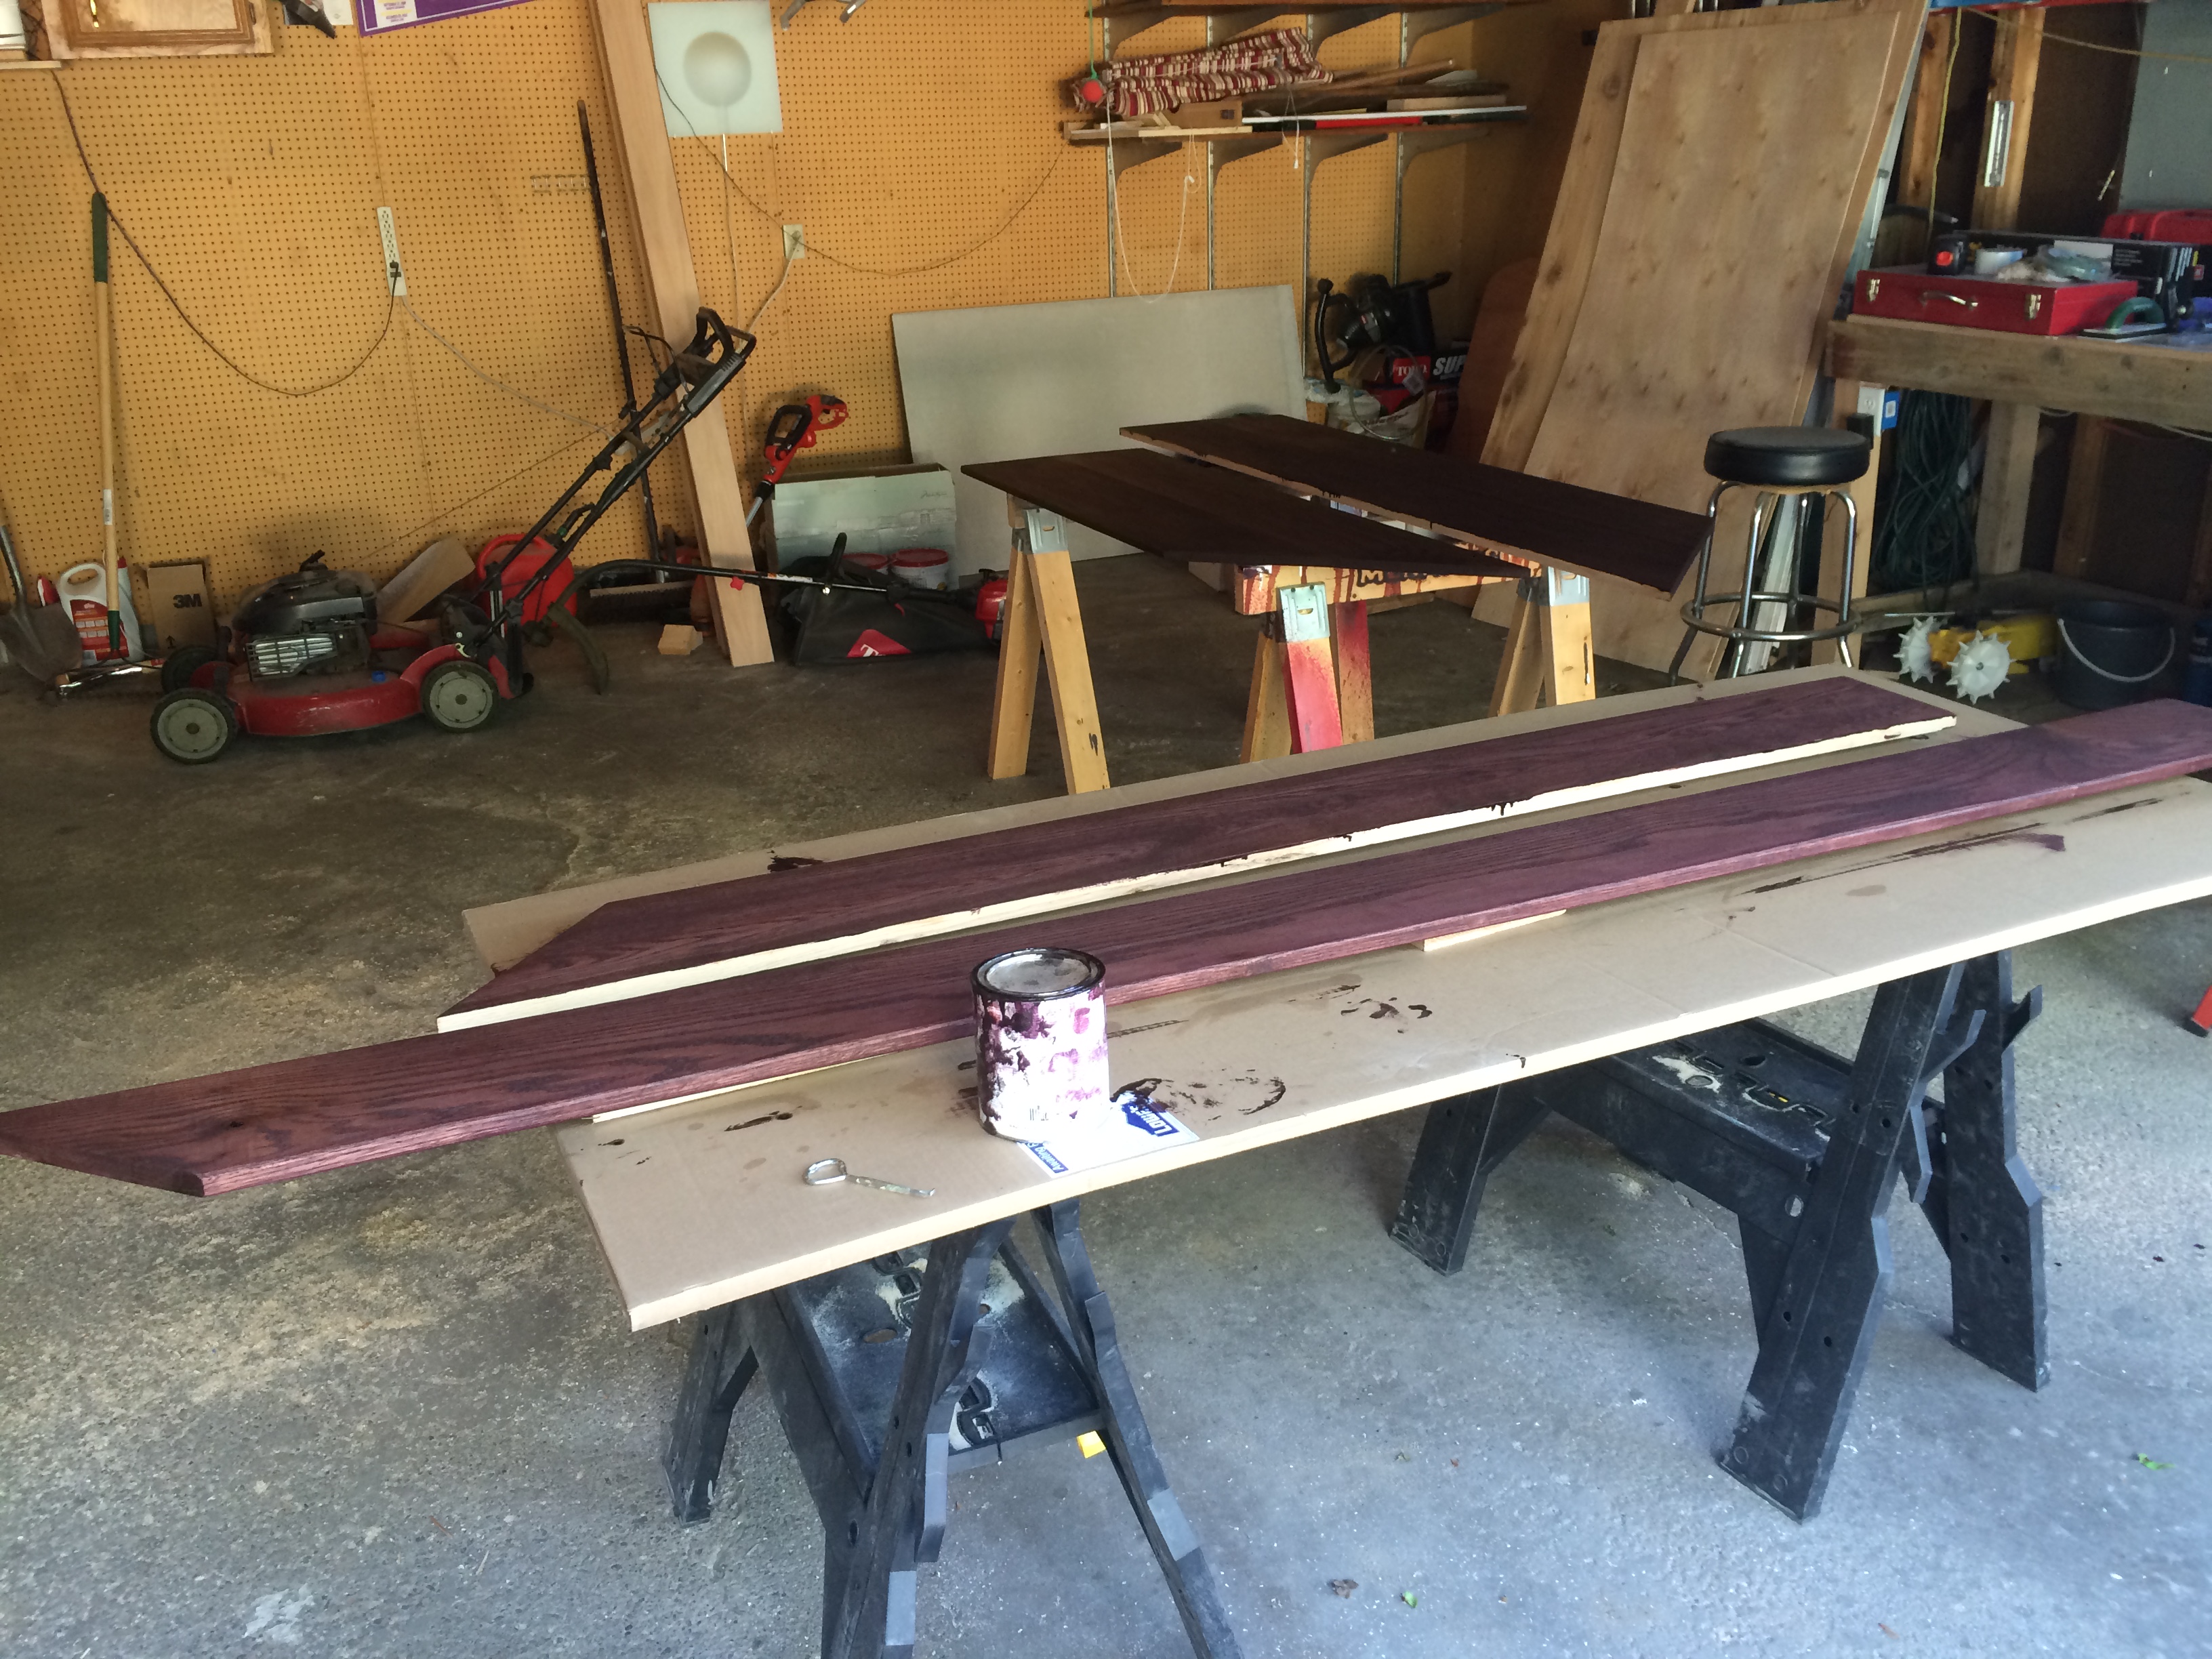
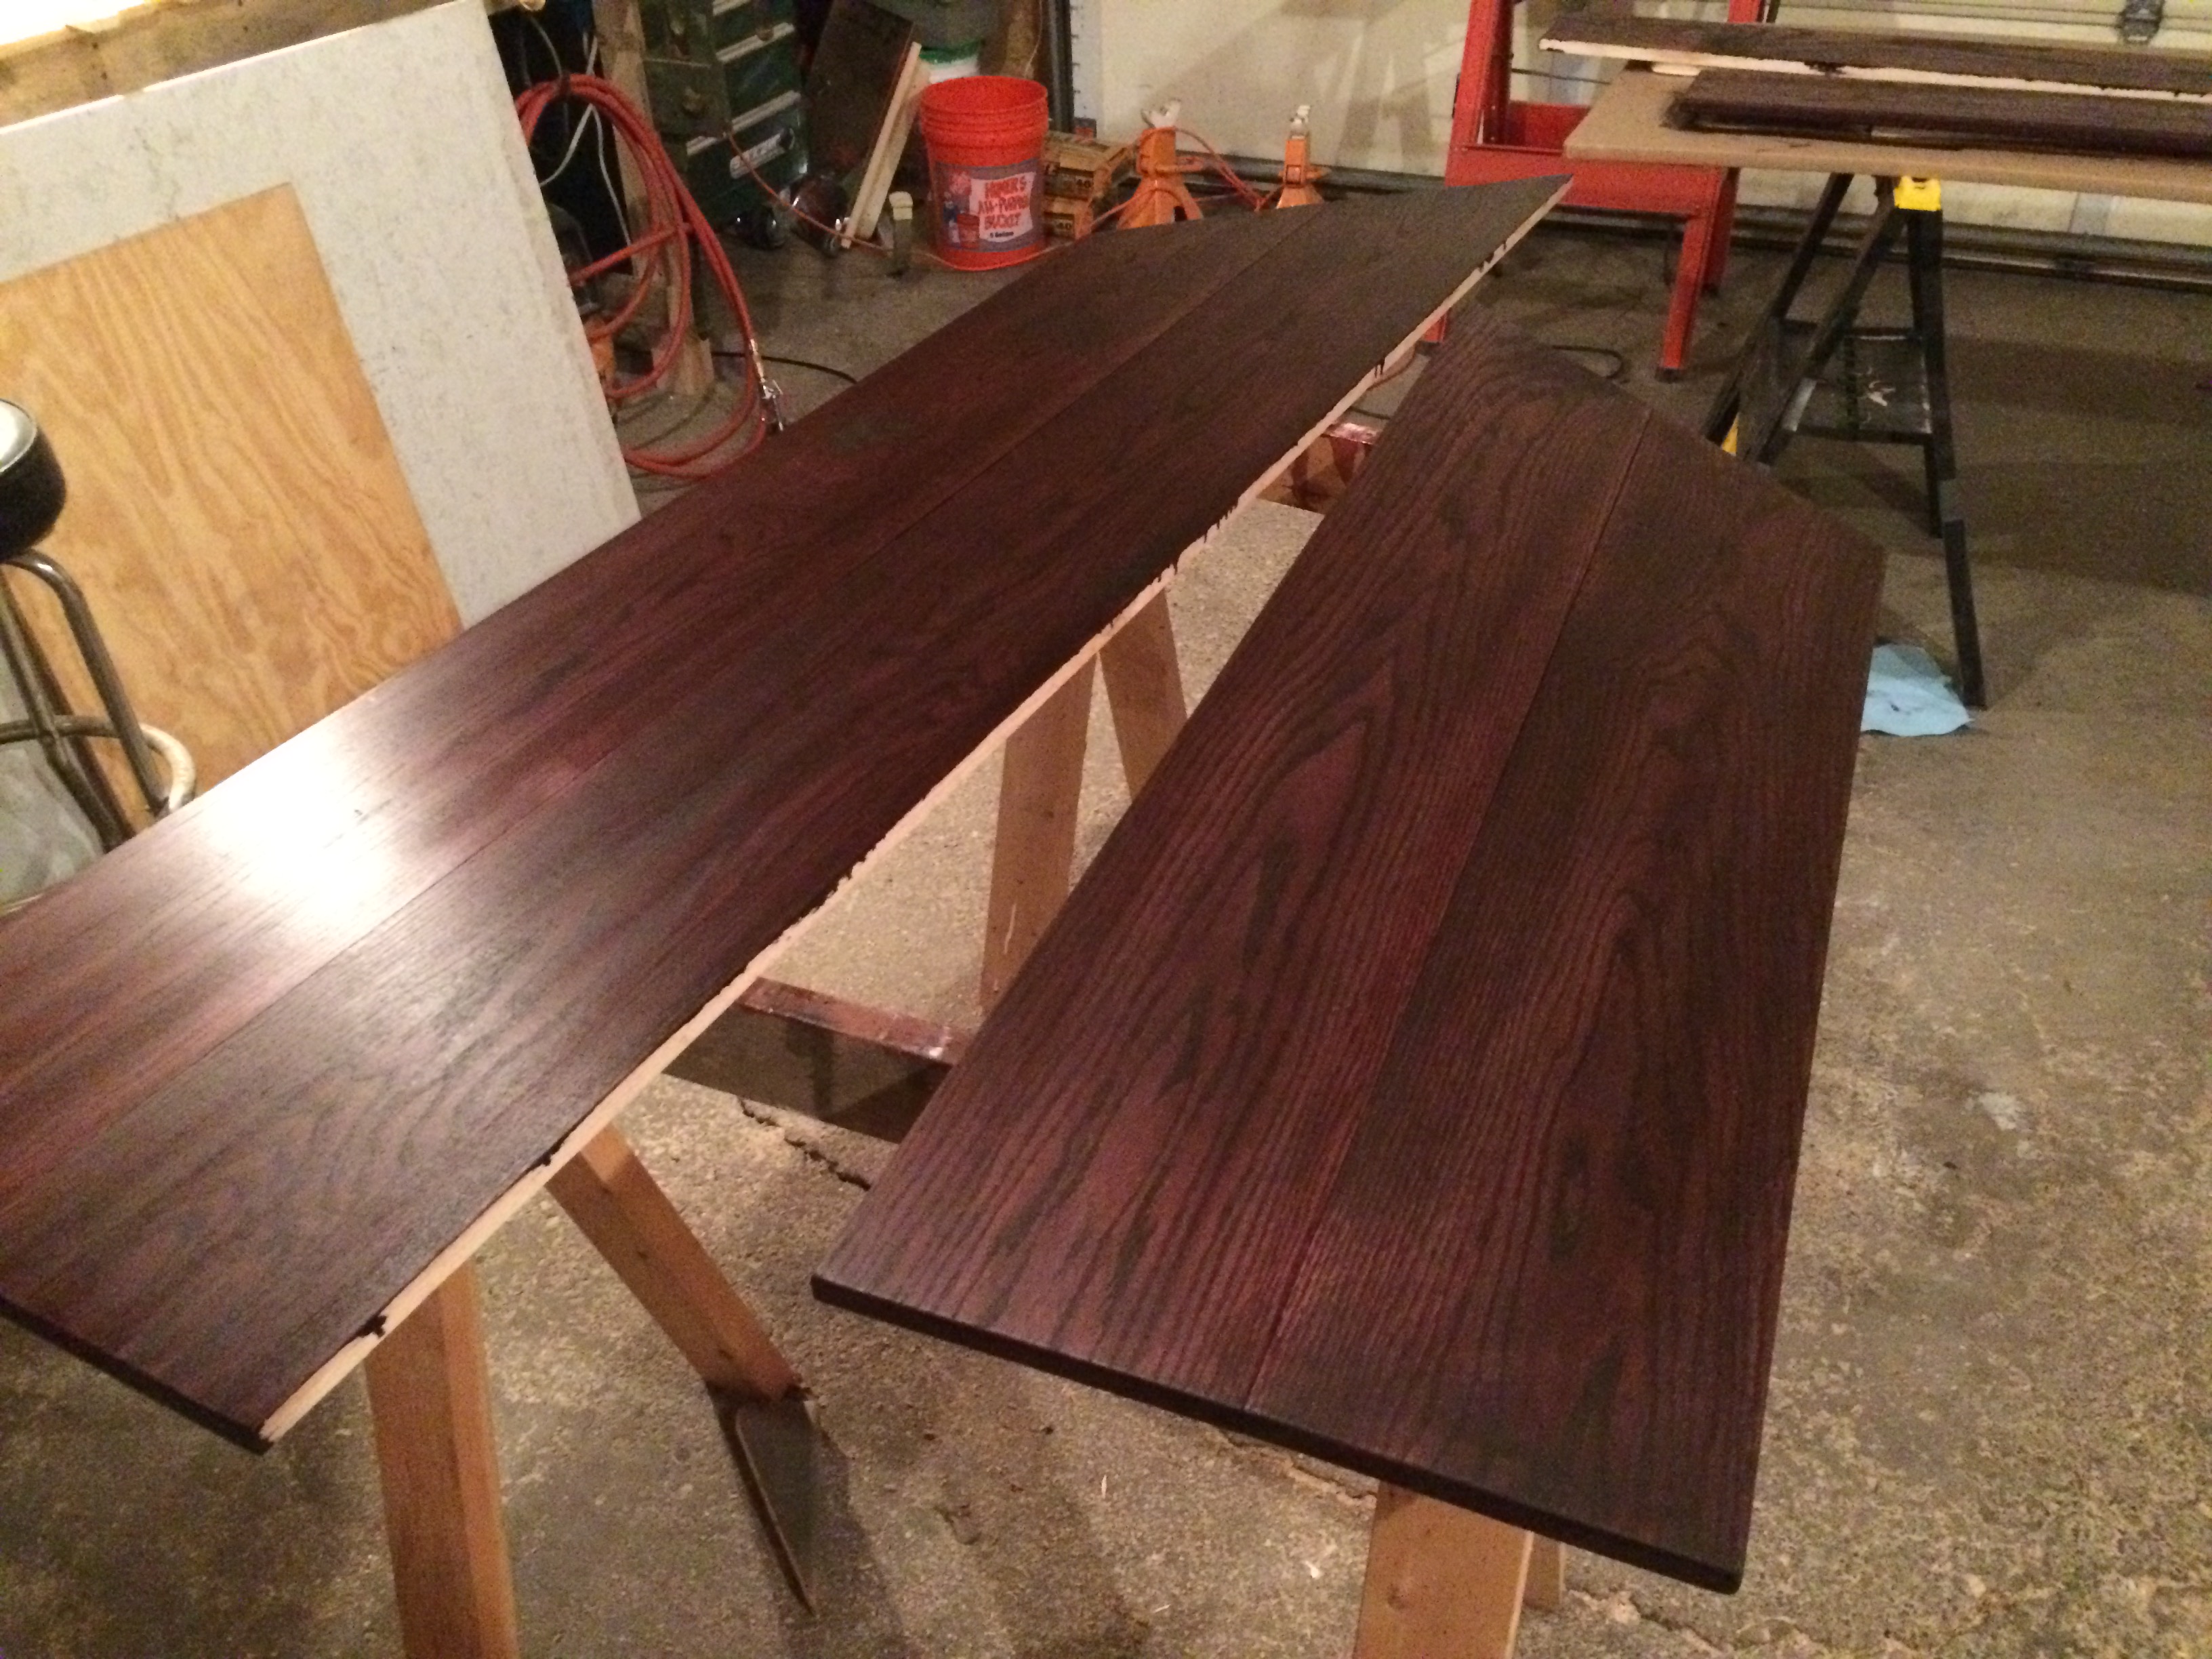
Once the wood for the seats was cut, it was time to start staining.

IMG_2202

Like previous projects, we used a Cabot Black Cherry wood stain.  We wanted to continue the theme of dark stain and white paint that was used in previous permanent projects in the house.

IMG_2203

The boards were secured from beneath with 2x4s so no nails or screws would be visible from above.

IMG_2206

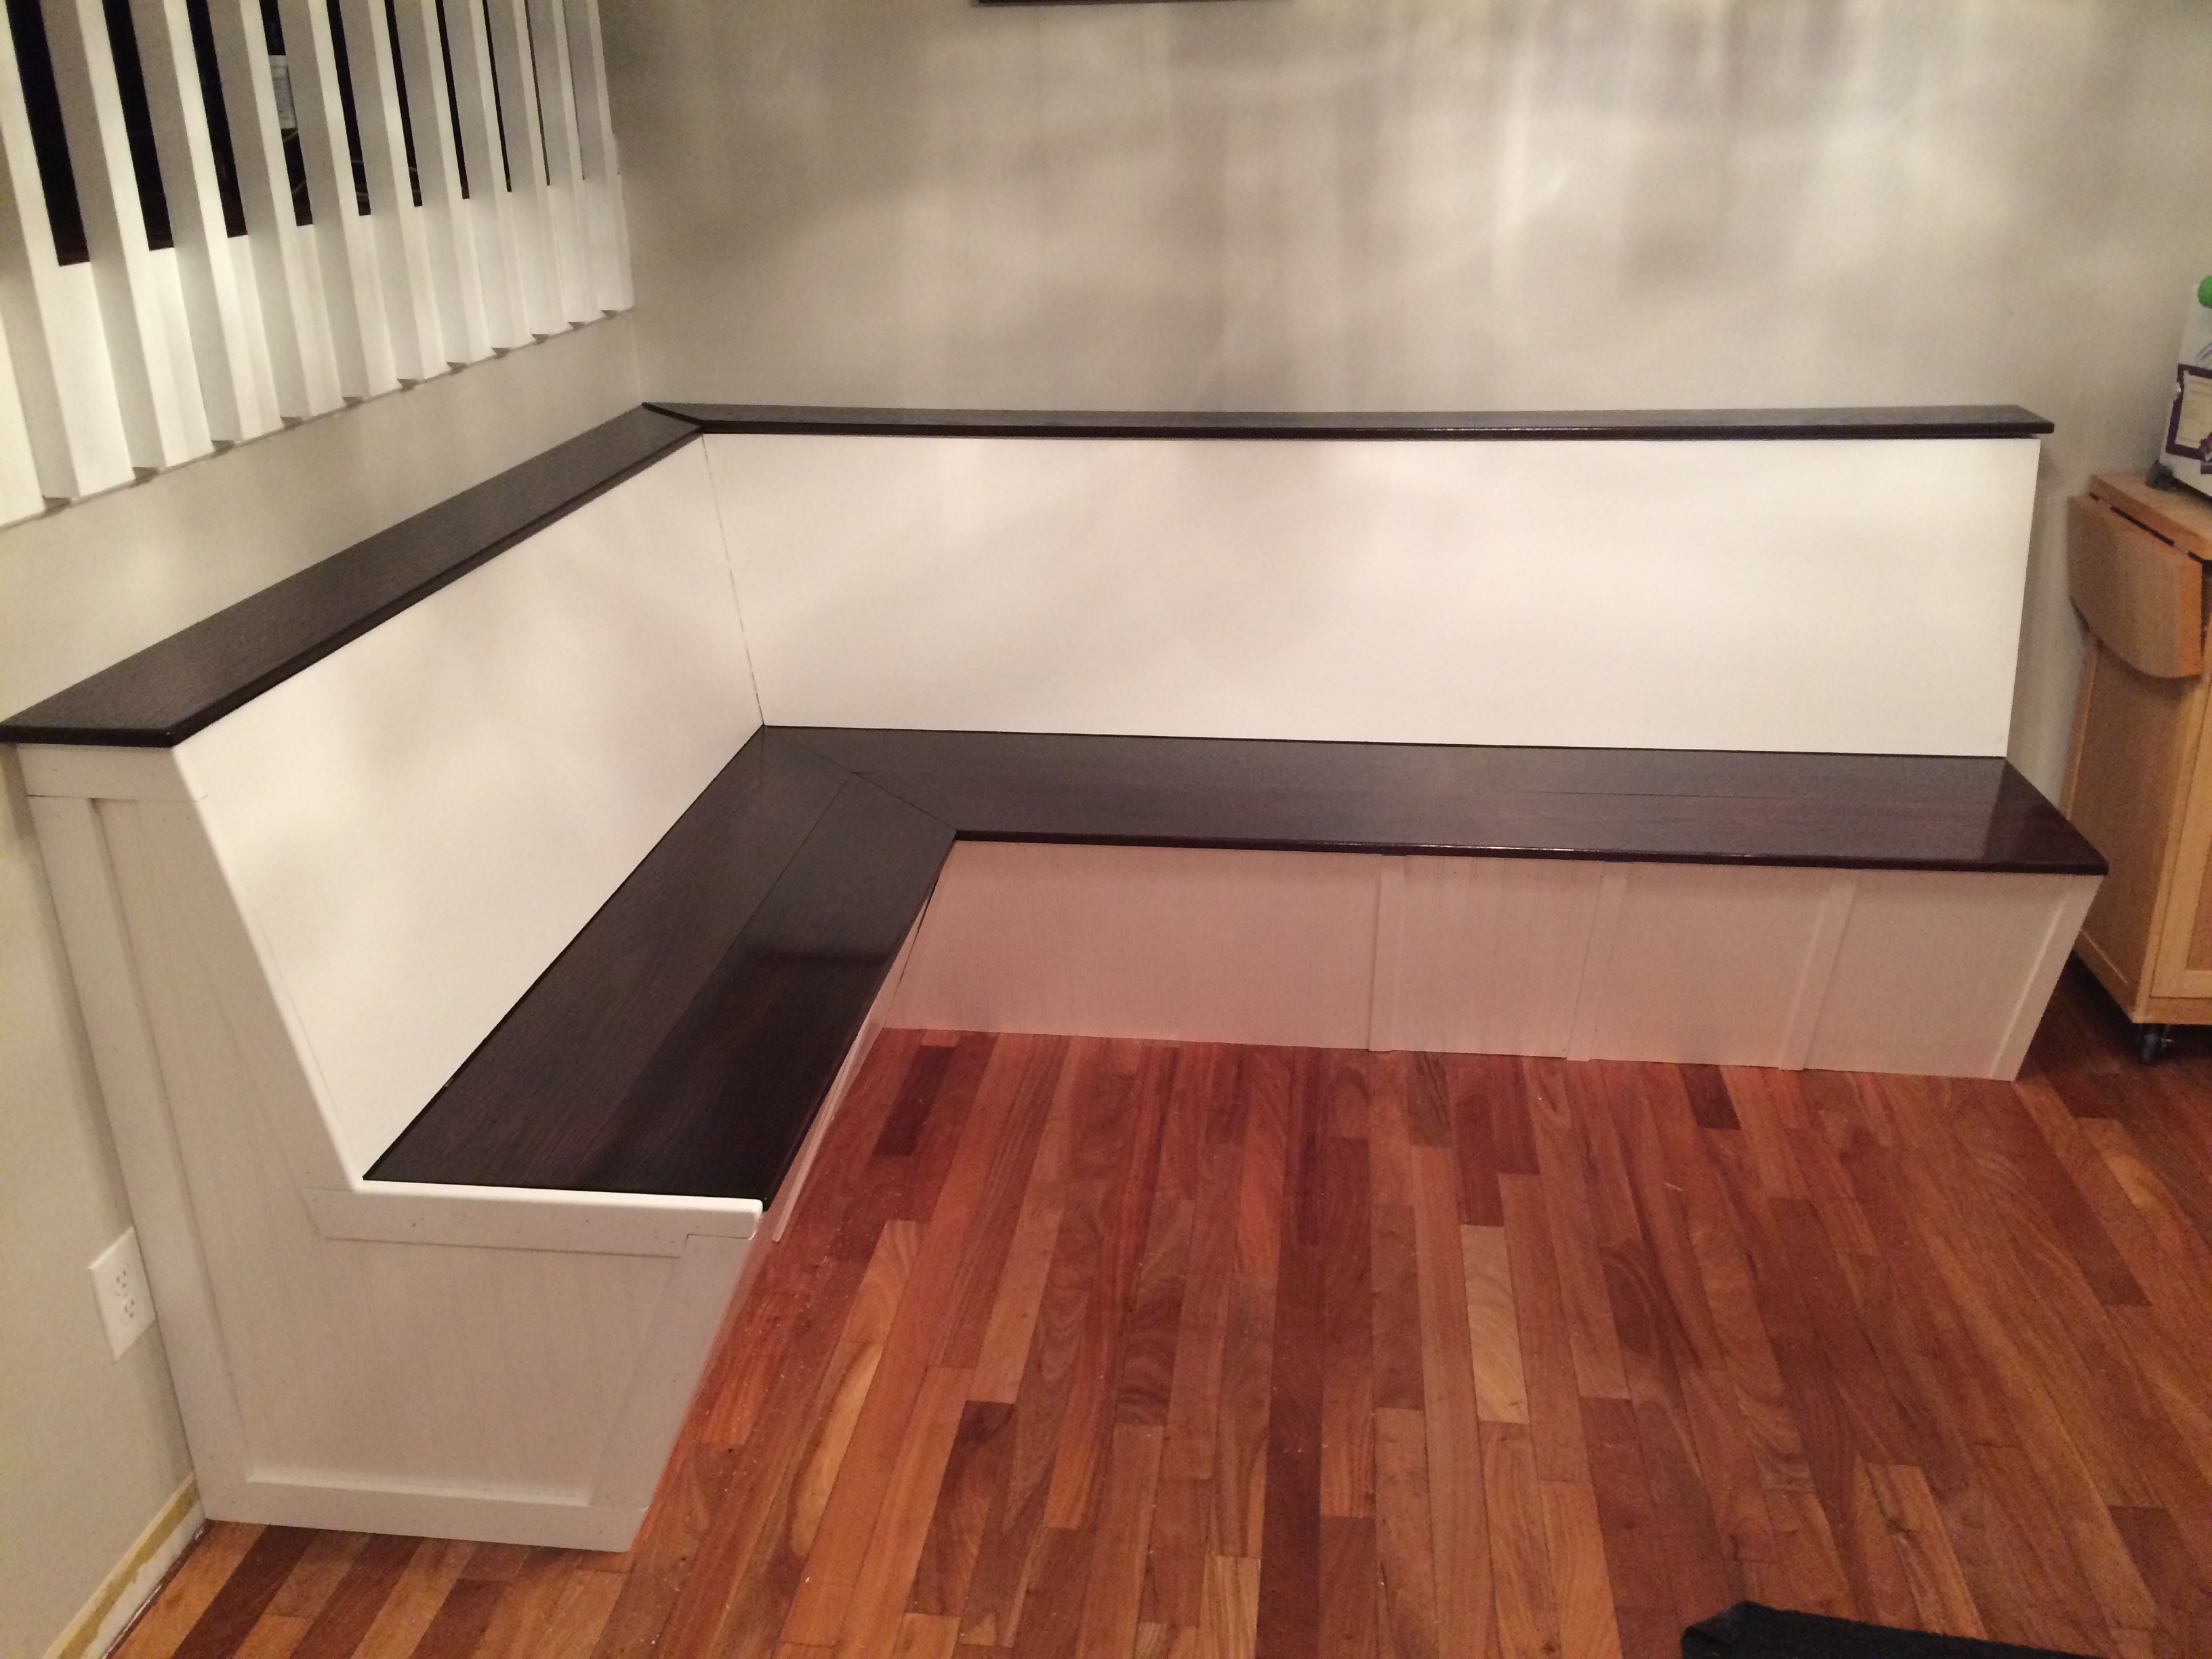
I love this part, you can finally see a banquette coming together.

IMG_2234

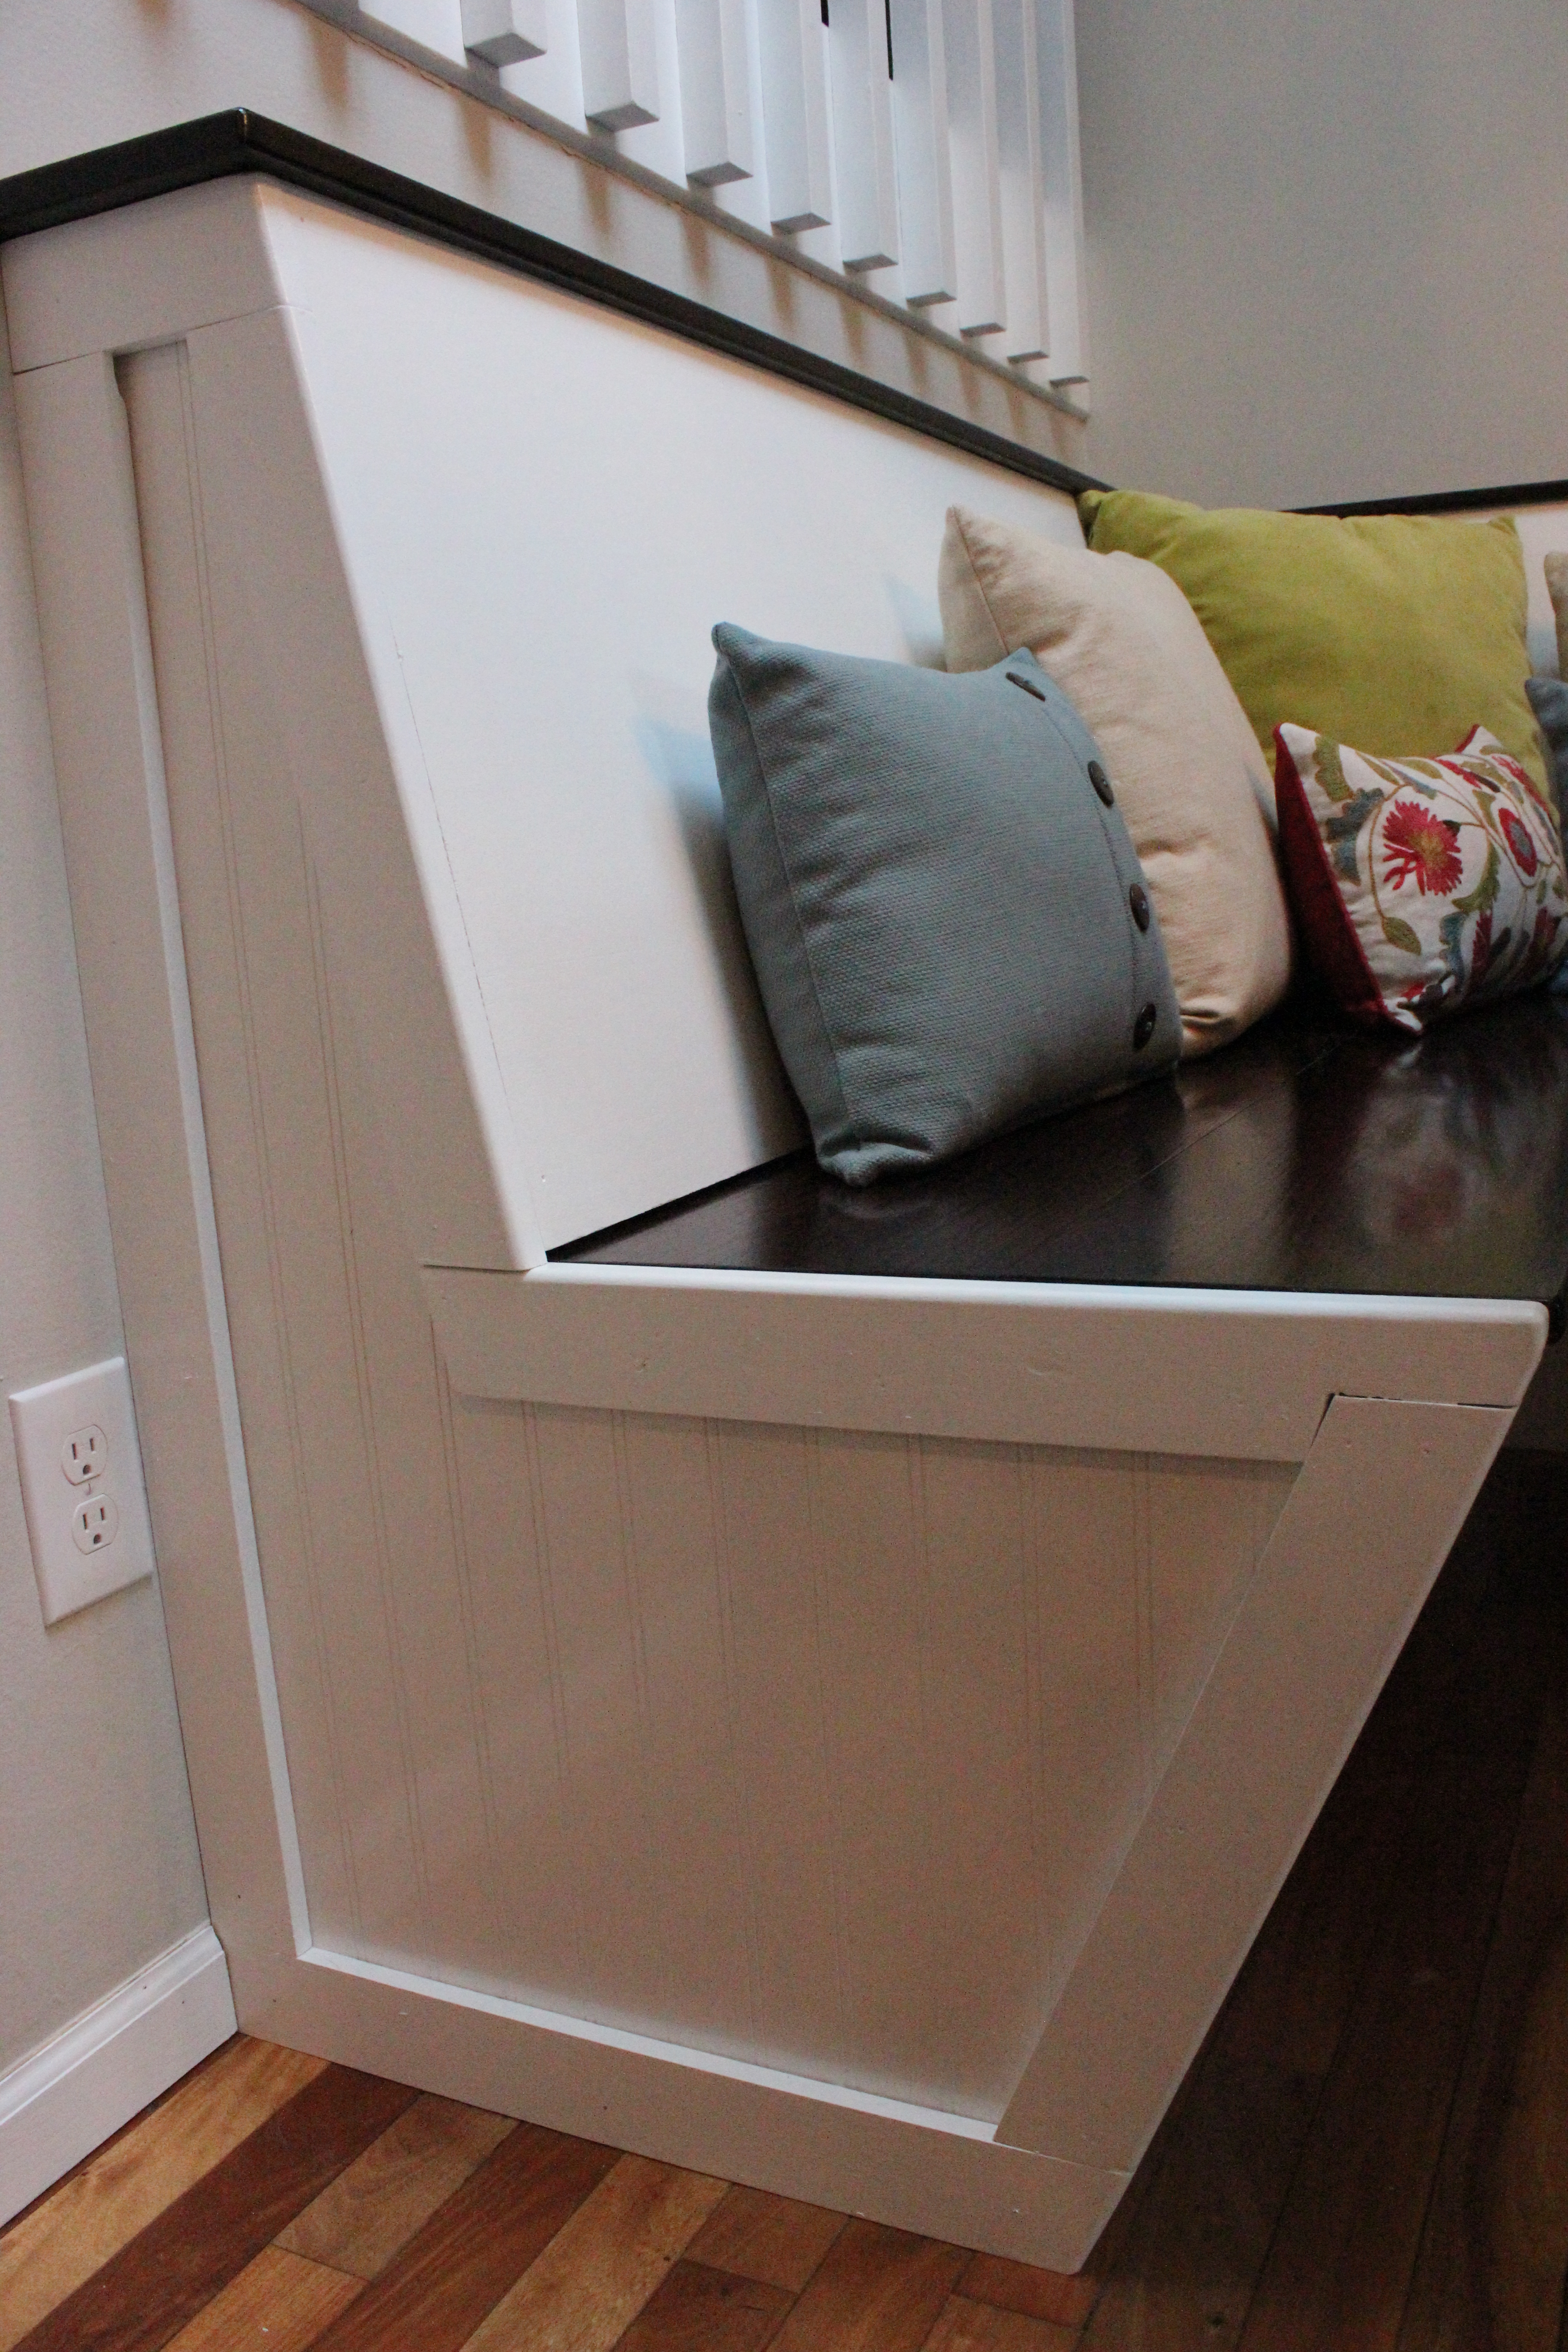
For the sides of the banquette, we went with a pre-finished decorative wood paneling and poplar wood for the trim.  I used a router to leave space for the plywood to fit beneath the trim pieces and also to give the trim a beveled edge around the sides.

IMG_3434

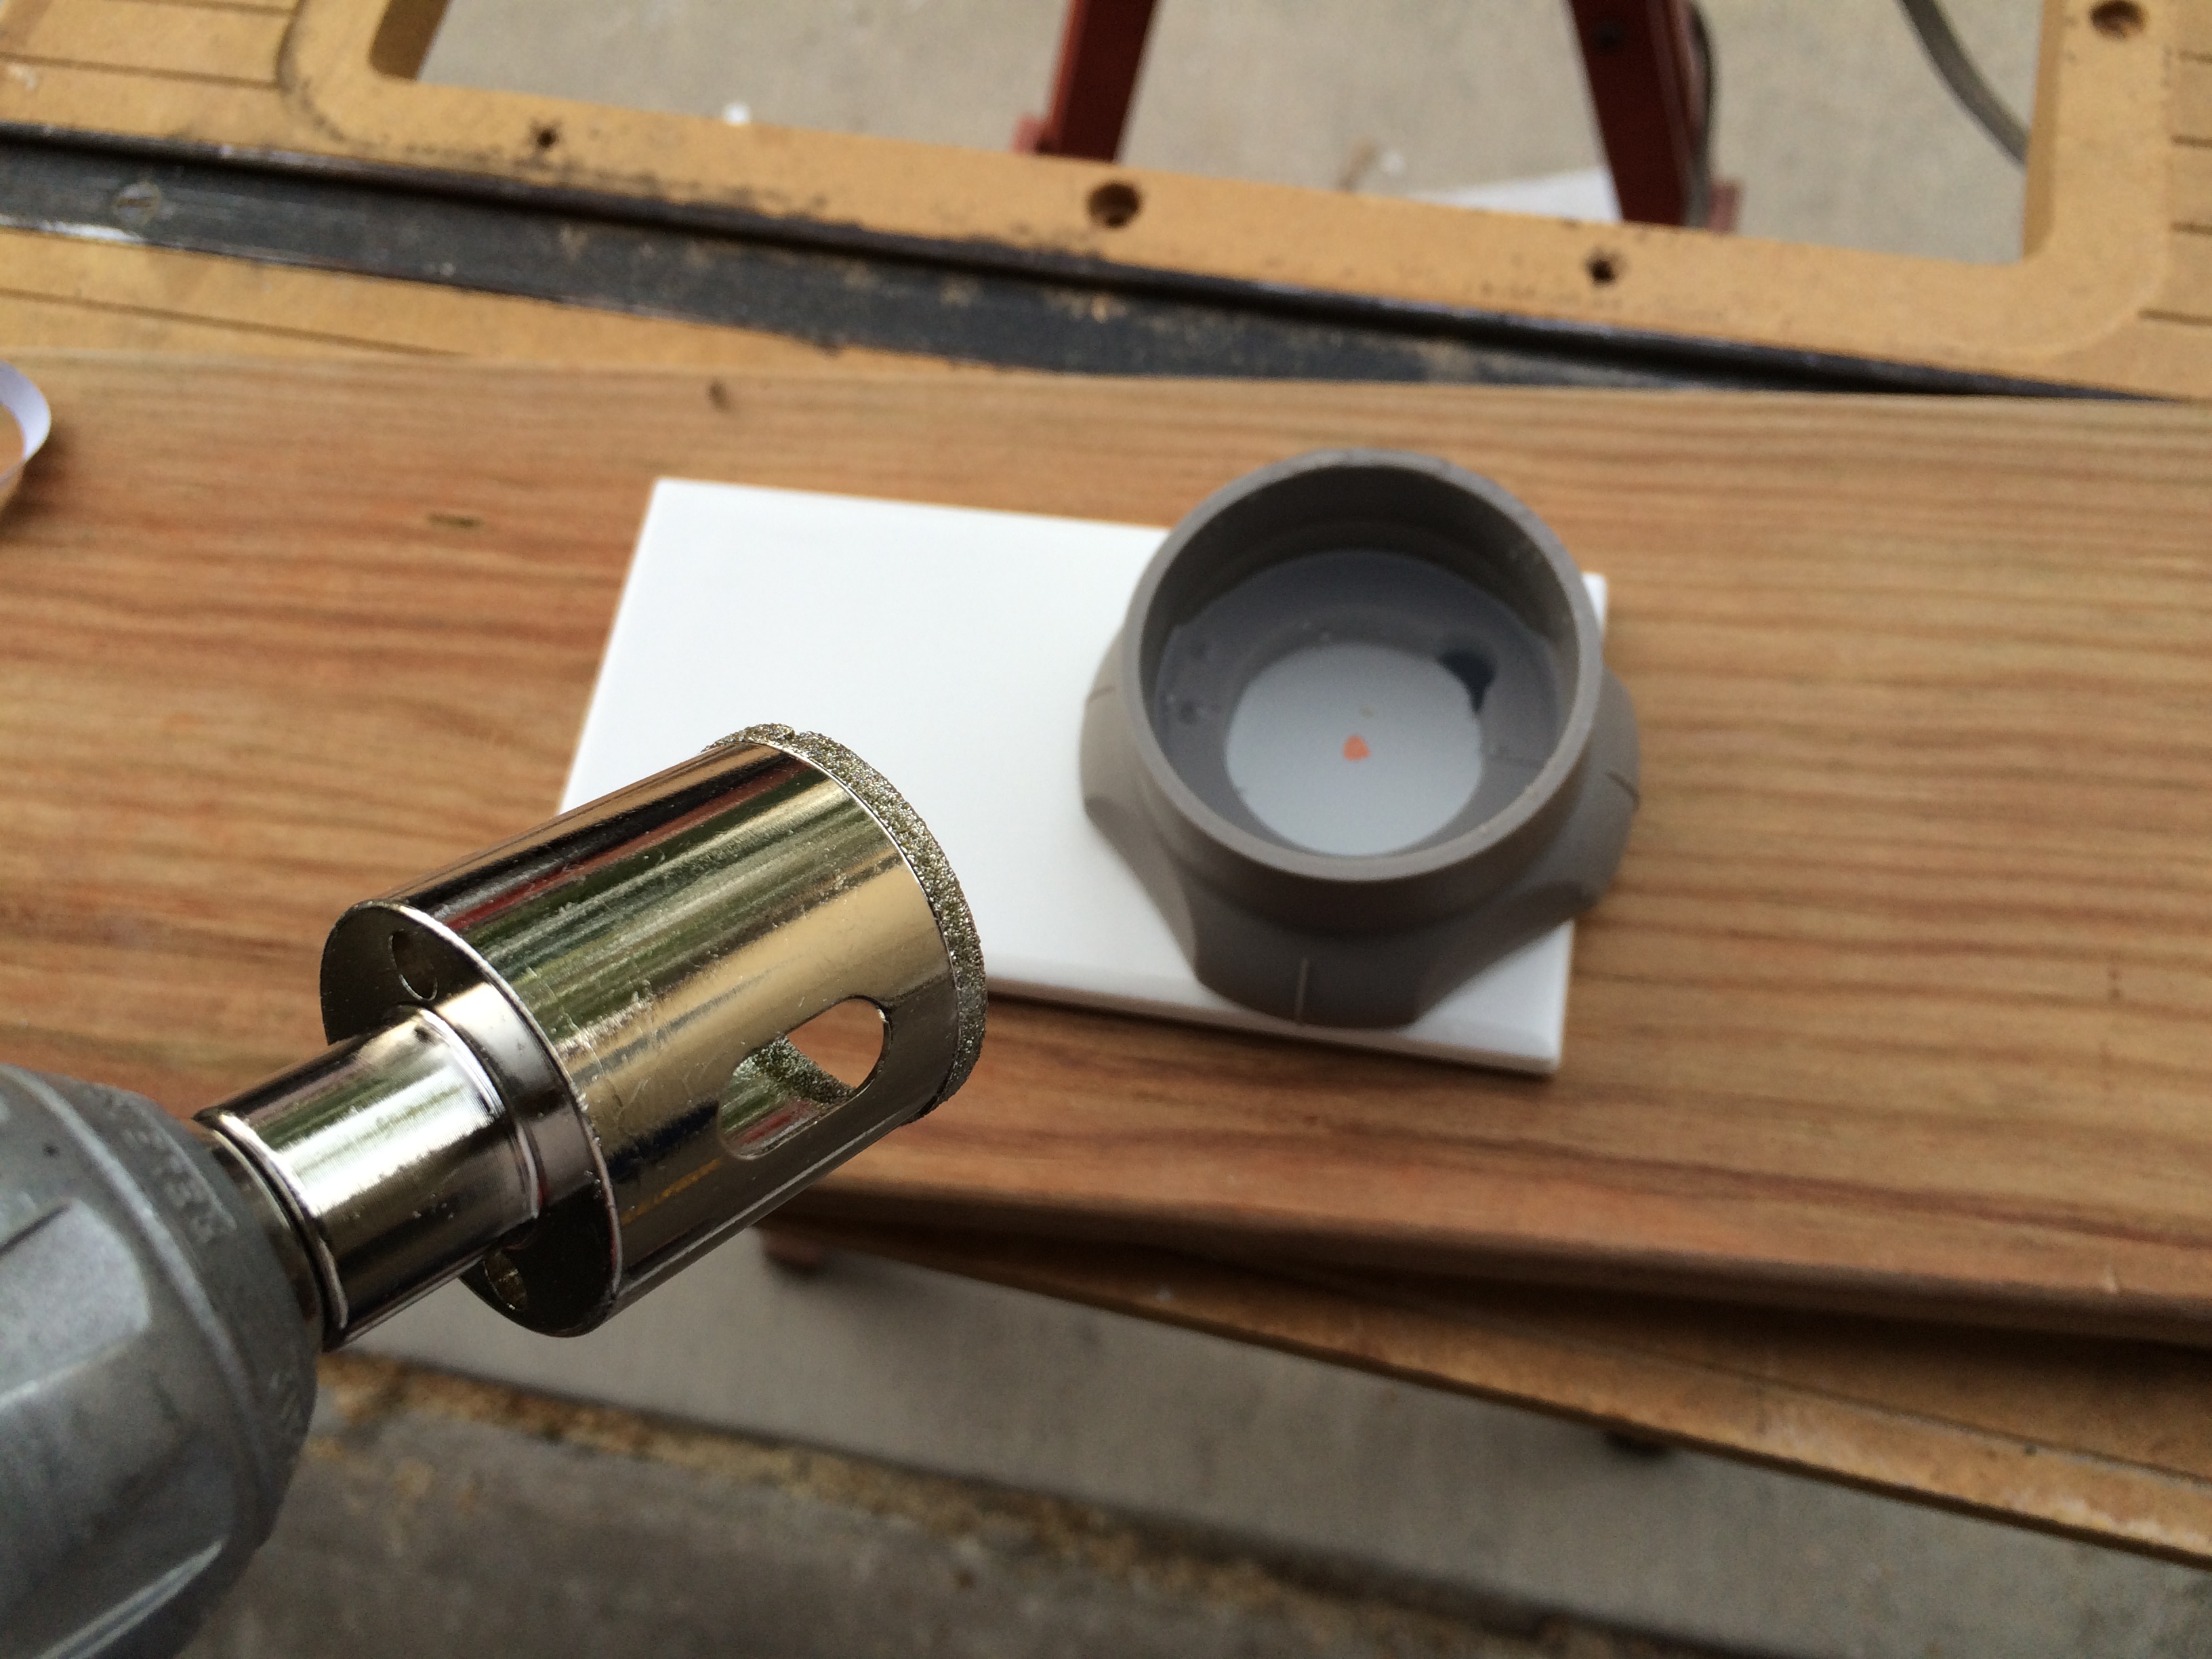
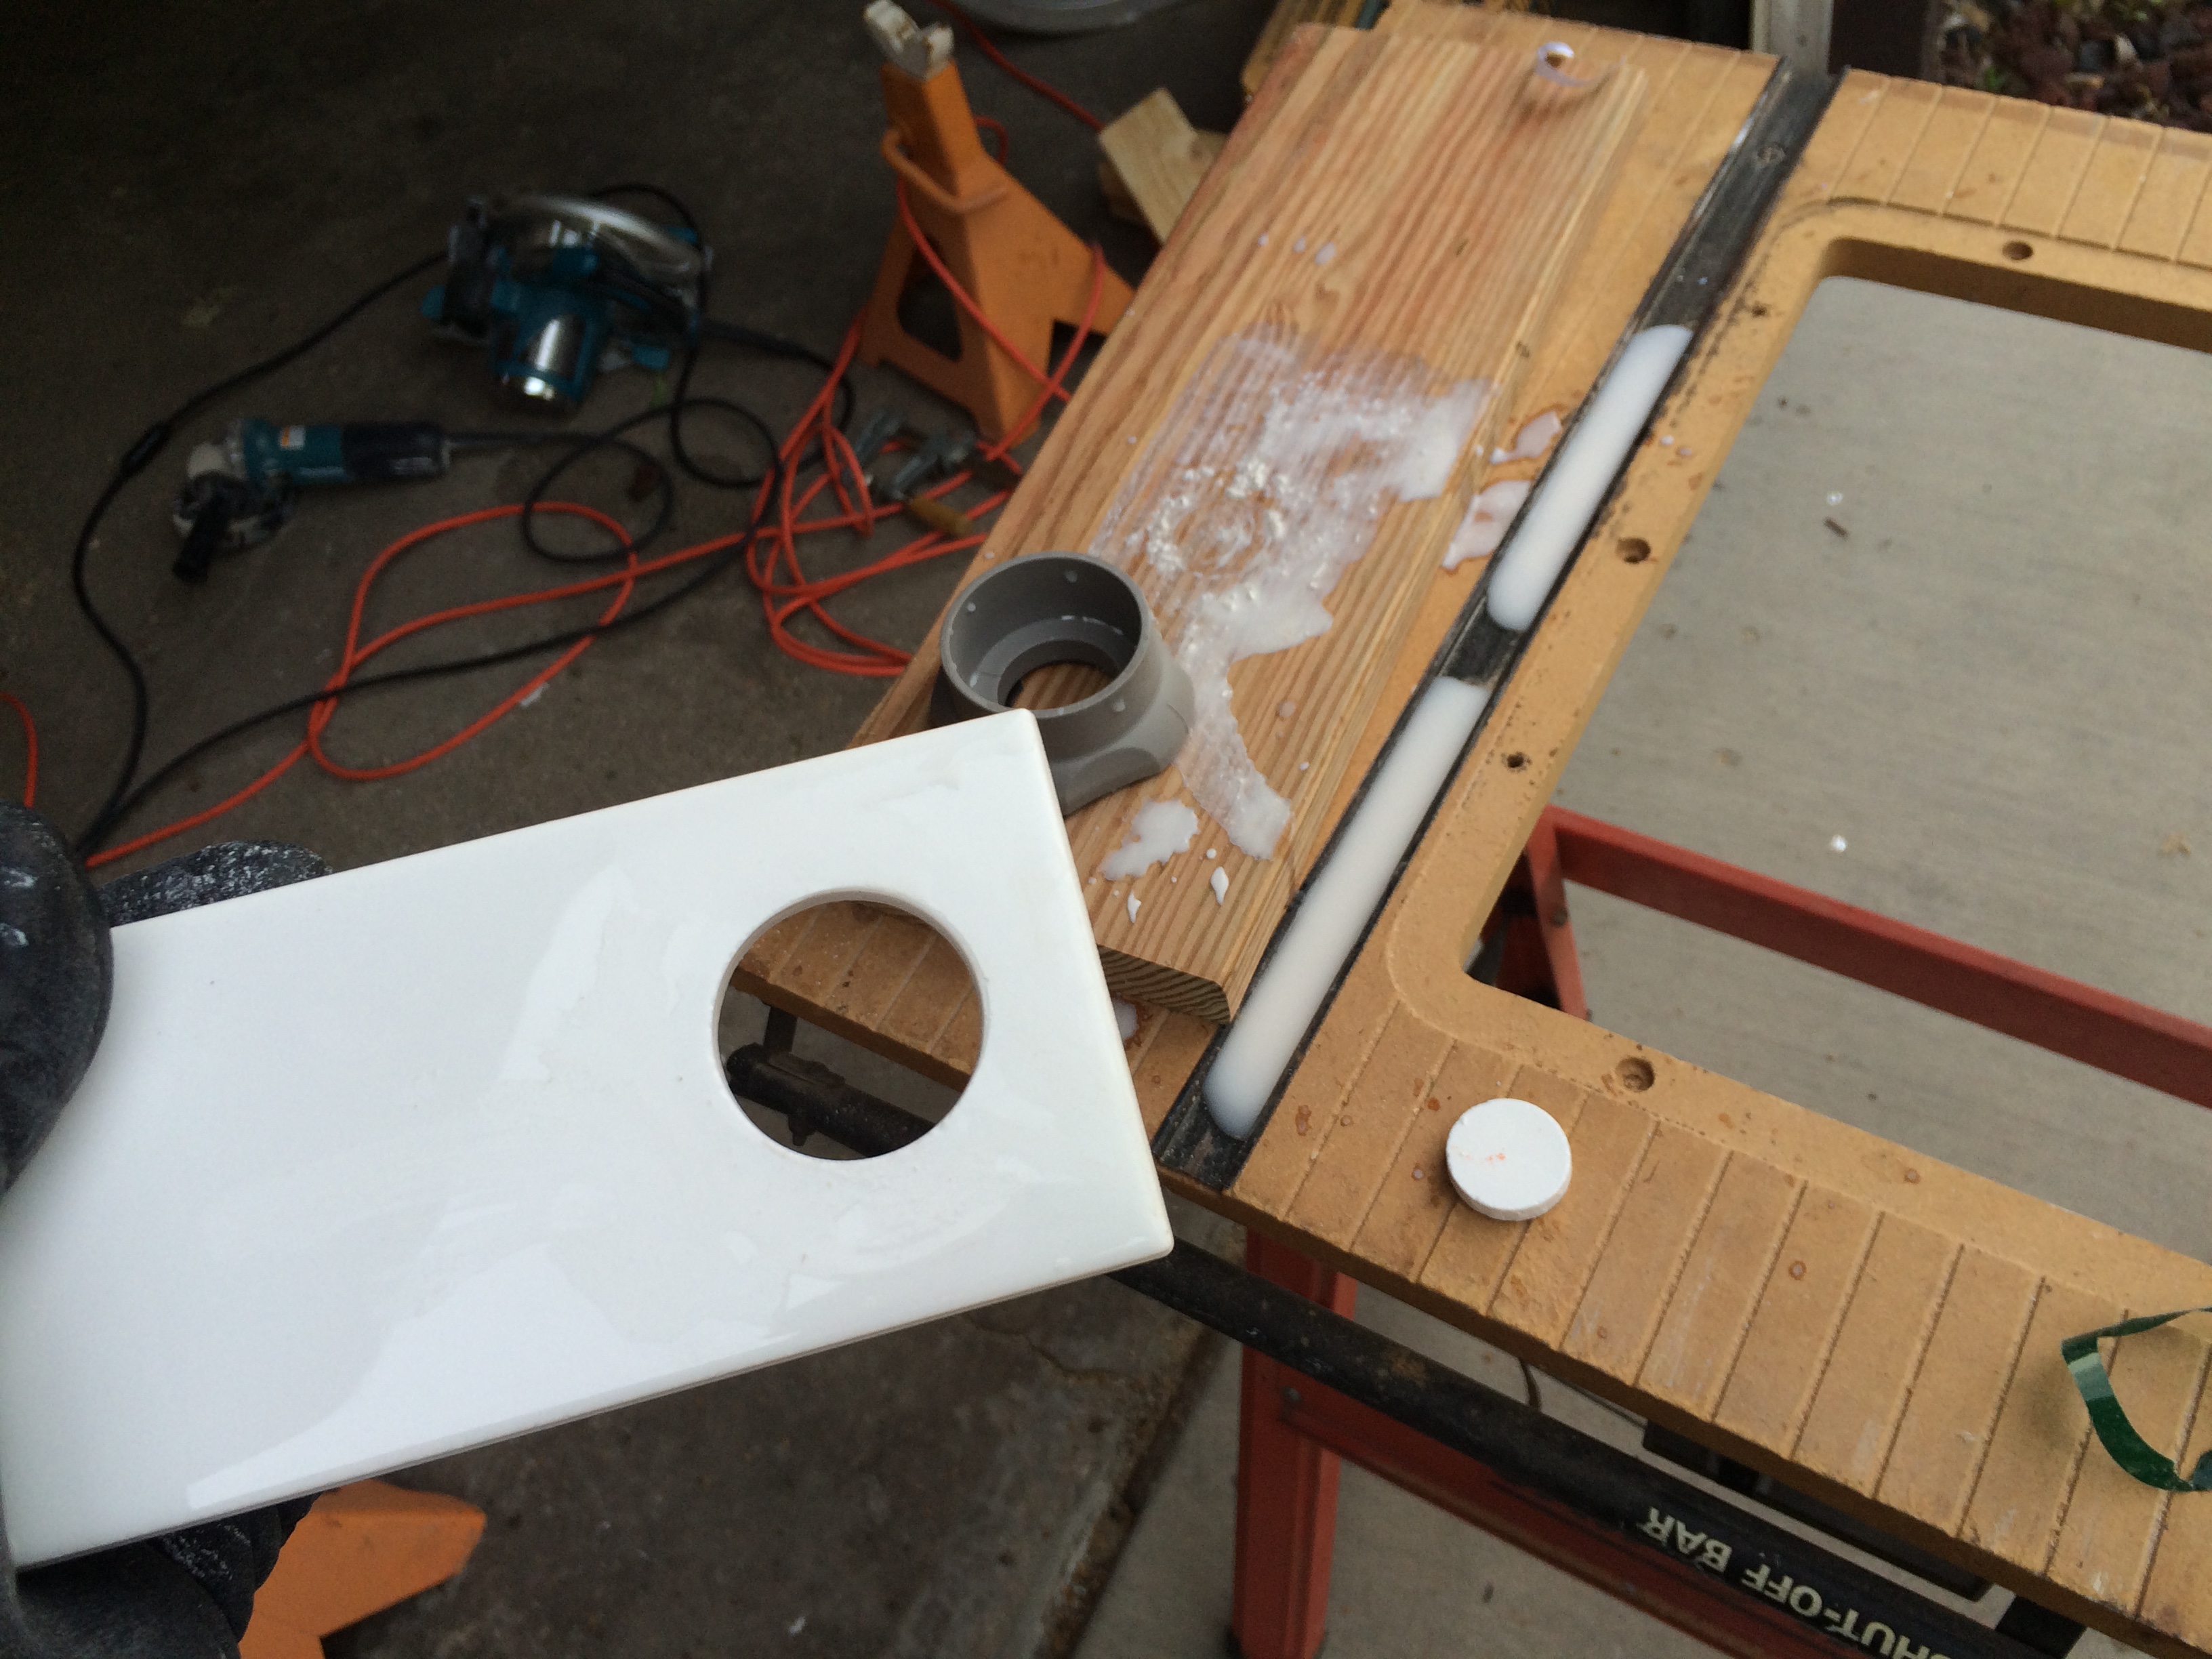
On the right side of the banquette, I installed an electrical outlet to plug in the microwave.  It is essentially a glorified extension cord with a fancy face plate, with a plugin on the inside of the banquette connected to the existing wall outlet.IMG_3435

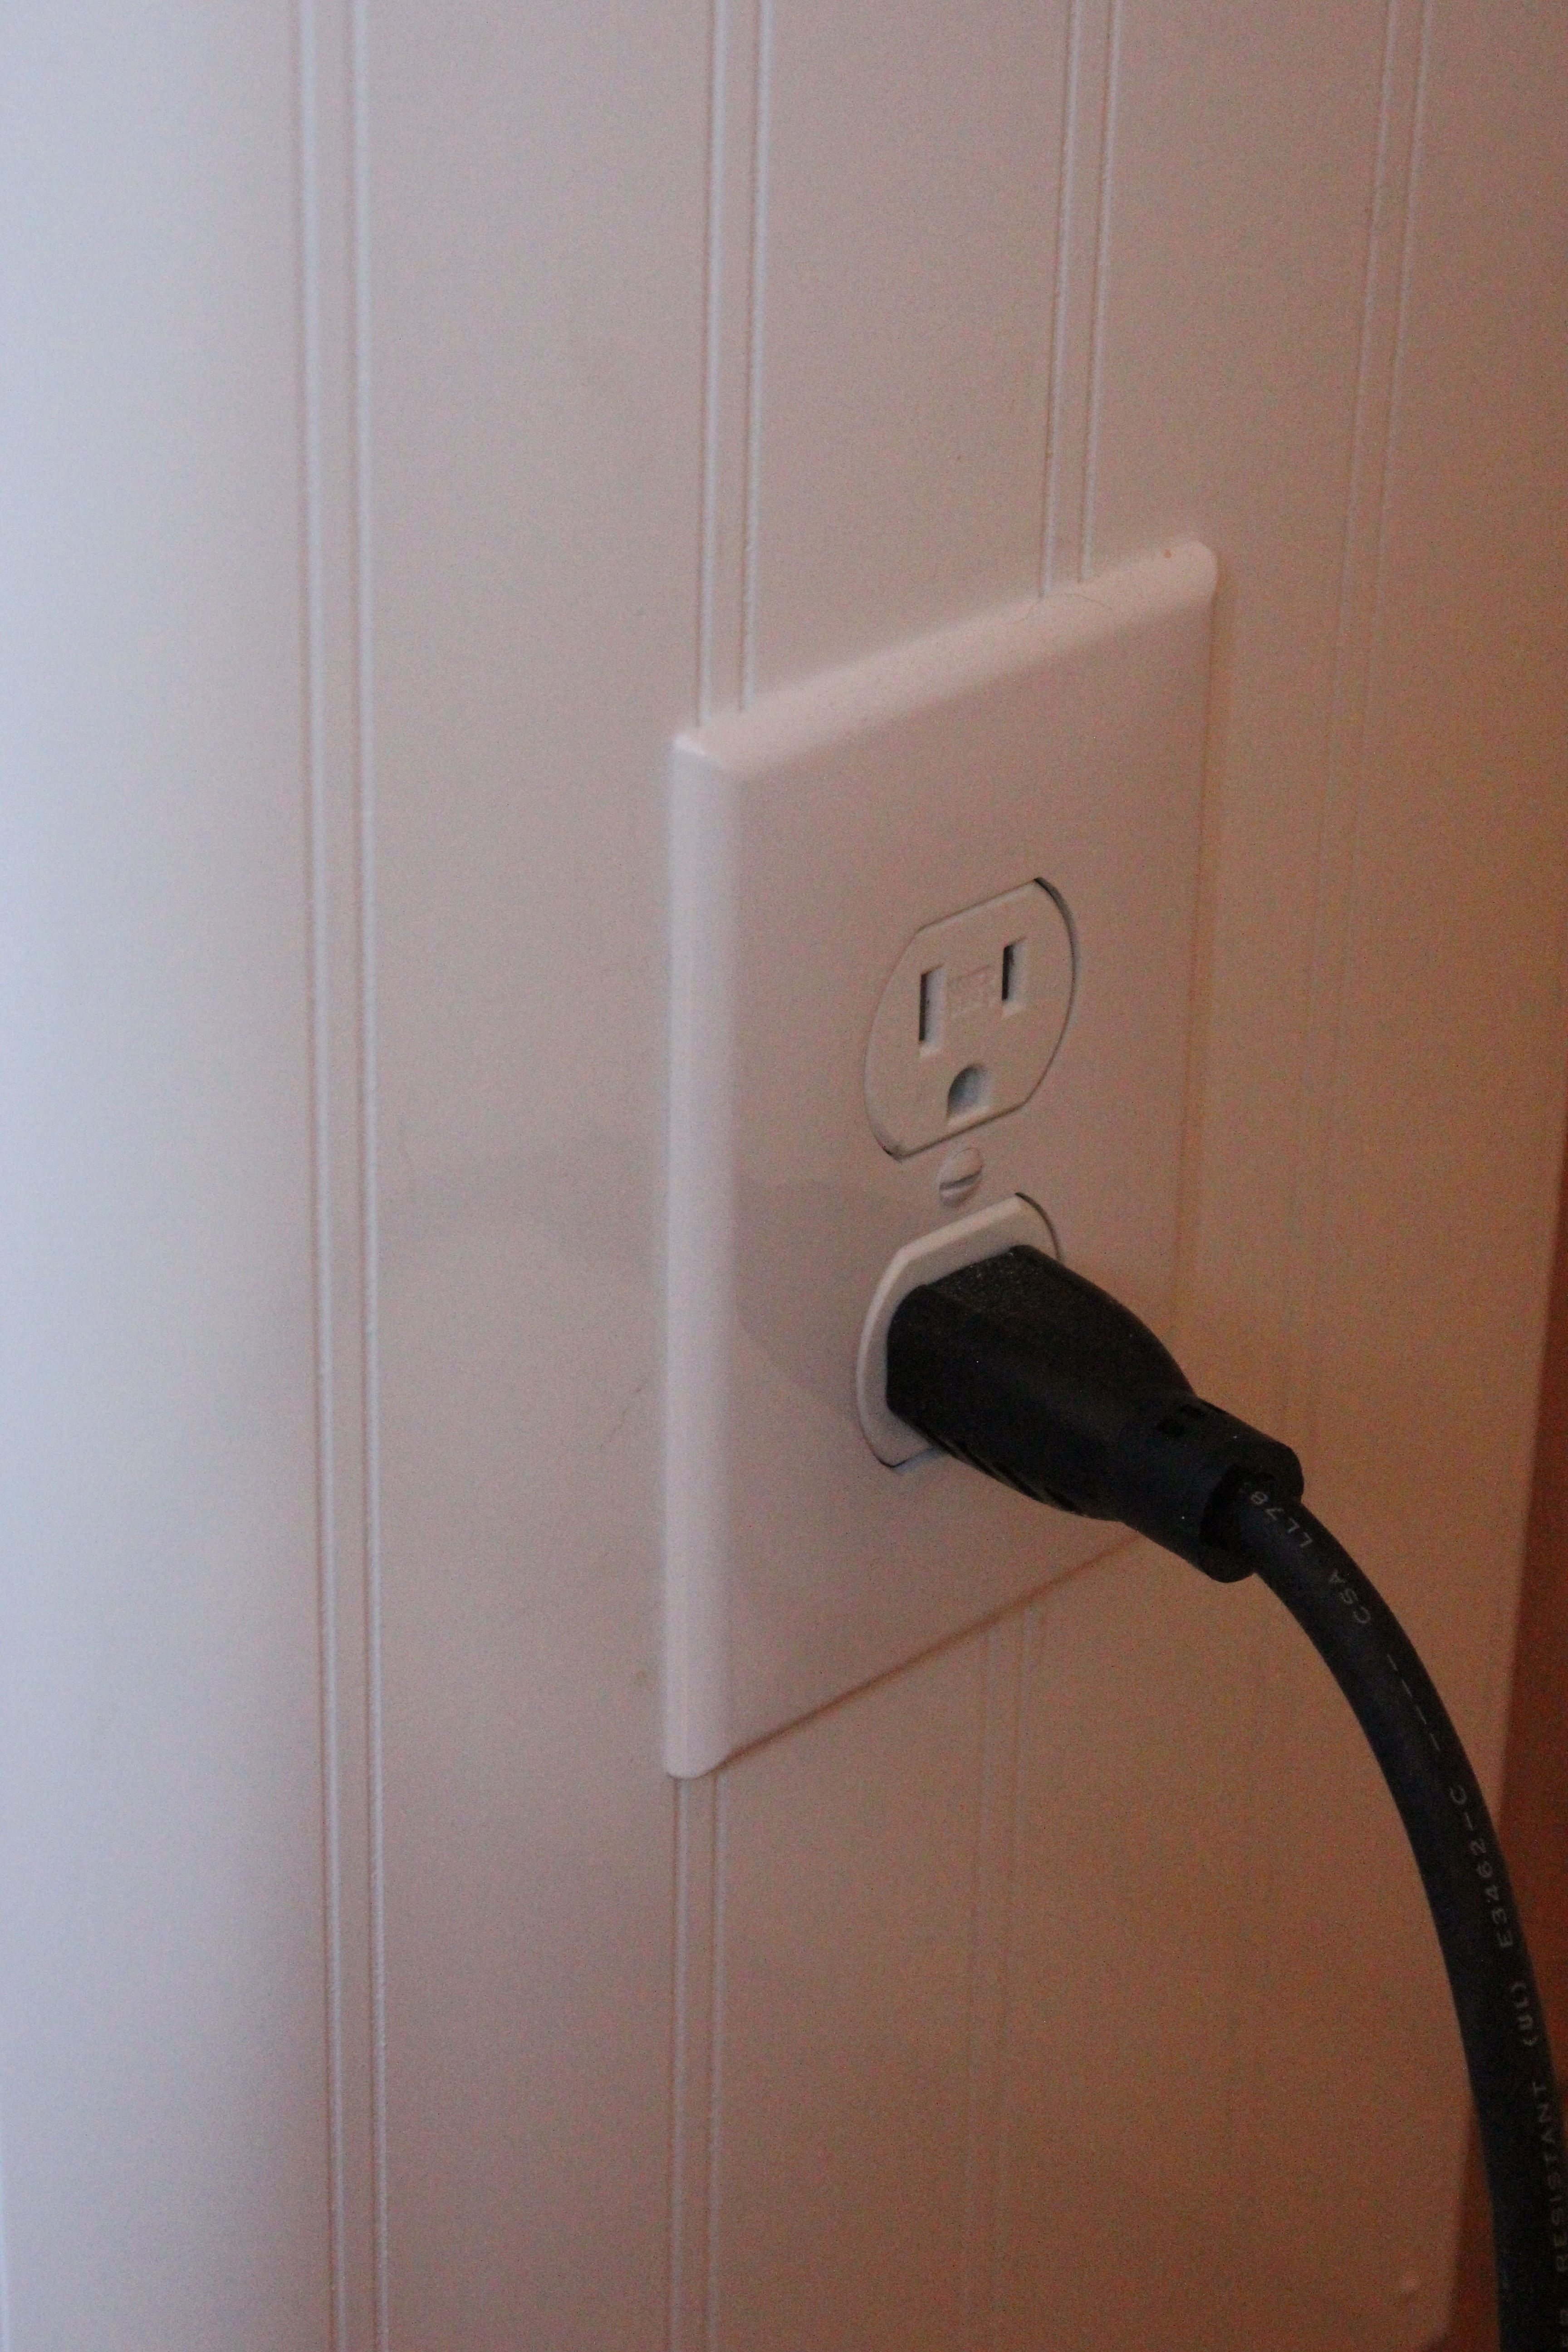
For the base of the banquette, we used the same decorative plywood, but went with vinyl trim pieces to give it a finished look.IMG_3436

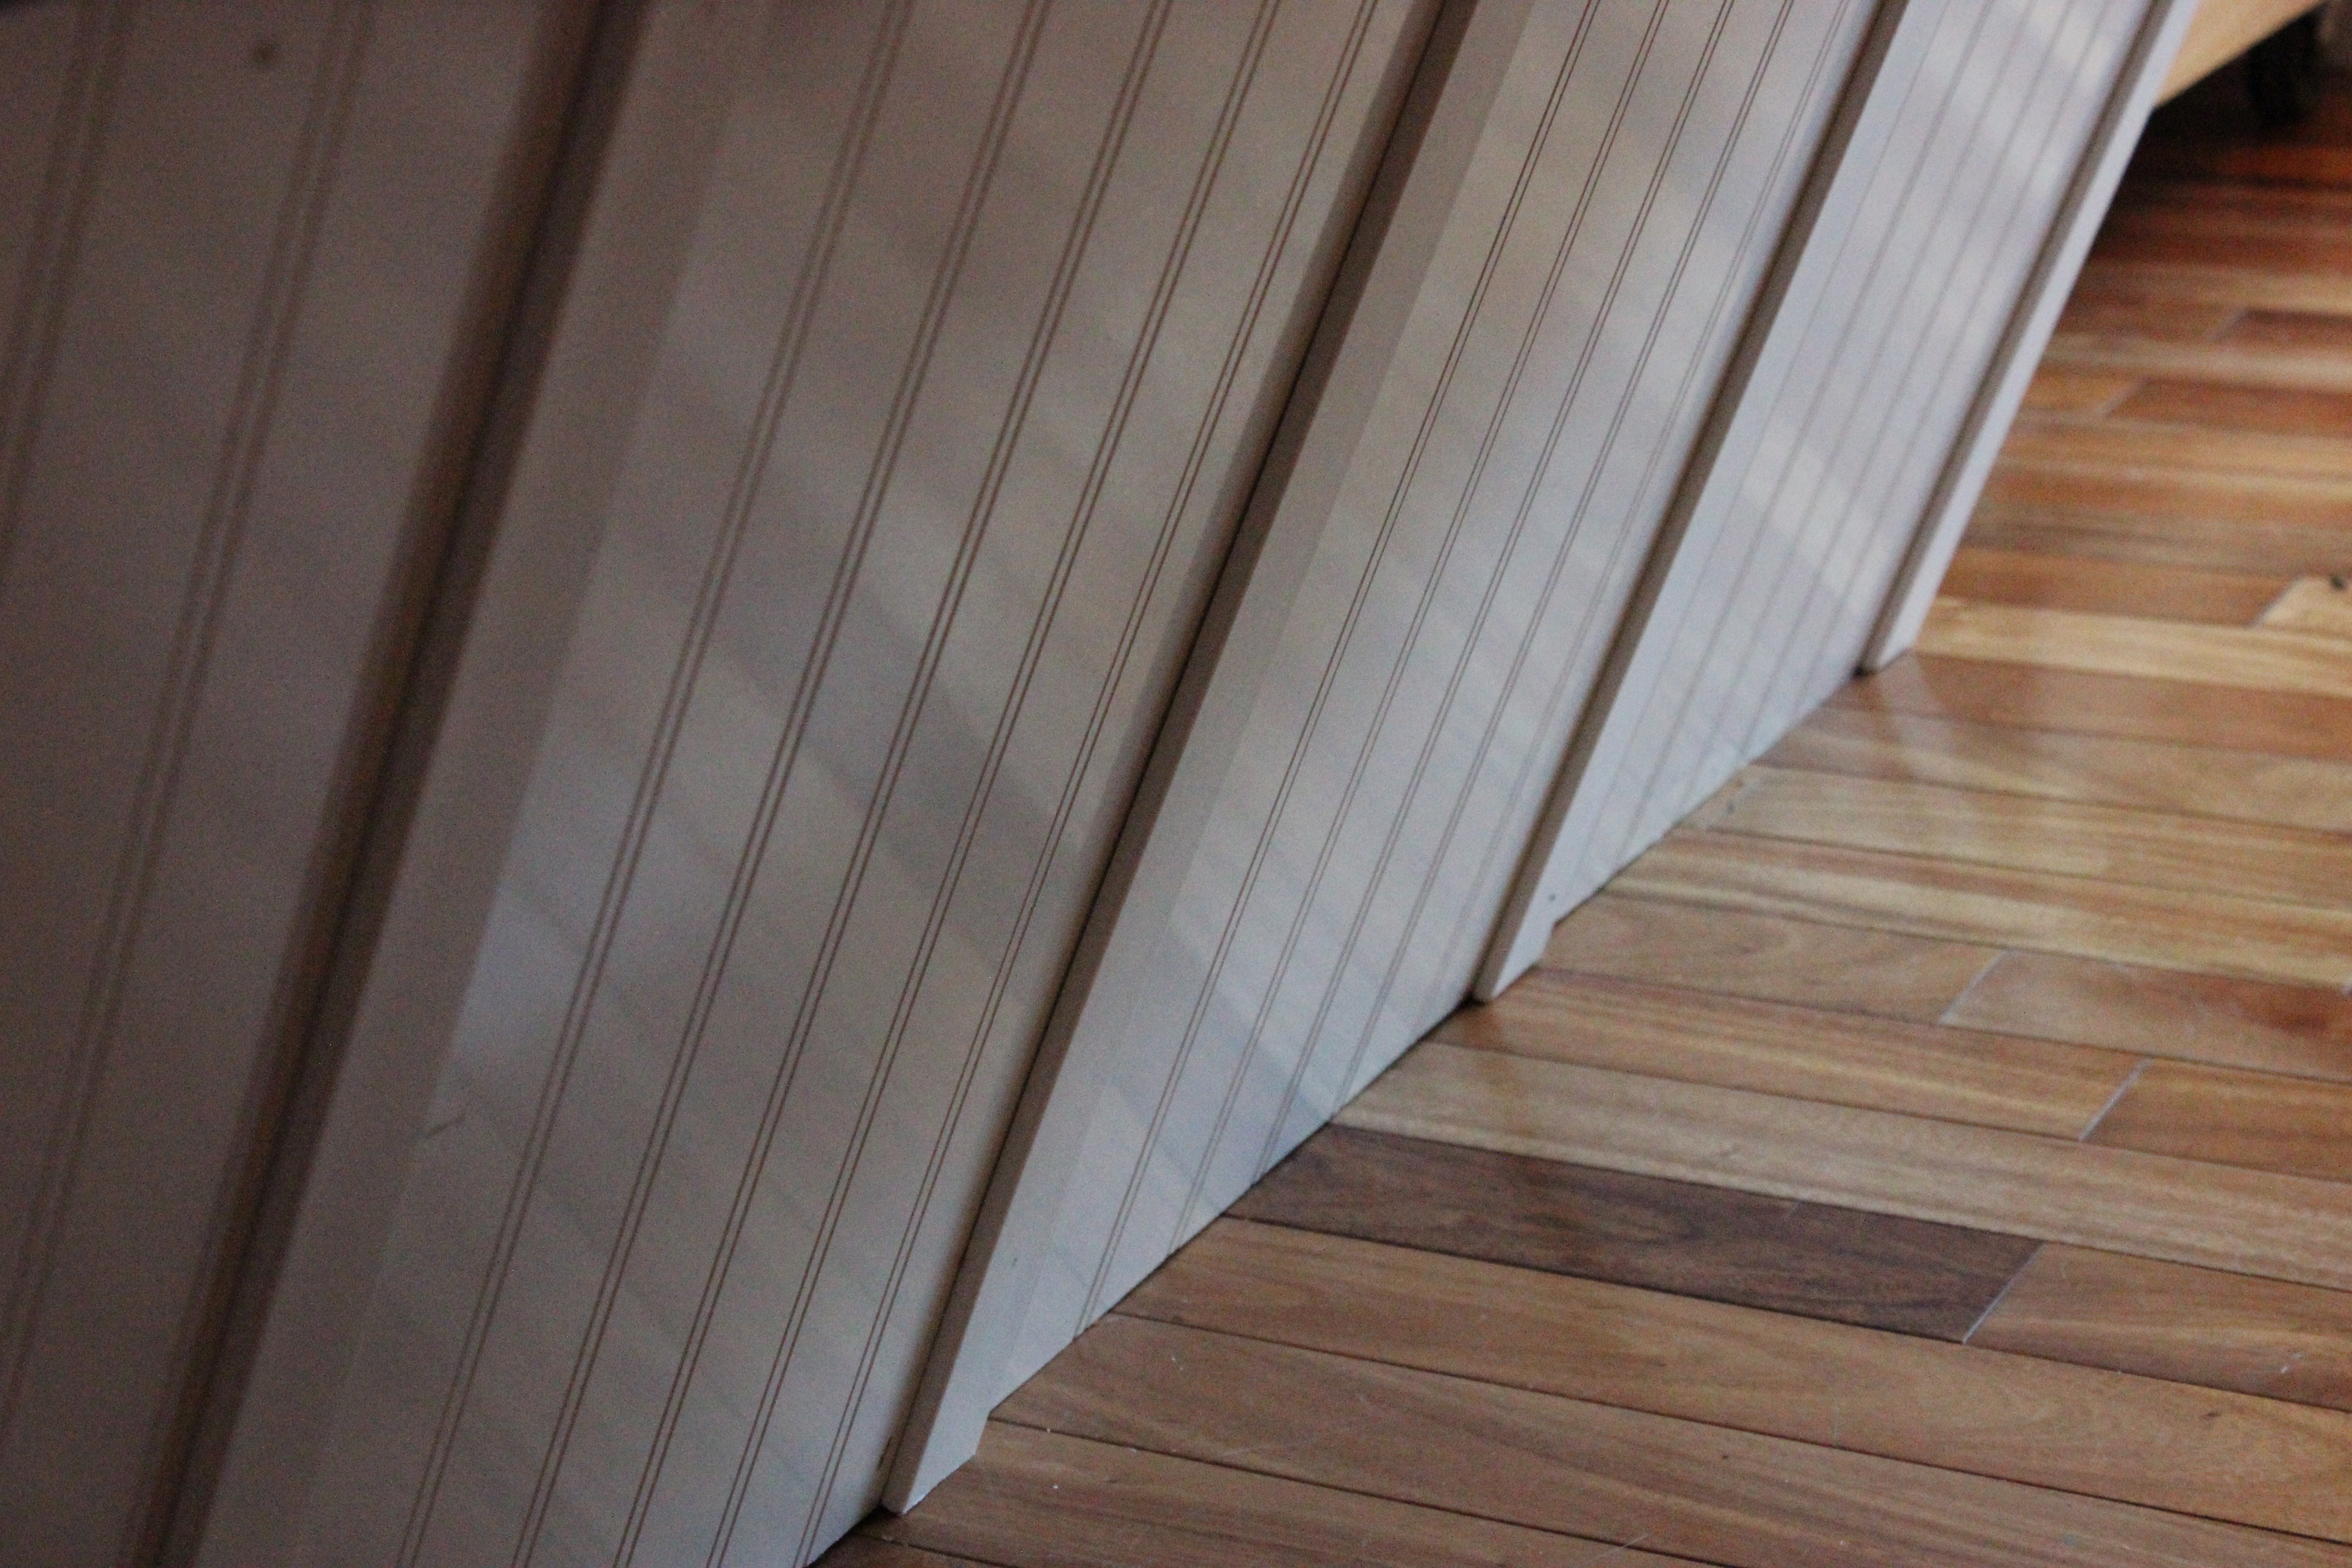
Here’s what we’ve all been waiting for (this includes every friend/family member we’ve had over in the last two years that we invited to eat with us in the living room).  After a few throw pillows and a new table (that’s actually a dining table and not a desk), we have a place to eat our meals and entertain guests!

IMG_3426

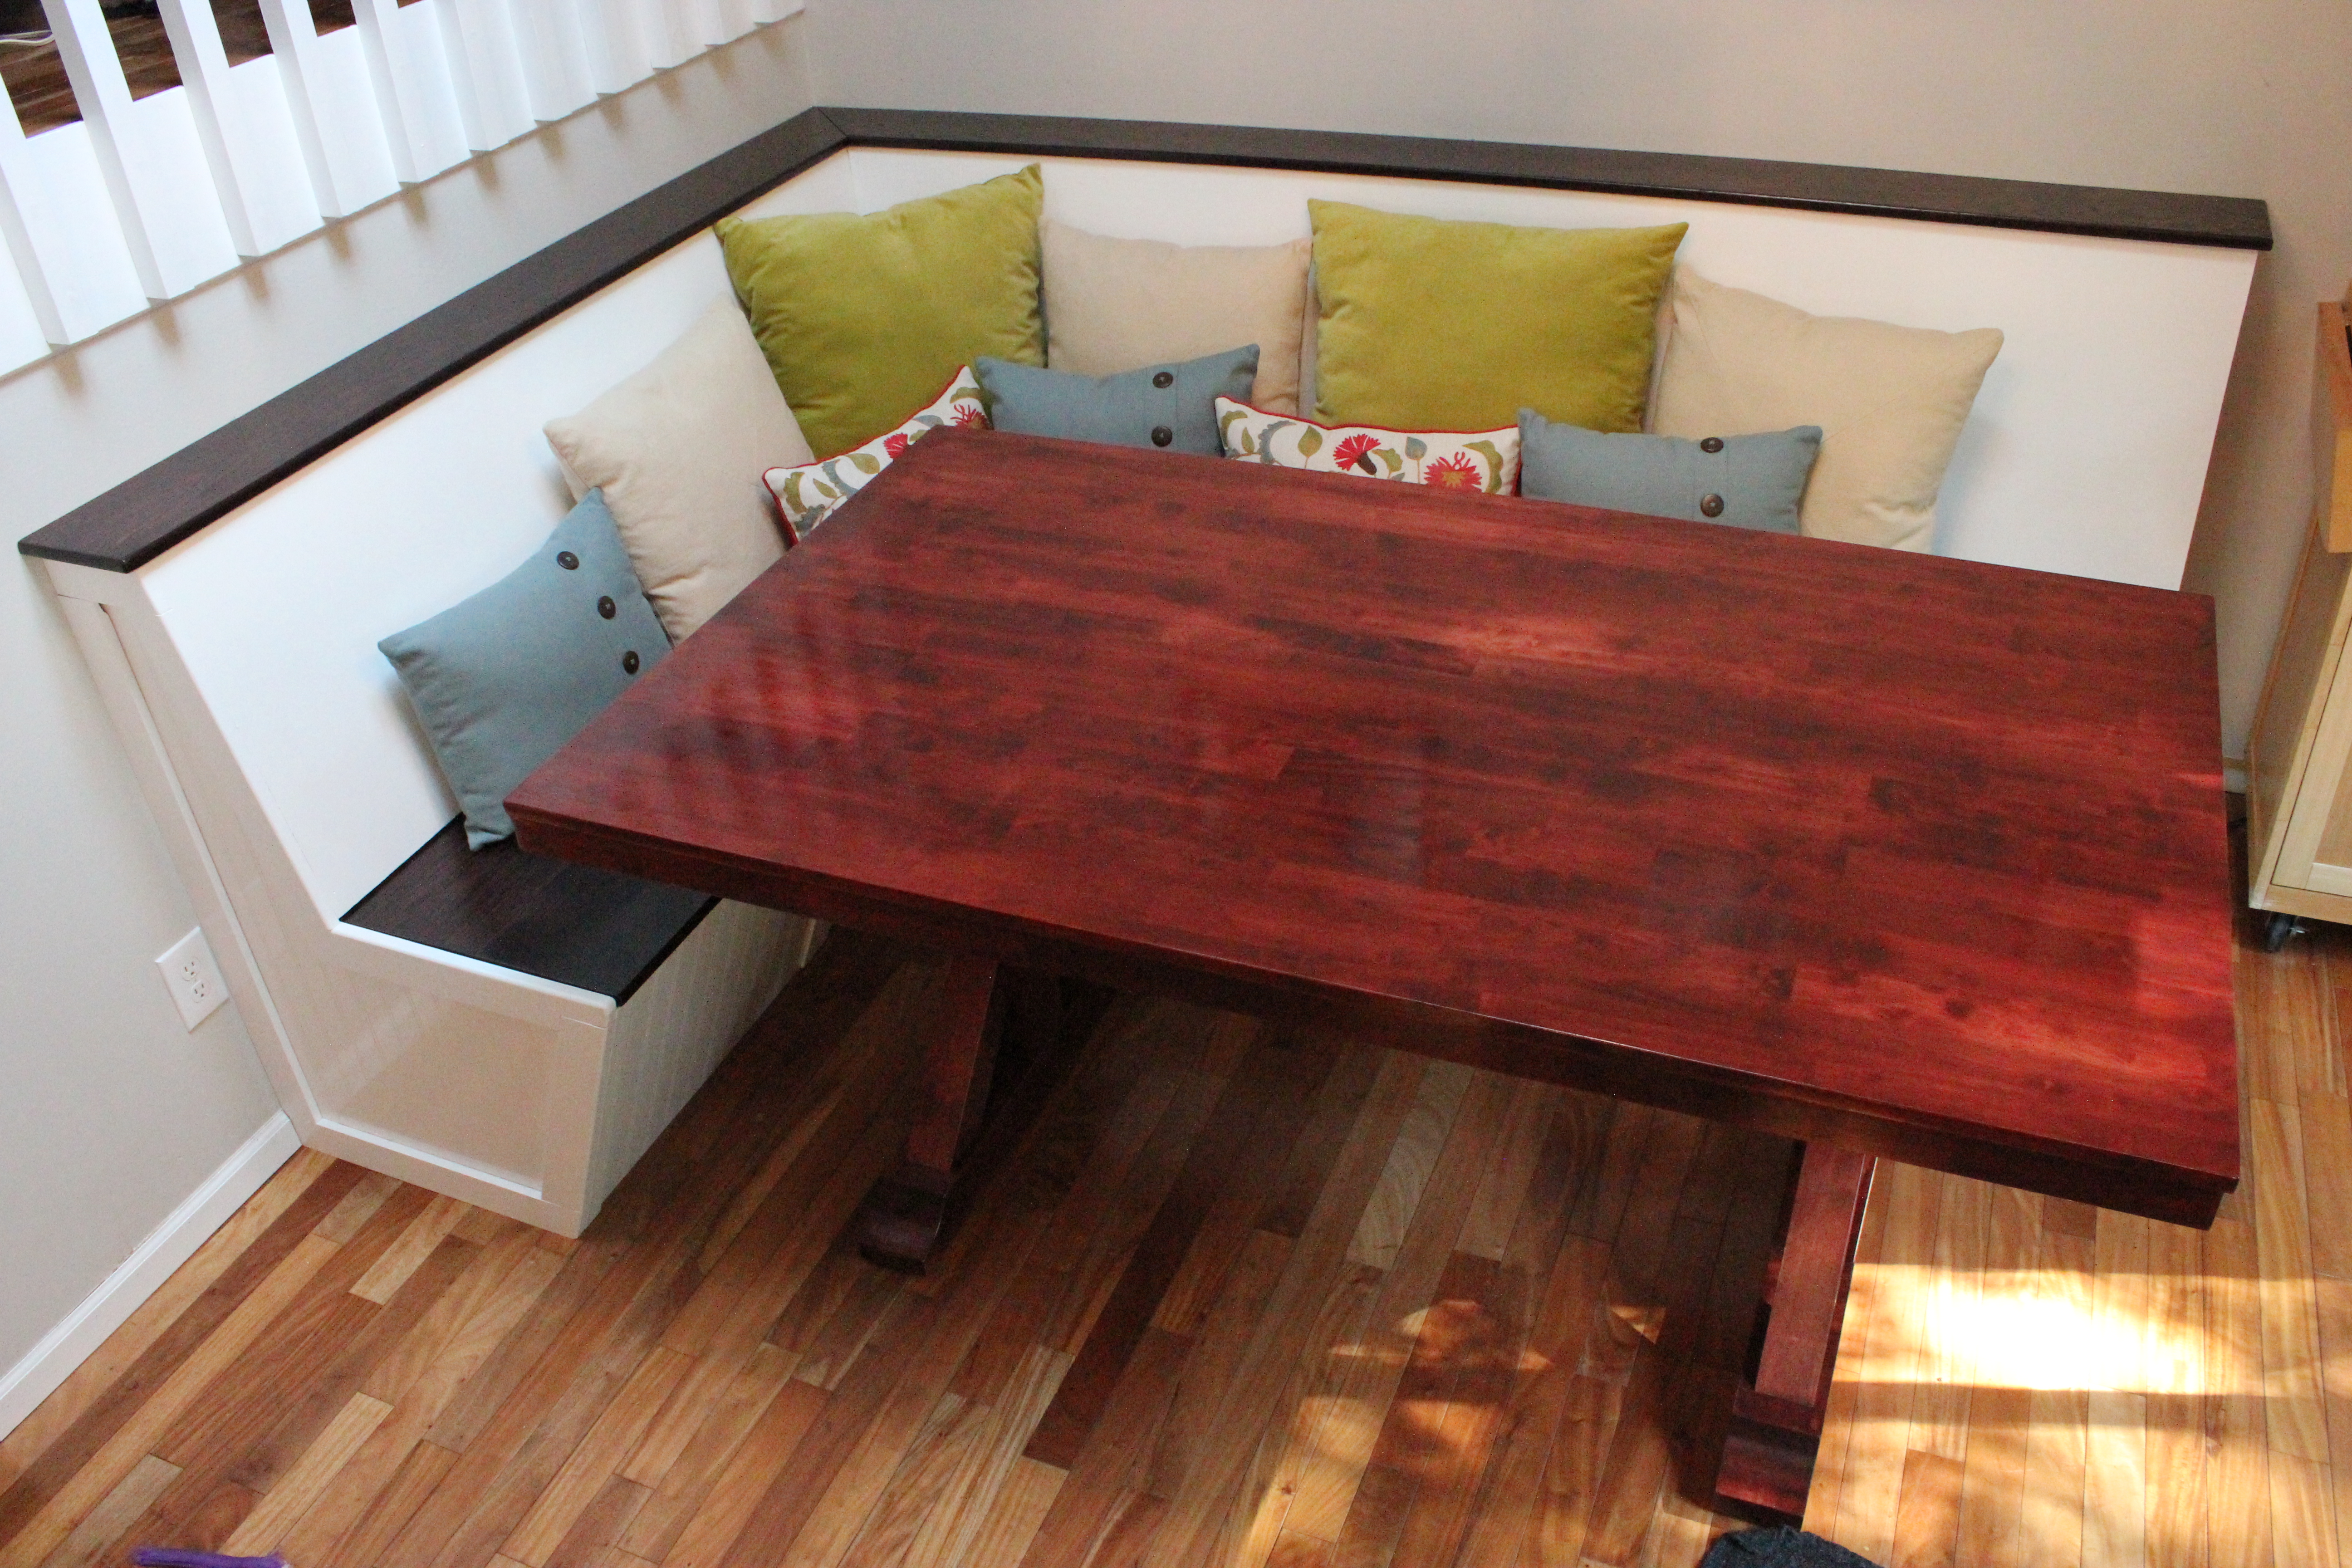
Adulting like pros, no longer eating at an Ikea office desk.

Edit: Now that this is all put together, we’re seriously considering painting the entire banquette white (i.e. not having the top and seat stained). But that’s another project for another post.

The Upstairs Bathroom Remodel – Part 1 of 2

This is a project we have wanted to do since the first day we moved into this house.  The upstairs guest bathroom had a cracked floor, moldy shower grout and an 80’s style that just couldn’t woo us.  Step one: Demolition!

IMG_2013

I tried to find a balance between my inner child wanting to swing a hammer, and my inner adult, warning me not to smash through two walls with one swing. (the living room wall is to the right)

Below are some of the materials we purchased.  Porcelain floor tiles, mortar, pre-mixed grout and concrete backer-board from Home Depot.  Ceramic subway tiles and 2×4 wall studs from Menards (because the prices were cheaper that week).

IMG_2016

Faux wood porcelain floor.

IMG_2015

When reading up about what we would need for this project, I saw that it would be helpful to have an extra drill, because mixing mortar by hand can be exhausting and totally unnecessary if you have a good electric drill.  I found this vintage Craftsman at a local thrift shop called Empty The Nest for $5.  It doesn’t go in reverse and smells a bit when you first use it, but it still has a lot of life left in it and was up to the task.

IMG_2019

“Rosie the riveter would be proud.”

With the supplies purchased, the demolition continues.  I now have all of the wall taken down around the shower.  I had an old blanket in the bottom of the tub to prevent scratches from falling tiles.  We decided from the beginning that the tub would stay. Its porcelain and super heavy, so moving it would have created more issues in renovating the bathroom than the space would warrant. Luckily, its white and easy to clean, which also gives it a Verlo seal of approval.

IMG_2022

“Don’t look at me, I’m not decent.”

Now begins the LONG process of removing the floor tiles.  I started by pulling up the threshold between the rooms, and chipping one tile away at a time.  The photo below shows how much progress I had made after about an hour of grueling work.

IMG_2080

On the area that has been cleared of tiles, note how there was only plywood beneath the tiles. This explains why many of the tiles were cracking. I have been reading how tile floors need at least 1/4″ concrete backer-board as a sub-surface. The wood will have to go!

After drilling a test hole, I determined that the floor beneath the tiles consists of a 1/2″ plywood layer, on top of a 3/4″ plywood layer.  Using a much quicker SMASH technique (read: hammer and a crowbar), I have started to remove the 1/2″ plywood layer and the tiles above it.  This wood layer will eventually be replaced by concrete backer-board.

IMG_2089

One other lesson I learned when tossing these tile scraps into the garbage. One broken piece sliced through the pair of leather work gloves I was wearing and nearly cut my finger. I stopped my work and bought a better pair of gloves designed for handling sharp edges.

With demolition complete, the next step is doing plumbing for the new bathtub fixtures.

IMG_2087

Before.

When doing this bathroom remodel, we took into consideration what we would need for our next bathroom remodel.  Behind the tub fixtures in this bathroom, is the master closet, which will eventually become part of an expanded master bathroom, specifically, where the tub will be located.  In the image below, I soldered copper pipes so that I have plumbing ready to go when we are ready to move forward with the next bathroom remodel.

IMG_2093

Hot and cold lines passing through the wall into the closet on the other side. More work now, but less down the road.  Also attached: the brass fixture for the new tub controls.

With the plumbing finished, I have started to screw the 1/2″ concrete backer-board into place around the shower.

IMG_2144

Guy at Home Depot recommended using coated screws sold right next to the concrete board. They do not rust and hold the board firmly to the wall.

There are a few different ways to cut the concrete board.  You can use a scribe tool on each side, then snap the board in two pieces.  Or, if you want to go the Tim The Tool-man Taylor route, you can buy a angle grinder with a diamond blade.

IMG_2196

The power tool method kicks up a bunch of dust, so they recommend wearing a mask and goggles. Also, avoid a bunch of cleanup by doing it outside.

More walls are getting covered.  This process requires a bunch of screws and a drill capable of high torque.  The battery on mine died a few times during this process, so I did this slowly over the course of a week.

IMG_2200

Between battery charges, I worked on some finishing touches to the plumbing.  Since this was my first attempt at plumbing a shower, I purchased the wrong elbow bend copper piece for the turn to the tub faucet.  So, I improvised, using a small piece of 2×4 and fastening the pipes on both sides.  This will keep the faucet from wiggling to the left and to the right.

IMG_2205

Okay, the concrete backer board is up.  Time to begin adding the subway tile!

IMG_2209

Step 1. Secure a level to the wall.

IMG_2210

Step 2. Tape the joints.

IMG_2211

Step 3. Apply mortar and start putting tiles on the wall.

IMG_2212

The amount I was able to finish the first night of work. I took my time and measured each layer before starting it. I also used 1/8″ spacers.


The tiling process was very slow.  I was working by myself and had just three hours each night during my workweek to dedicate to it.  It takes about 20 minutes to prepare the mortar, a couple of minutes per tile when you add up the time it takes to cut some of them, and about 20 minutes to clean up after the job each night.

IMG_2215

The first wall is nearly in place. And 2x4s are holding up the corner shelves.

The corner shelves were a bit tricky.  They are an odd weight, and held in place using just mortar.  I had to stick them to the wall, then wedge the piece of wood beneath them.  And over the course of a half an hour, I kept making small adjustments using a level, because they would move slightly over time.

Once I had the corner shelves taken care of, my next hurdle would be finding a way to make holes for the shower pipe and the tub pipe.

IMG_2243

I found a tool at Home Depot that is designed to cut holes in tiles.  It comes with a reservoir that you stick to the tile, and fill with water.  The reservoir helps guide the drill bit and keep it cool to cut the hole.

IMG_2244

Holes cut, the tiles fit right into place, and the ceramic subway tiles look great!

IMG_2245

Click here to see the finishing touches of this project.

-Mike