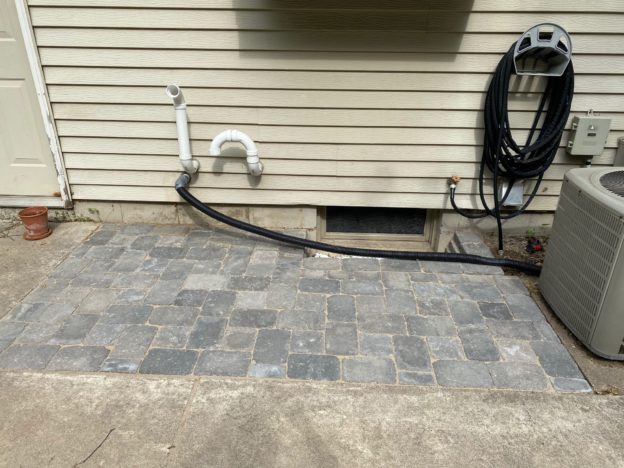
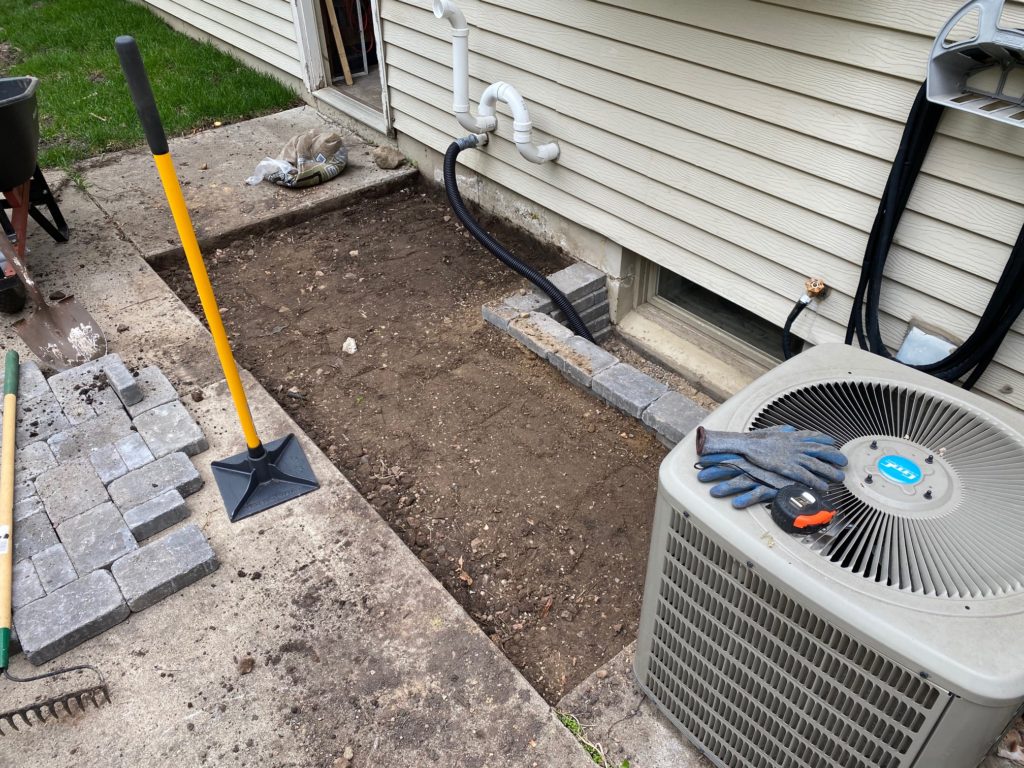
Welcome to the jungle behind our house! For years, this is where the weeds would call home. This year, I decided to do something about it, and replace the unsightly window well in the process.
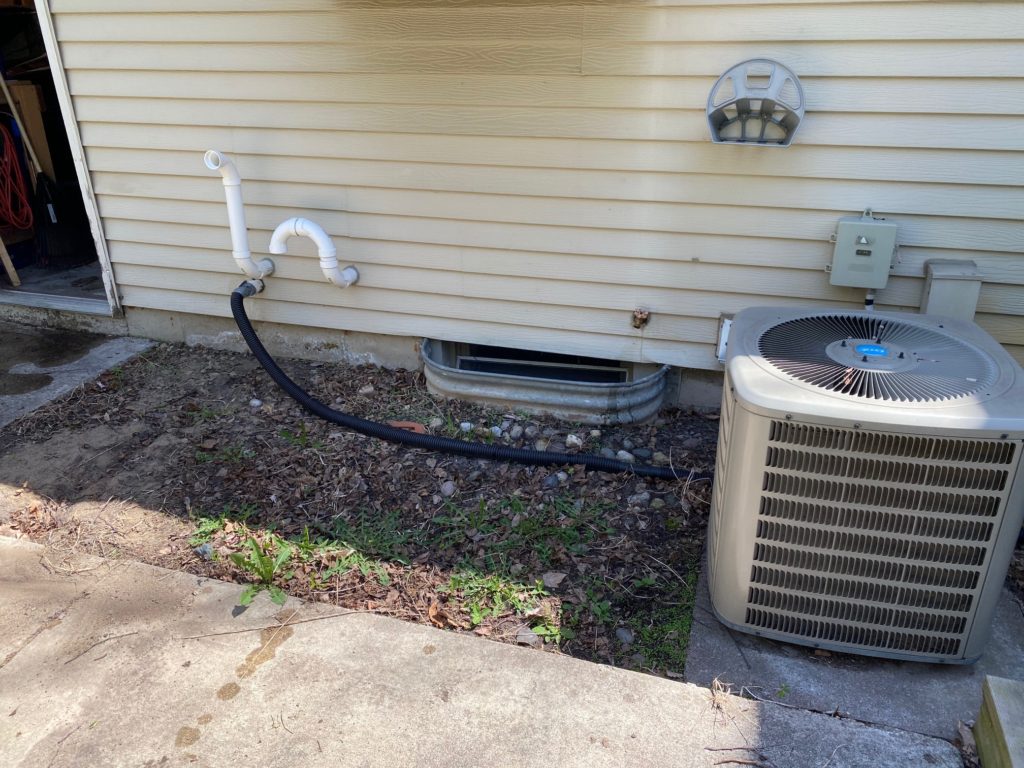
This project began, like many yard projects, with a shovel. I dug a hole around the steel window well, and pulled it out.
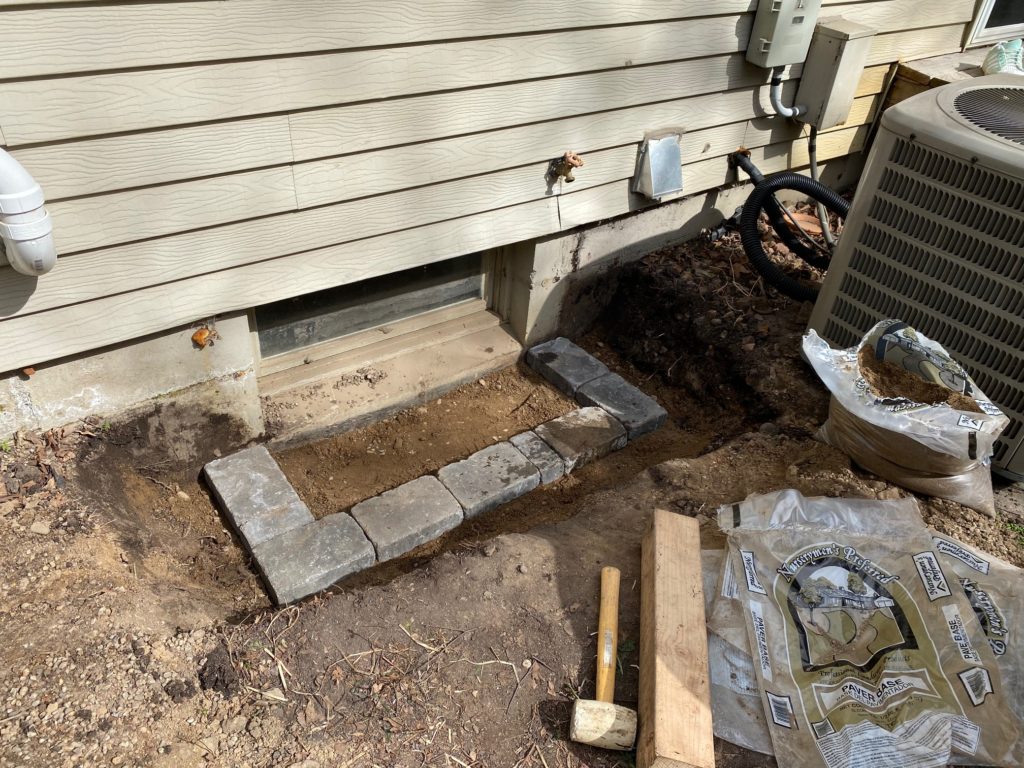
Next, I dug a little deeper, then put down “paver base,” which is a sand-gravel mix that I bought at Menards. I compacted the base layer, then started laying my bricks.
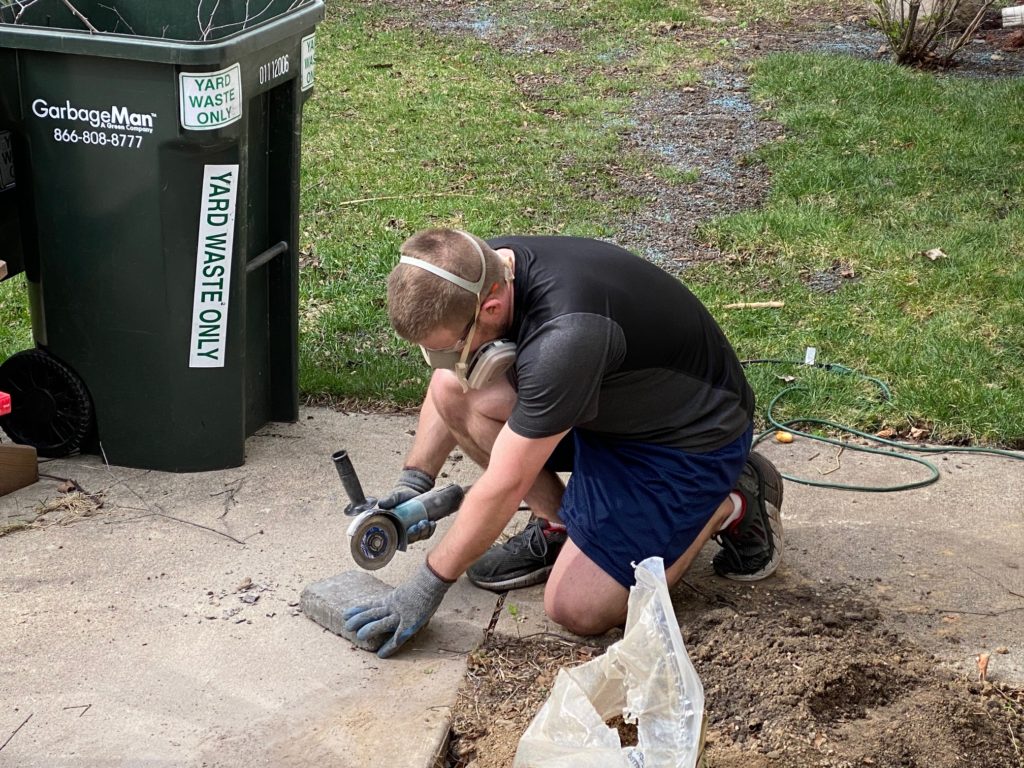
We used 6×9 Quarry Gray bricks that we bought at Menard’s. My Makita angle grinder with a mason blade had no trouble cutting through these!
The window well bricks are spaced out 1/2″ further each layer, and are held together with landscape block construction adhesive.
Also bought a Tamper for this project–one of those boring tools that just takes up space.
After creating the window well, I dug out 5″ deep all around the area where pavers would be placed. I needed to go 5″ deep, because I needed 3″ of paver base and the bricks themselves are 2″ deep.
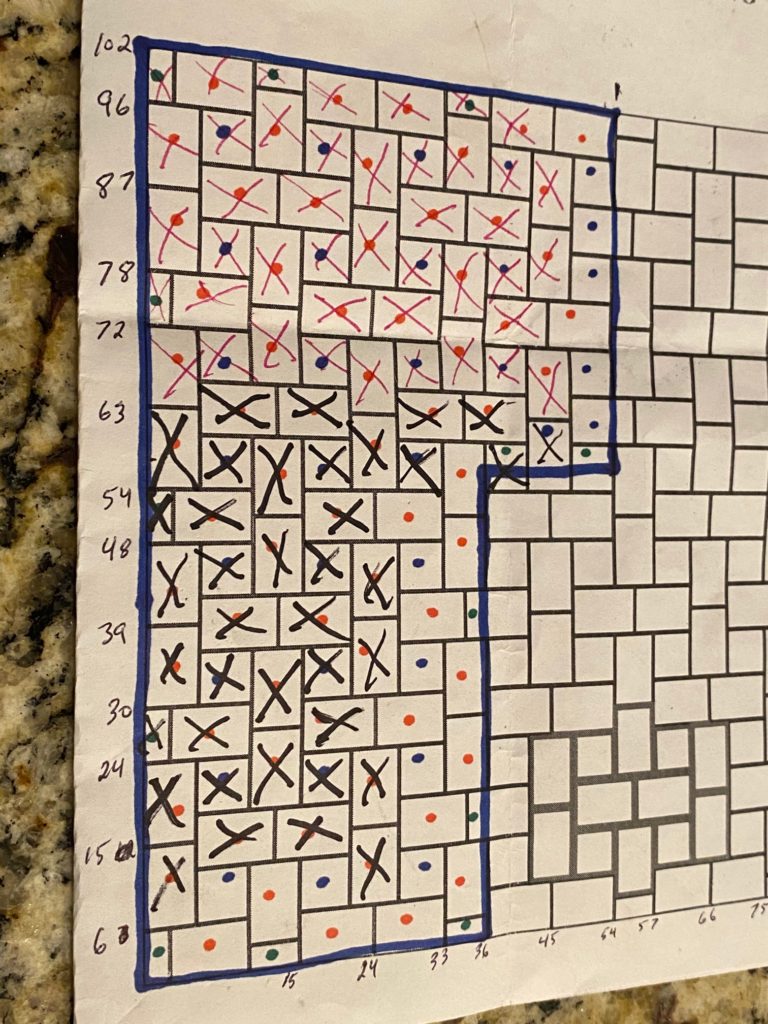
This is the pattern we used. The orange dots represent 6×9 bricks, the green dots represent 3×6 bricks and the blue dots represent 6×6 bricks. Sara crossed them out as we went.
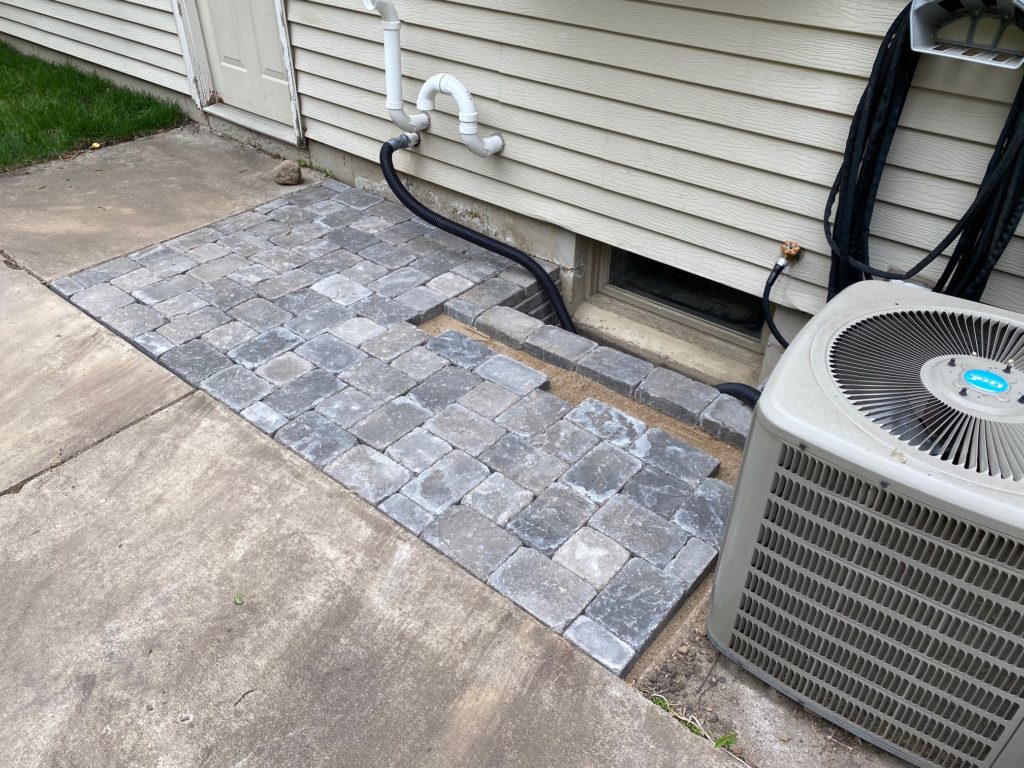
I was surprised at how easily the pavers went into place. I have always heard that the hardest part of making a patio is the preparation, and good prep certainly made the rest of the process very easy!
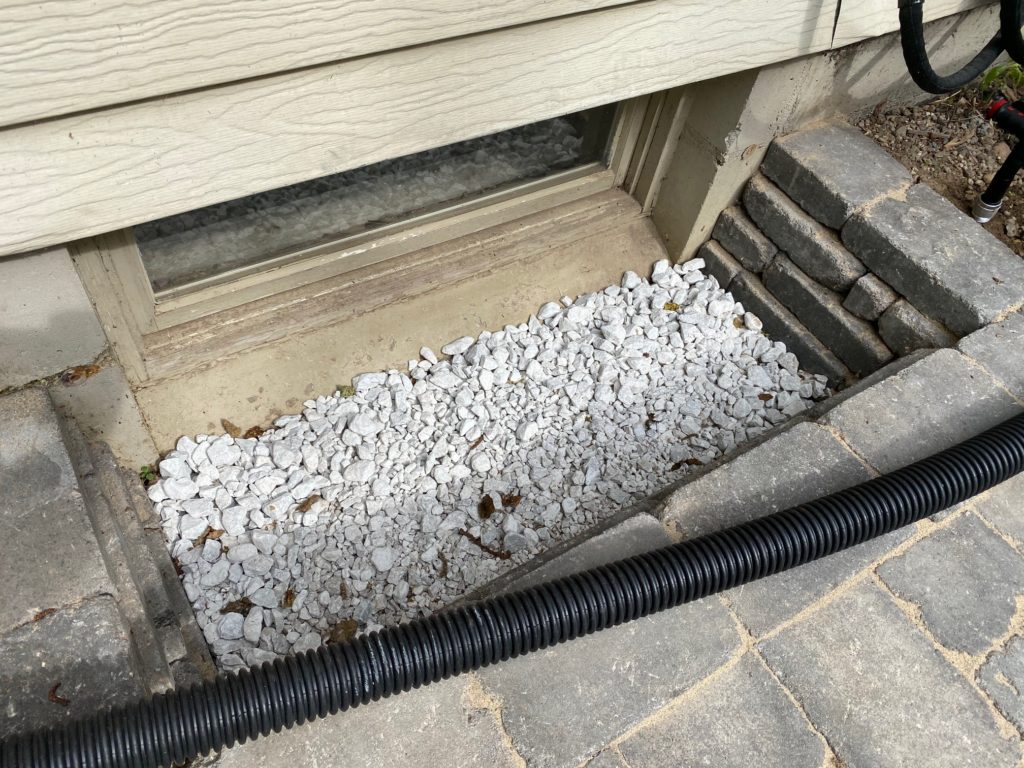
I put white gravel in the bottom of the window well.
We finished the project by putting polymeric sand in the cracks (when mixed with water, it bonds together, preventing weeds from growing)
We’re very happy with the results. Maybe someday, we will get rid of the cement patio and expand it further!
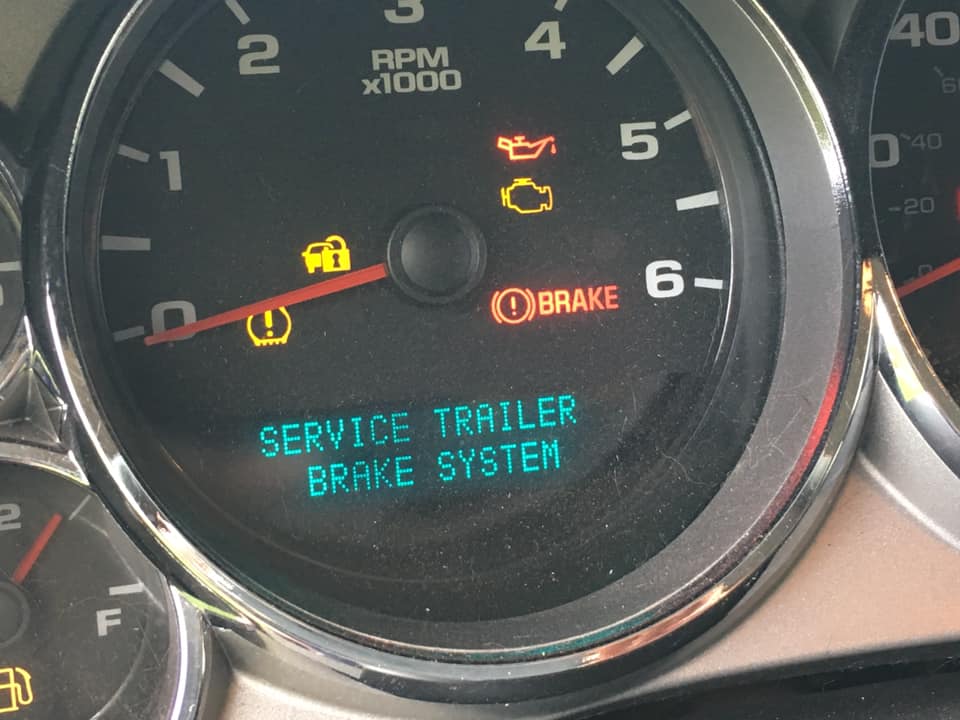
Like all good projects, this started by mistake. I was trying to get rid of a dashboard warning message saying I needed to service my trailer brake system.
After researching how to fix the problem, I found that I would need to drop down the spare tire, because that’s where the (presumed) faulty relay controller is located. The problem was, when I tried to drop the tire, the device that does nothing beyond dropping a spare tire was not doing its job. So, after no less than an hour hammering and using an air chisel, I used a saw to cut the thing holding the wheel in half.
From there, I easily swapped out the faulty trailer brake relay controller with a new one I ordered. It worked, the warning message disappeared.
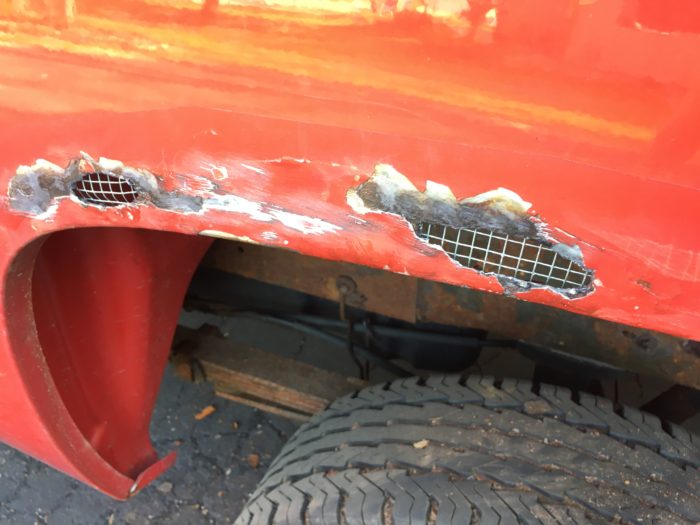
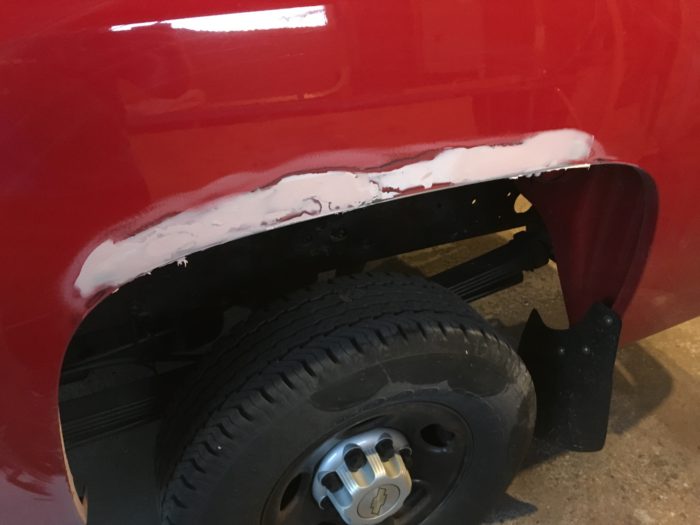
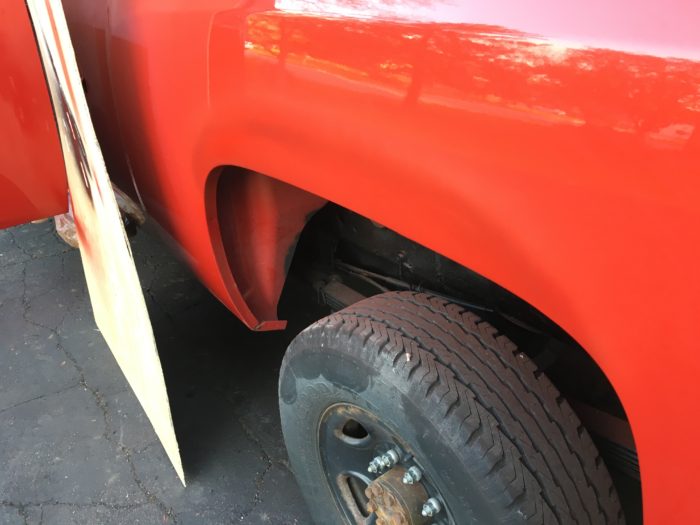
One problem solved–another uncovered. Spending all that time under the truck made me fully appreciate the rust issues that have gone unaddressed for my 5 years spent with this (now 12-year-old) vehicle. For the briefest of moments, I thought about selling the truck. I thought: “It’s paid off, and up to this point, the only money I’ve invested in it is for oil changes.” But that thought quickly faded when I considered how much more it would cost to replace than to simply fix. So, I got to work, first fixing some visible body rust.
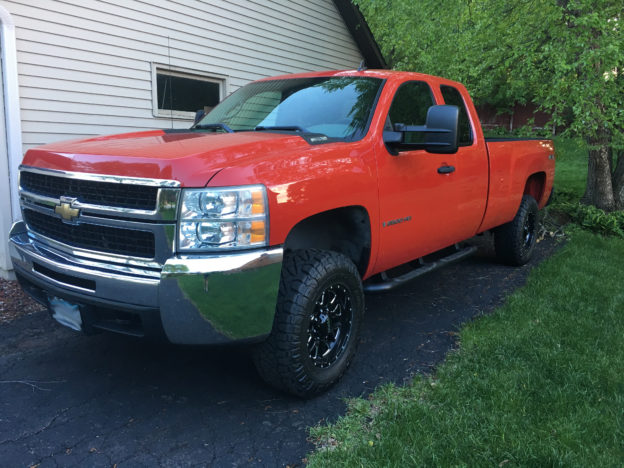
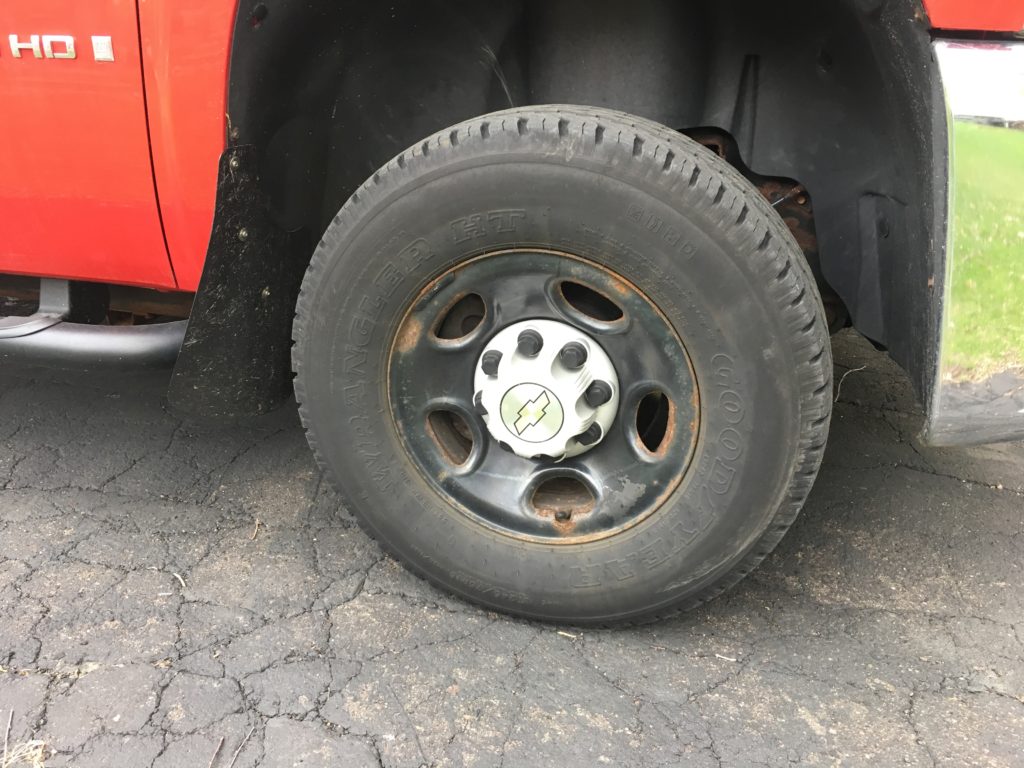
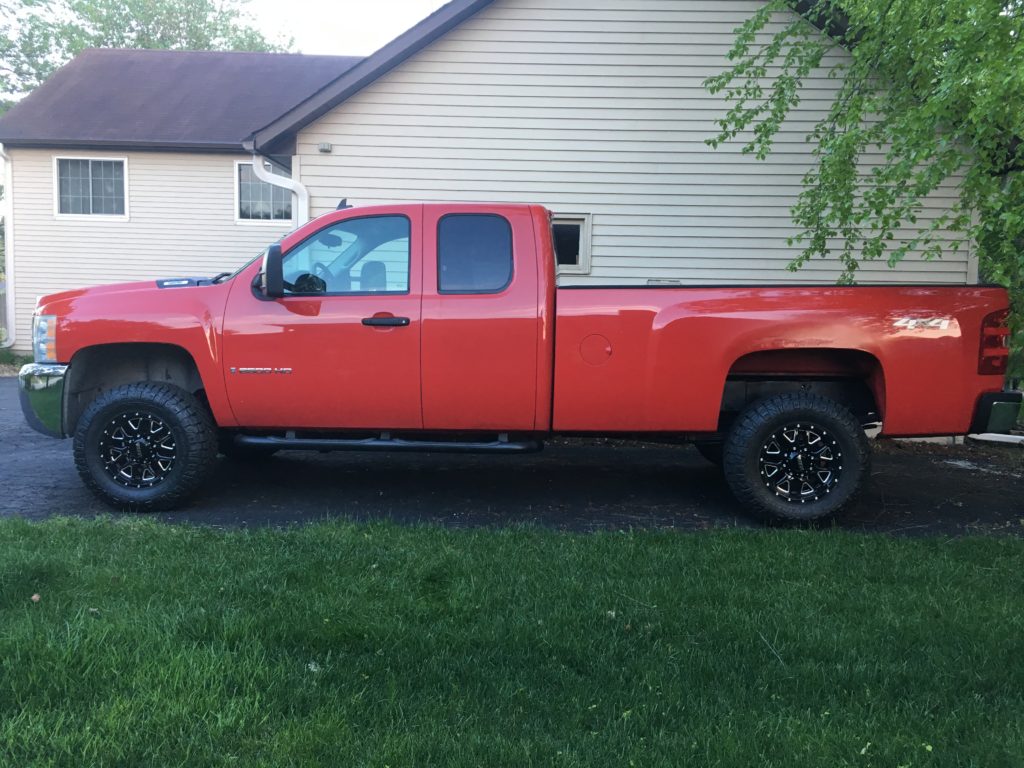
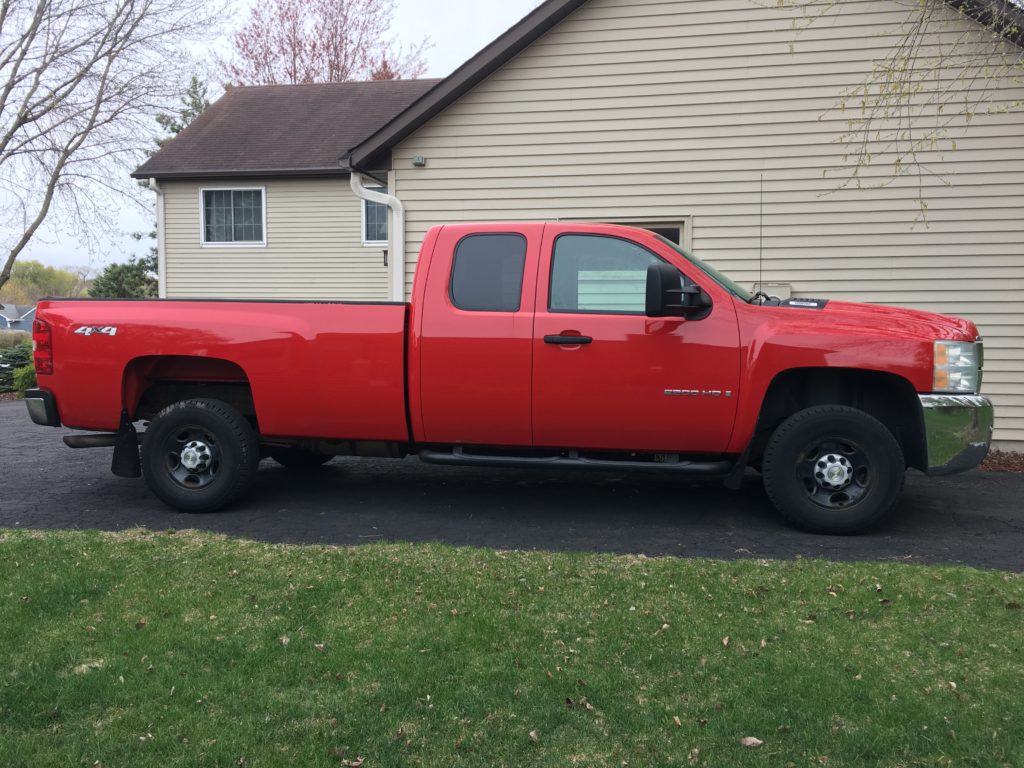
Once I decided to pull the trigger and start fixing up this truck, new wheels and tires were a MUST! I had been waiting years to replace the stock 16″ rims with something a little bigger. And the 245/70/16 tires just didn’t compliment the size of this extended cab 8′ bed pickup, but they were nearly new when I purchased, so it seemed wasteful to replace any sooner.
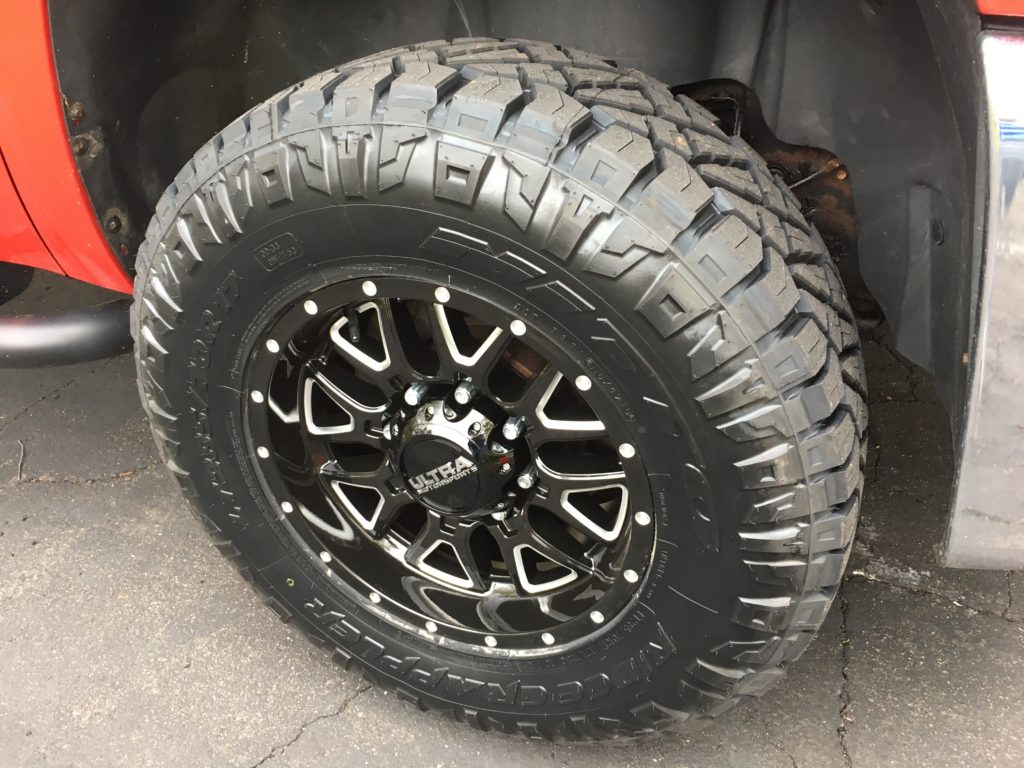
The new wheels (rims) I picked are Ultra Motorsports Hunter Black w/Milled Accent. They have a 17″ diameter, 9″ width and +18mm offset. The tires are Nitto Ridge Grapplers, designed for off-road but still quiet on highways. Their specifications are 285/70/17 (meaning the tire is 285mm wide, the sidewall is 70% of that, and the inside diameter of the rim is 17 inches. Basically, they have a nearly 33″ diameter and 11″ width, compared to my old tires that had a 29.5″ diameter and 9.6″ width. Ridge Grapplers also have two distinct sidewall design options. From what I’ve read, most people choose the angular design, which installers sometimes refer to the T-walls (because they resemble Transformers).
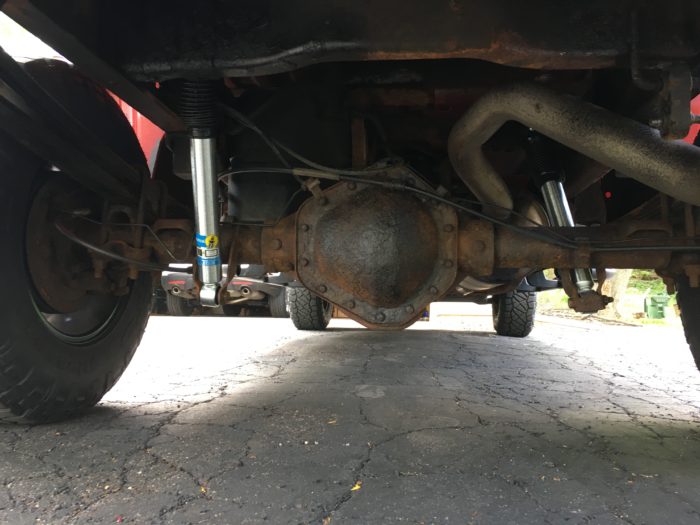
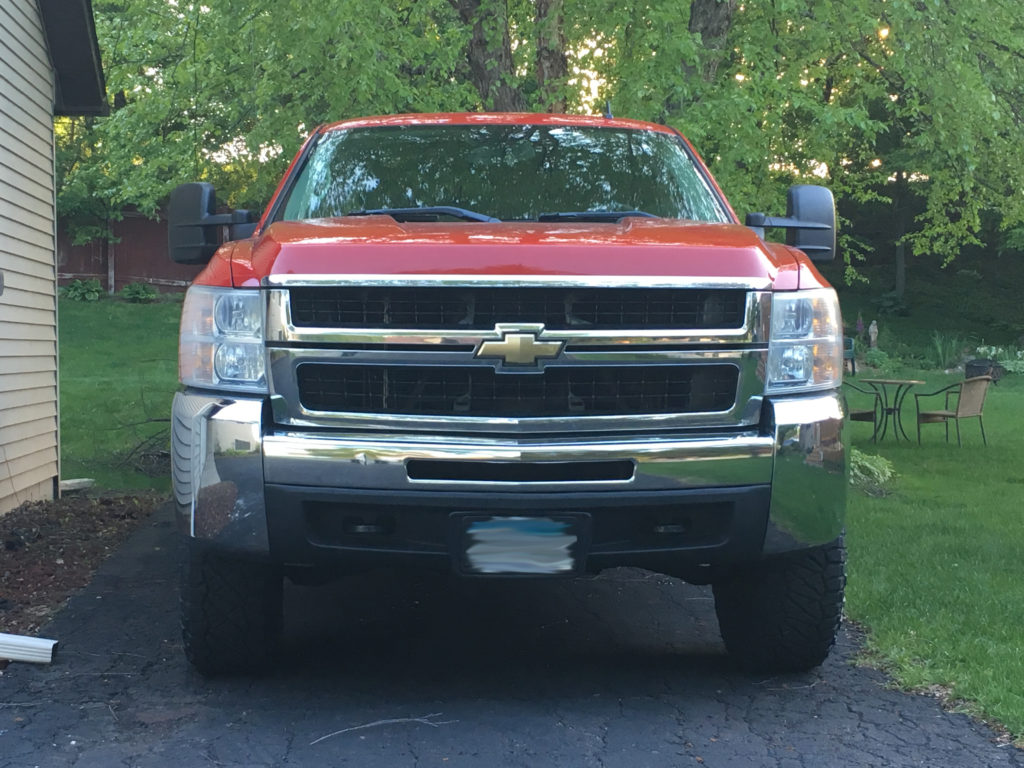
New wheels installed, my next step involved raising the front end of the truck, which people call “Leveling.” I wanted to do this for two reasons: Give the bigger tires more turning clearance (so they don’t rub against the wheel well when the wheel is turned all the way), and also to get rid of the aggressive nose-down appearance on this particular model of truck. Nearly all modern trucks leave the factory with a rear-end higher than the front-end, possibly for towing reasons so the rear doesn’t sag when it’s hauling a lot of cargo. The “rake” as it’s called, of my vehicle, was 3″ taller in the back than the front.
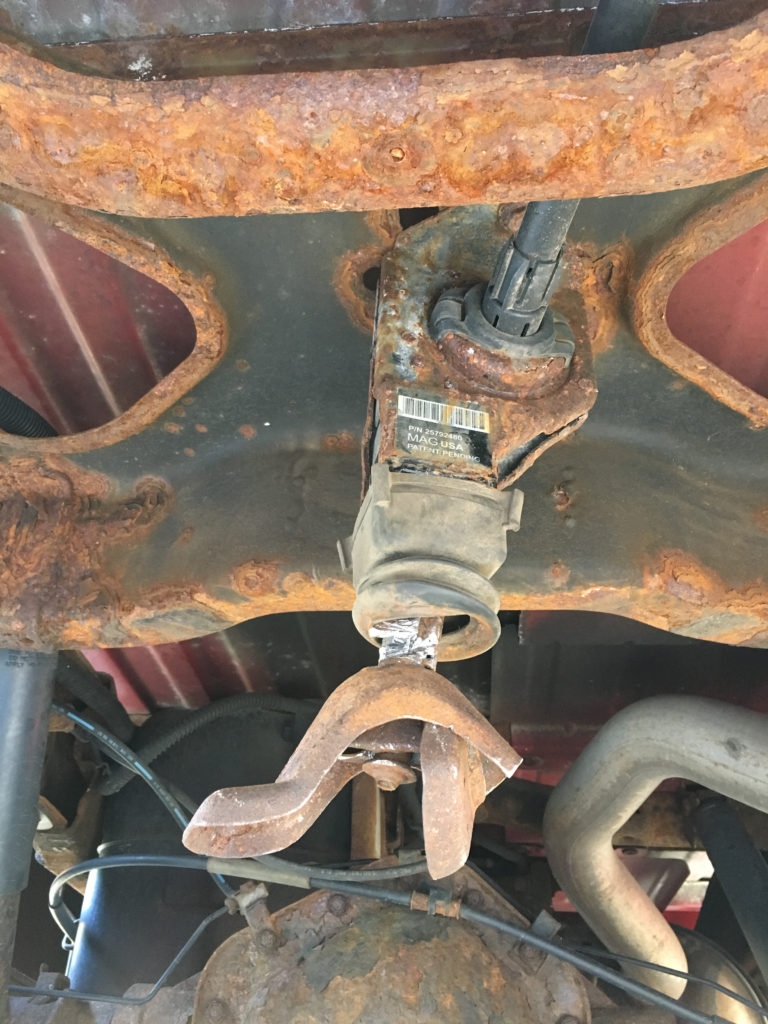
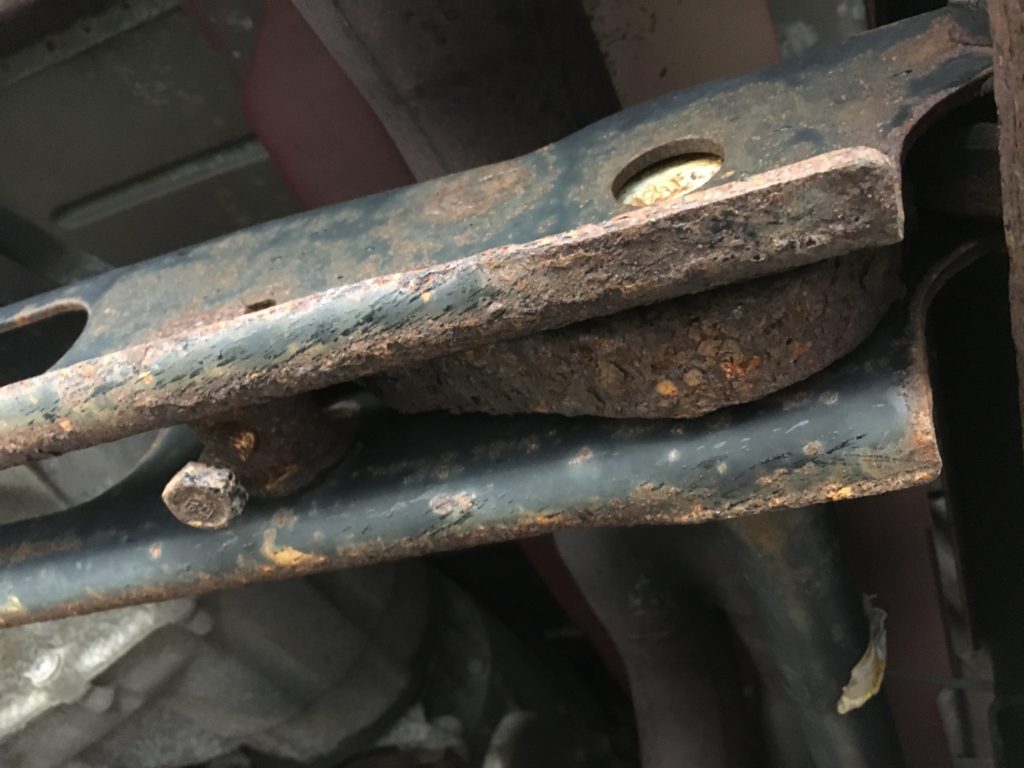
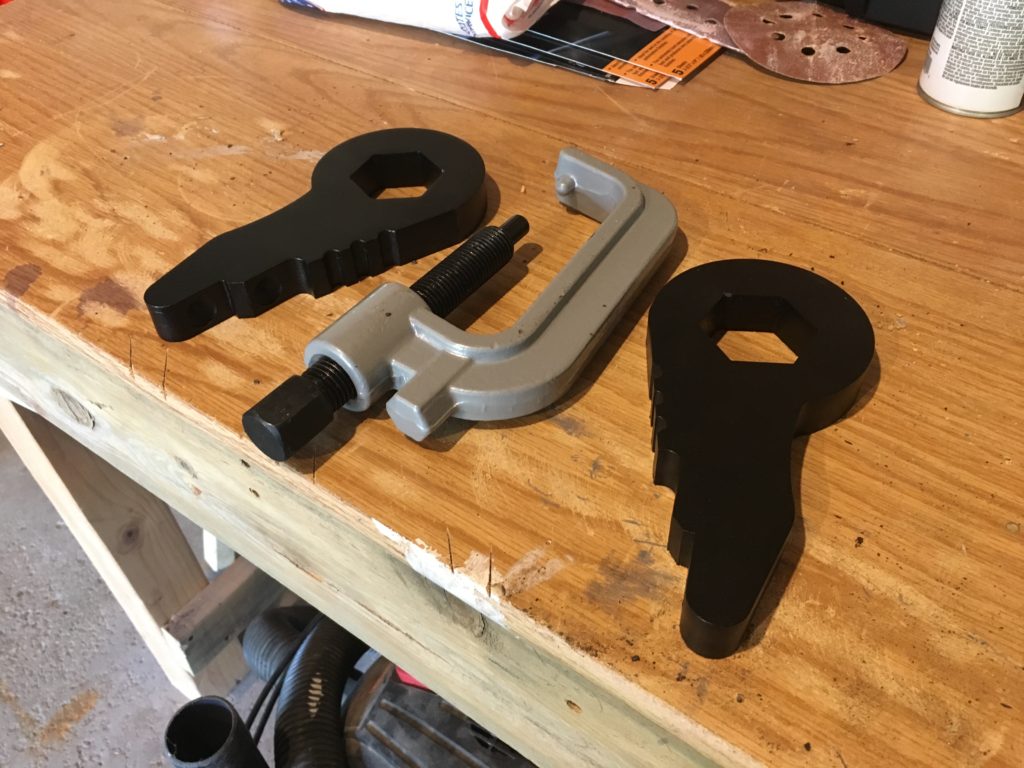
As I’ve learned through my research on the topic, there is truly no one-size-fits-all approach to lifting a truck. The options all depend on your model, height expectations, ride quality aspirations, and how often you want to replace CV joints. For example, if I had a 1/2 ton truck, I would be talking about getting a leveling kit to make the spring a little taller. However, this 3/4 ton truck doesn’t have a spring in the front suspension, it has a torsion rod. The “twist” of the torsion rod is controlled by a “key,” which can be adjusted with a bolt:
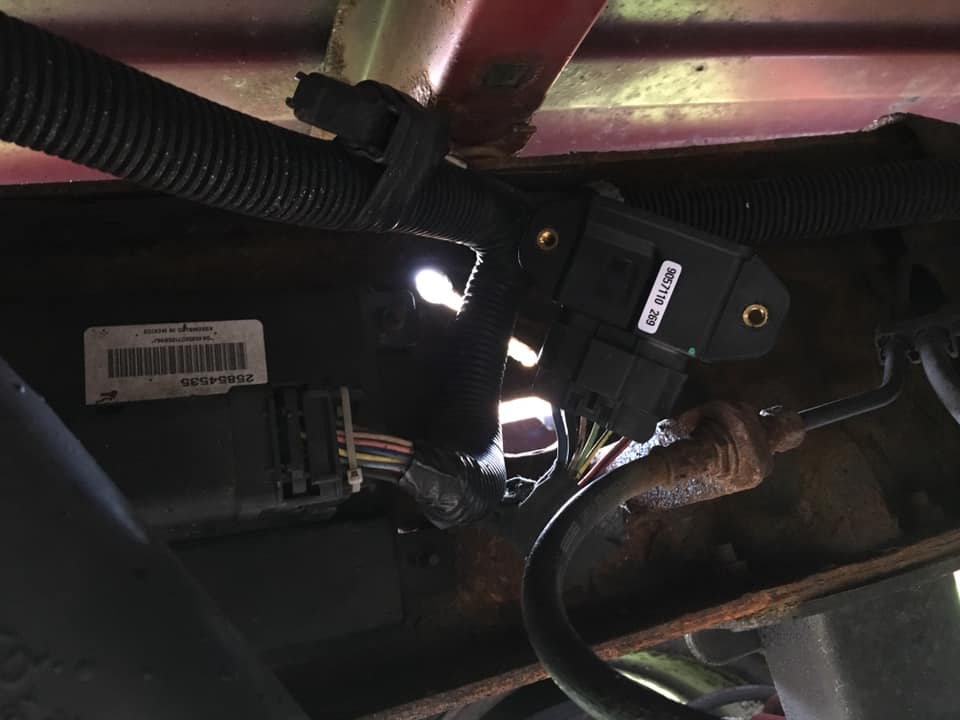
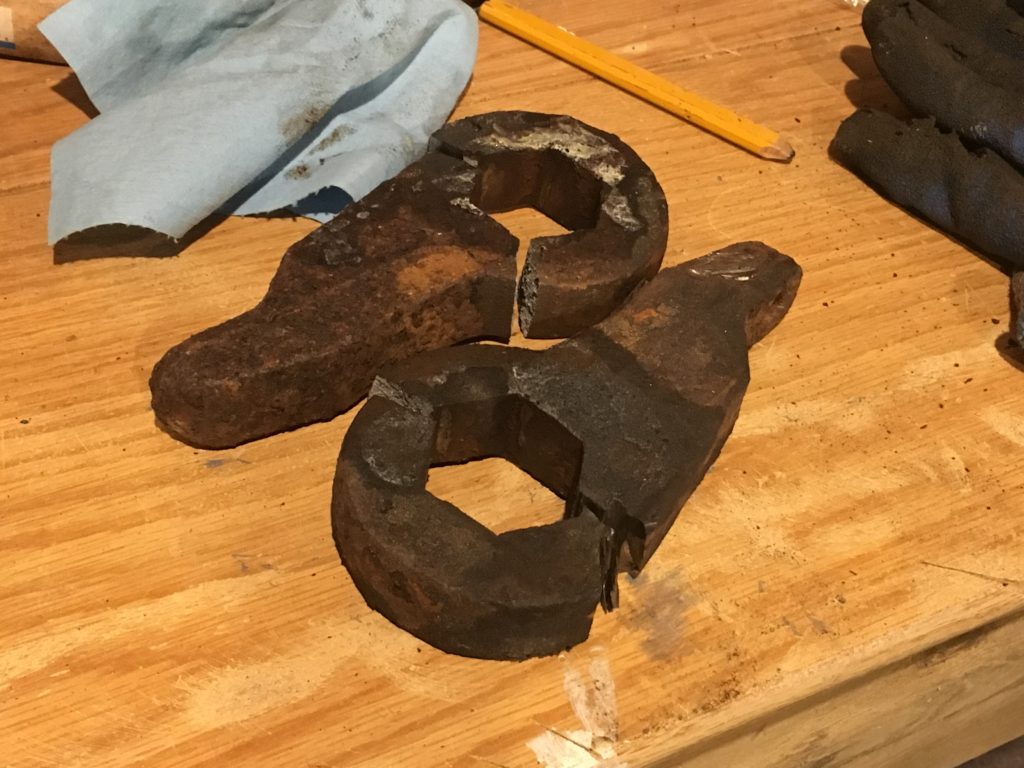
Pay attention to the bolt on the left of the screen in the photo above. If I were to screw that bolt in all the way, it would probably raise the front end about one inch, but ride quality would suffer. The next best option is to buy an aftermarket torsion key that preserves the factory preload settings. In the photo below, the black pieces have a hexagon shape in the middle. This is where the torsion rod fits. These new aftermarket keys have the hexagon cutout turned slightly from the factory keys. This minor change is how they are able to twist the torsion key further, while maintaining ride quality. I also purchased the special tool, required for installation.
SAFETY NOTE: While that torsion key unloader tool looks like a C-Clamp, it is NOT! Using anything other than these tools, how they were designed, could result in injury or damage to the vehicle. This tool included a warning against using an impact wrench because it is designed to only be used with a hand tool
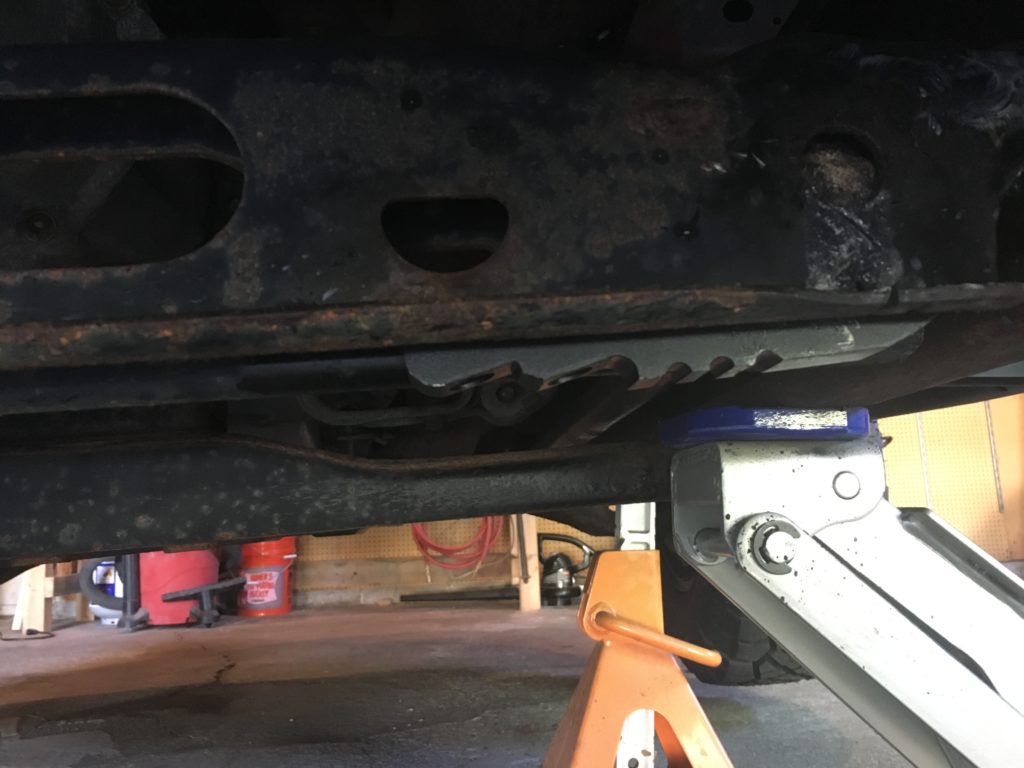
There are many videos online showing how to safely remove and replace torsion keys. I do not consider myself qualified to offer a tutorial on the process, but I will say that hammering and using an air chisel did not work for my situation — my truck just had way too much rust. However, after safely jacking up the truck, using jackstands as a backup, removing tension from the torsion rod and wearing PPE, I did find success removing the old torsion keys with an angle grinder and metal-cutting wheel.
I cut part of the key, compromising the metal’s integrity, then very slowly and carefully, put the vehicle’s weight back on the torsion rod to let gravity and a twisting hexagonal shape finish the job. This is not a recommendation because a vehicle’s weight is nothing to be played around with, but it was effective for me after 4 hours of exhausting all other options. I recommend paying a professional.
Compared to removing the old keys, installing the new ones was a breeze.
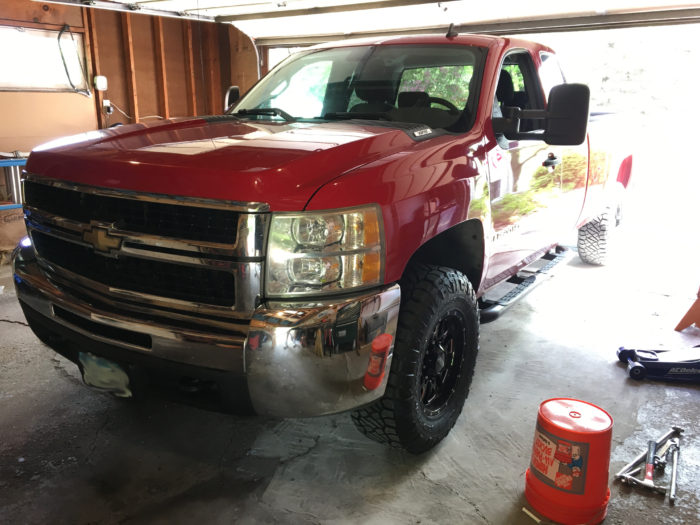
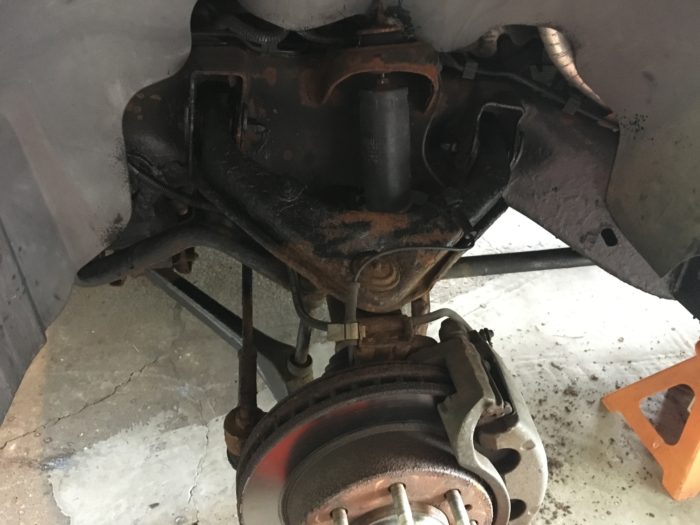
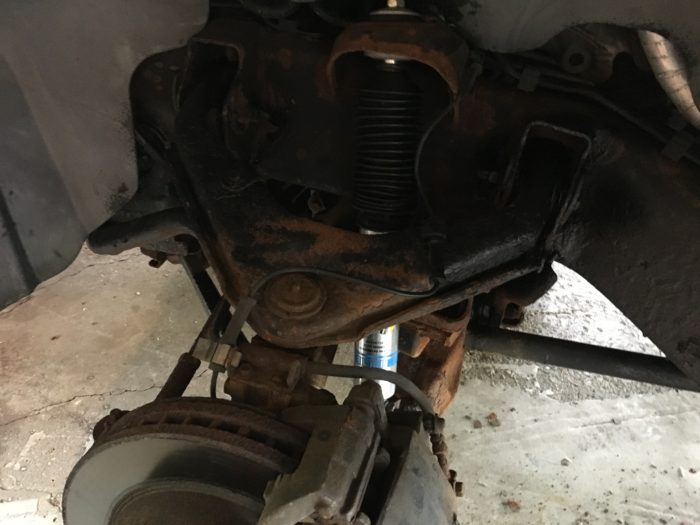
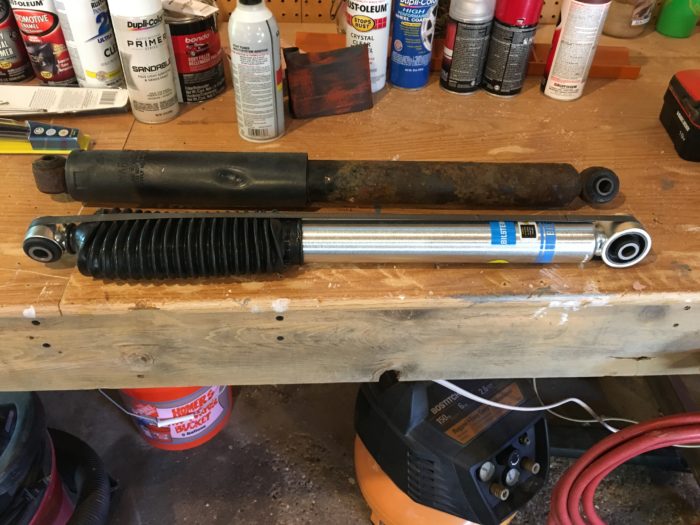
I also installed new shocks and struts, just on the front for now. These are Biltstein 5100 series, designed for trucks with a lift between 0 – 2.5″ in the front and 0 – 1″ in the rear.
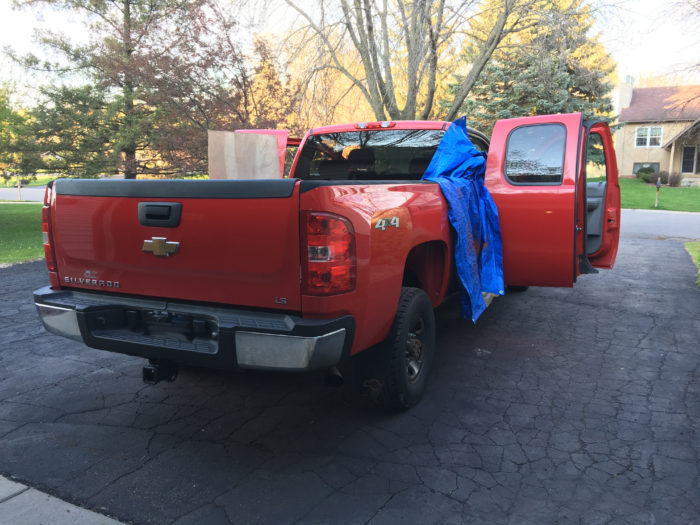
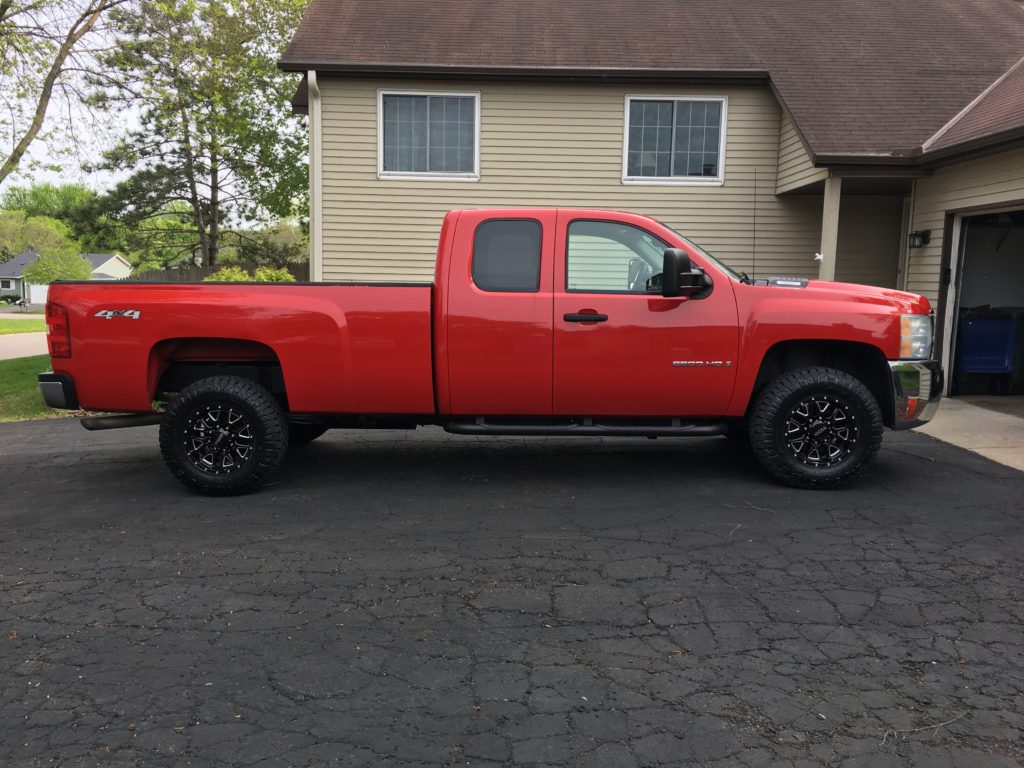
Here’s the finished product:
I still need to sand and polish the new paint on the rear fender (if you look closely you can see a few bumps because it’s not blended yet). Another important note about this project: I had to adjust the aim of the headlights. With the front end raised, the headlights will blind other drivers.