Choo Choo! My Great Aunt LaVaune recently handed down some family antiques to me. Among the treasures: A 110 lb Peter Wright anvil, a kerosene railroad lantern and a locomotive steam whistle.
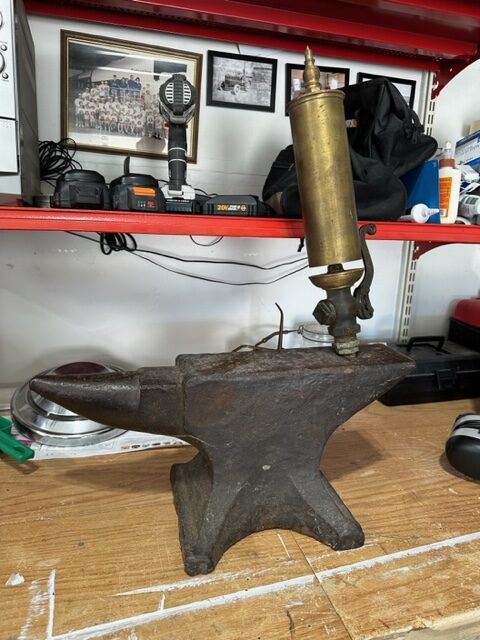
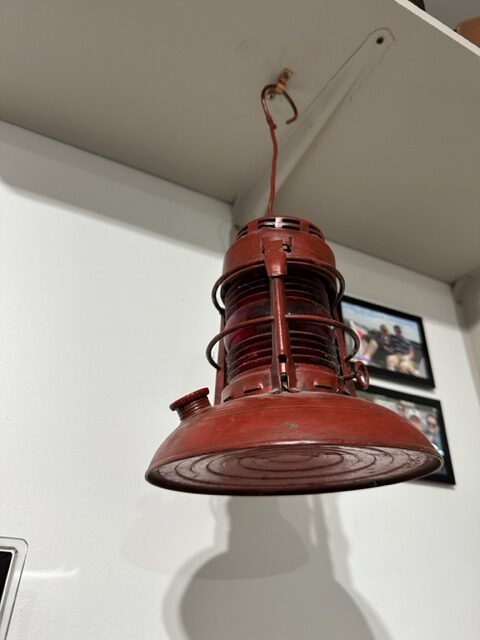
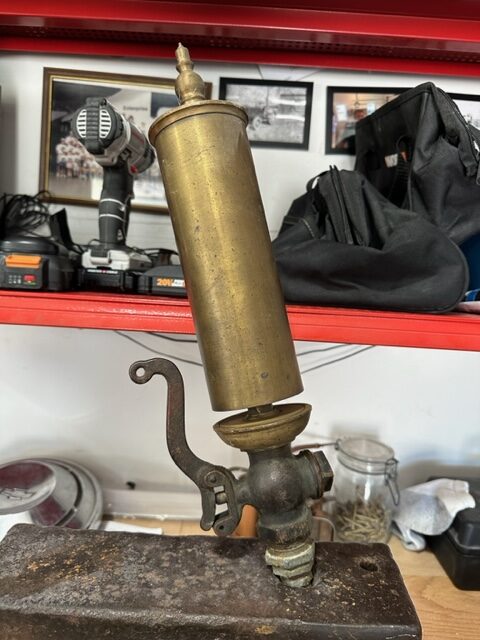
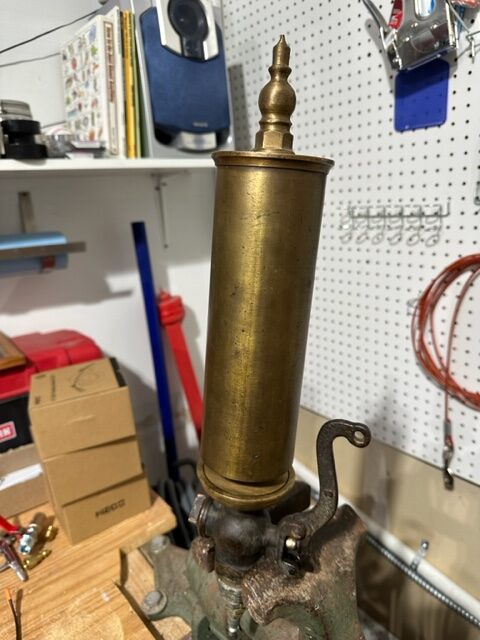
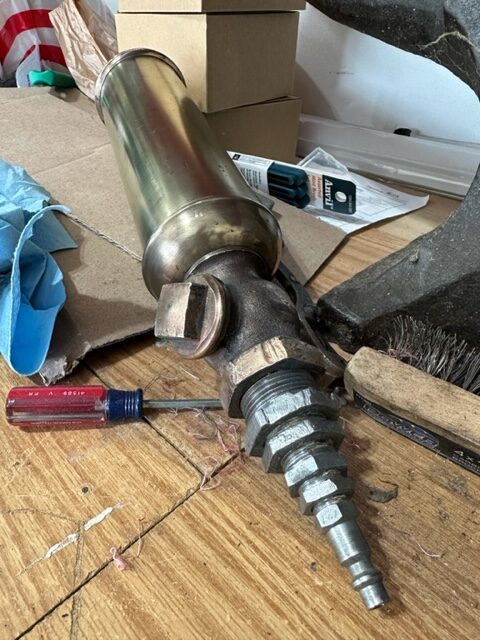
By far, I’m the most excited about the whistle! I don’t have the full backstory, but understand it was one of my Great Grandpa Andrew’s favorite things in his shop. He clearly used it too, as you can tell by all of the adapters at the base, so he could hook it up to an air hose.

Here’s a video of my first time hooking it up to my air compressor:
Could you tell I was surprised? I wasn’t expecting the 100+ year old locomotive relic to burst to life the moment I hooked it up to air, but it did. The valve didn’t seem to do anything to stop the air from freely flowing through the brass instrument. Knowing little about how brass air valves work, I began by taking the thing apart.
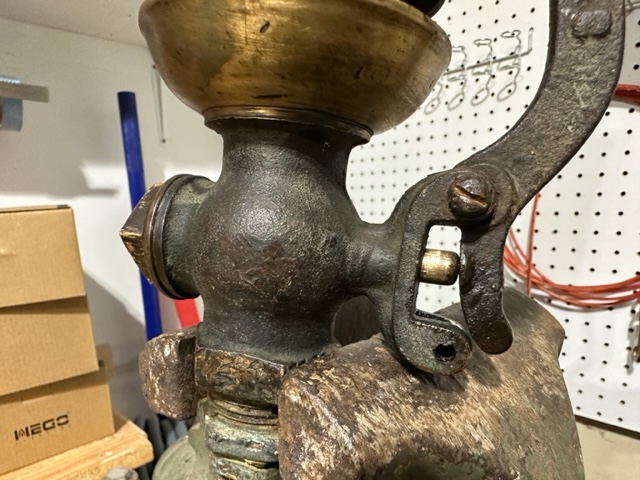
Heads up to anyone ever attempting to crack one of these open: There’s a spring! You want to use caution when removing the valve stem otherwise the spring will fly out of there. I didn’t take any pictures of the next steps, but can tell you the valve had obvious signs of wear and tear. It was badly in need of repair.
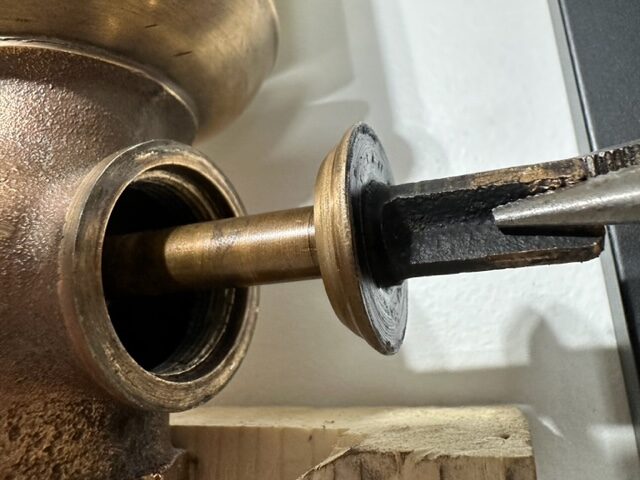
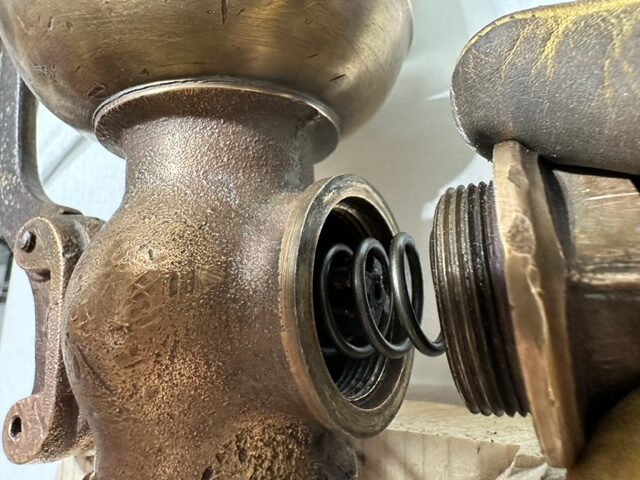
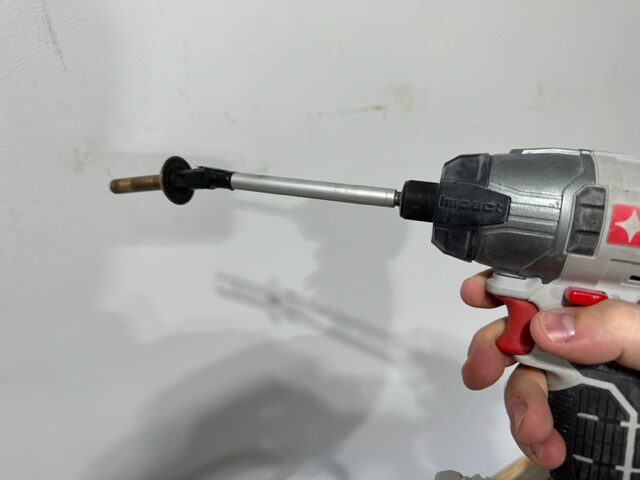
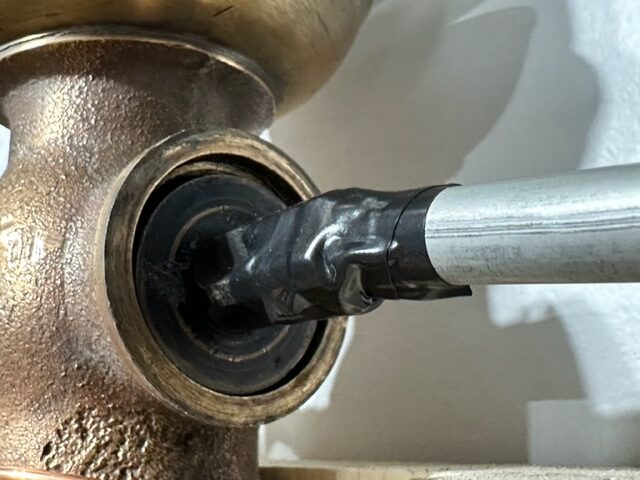
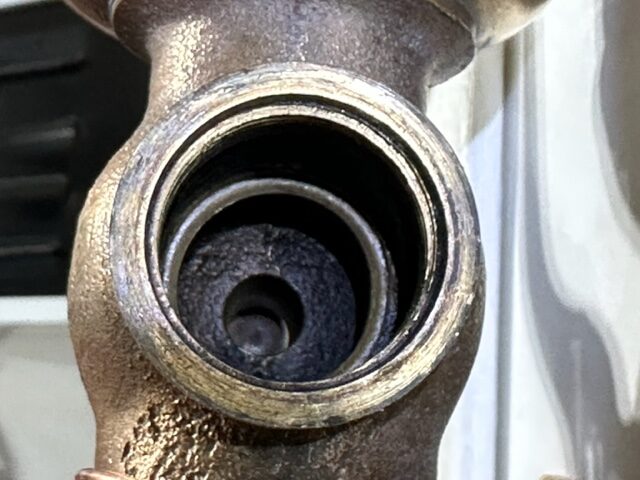
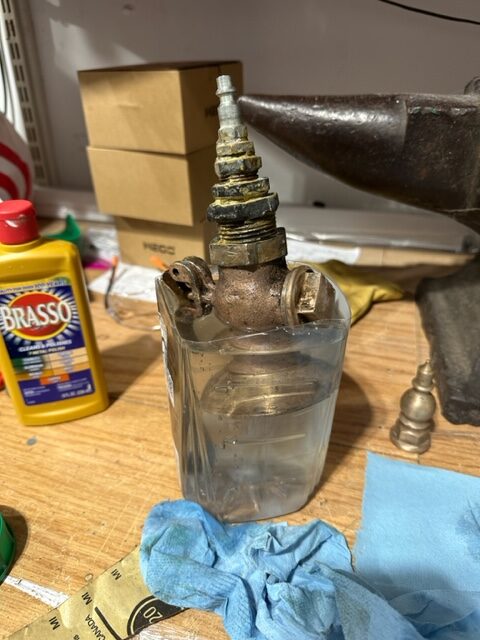
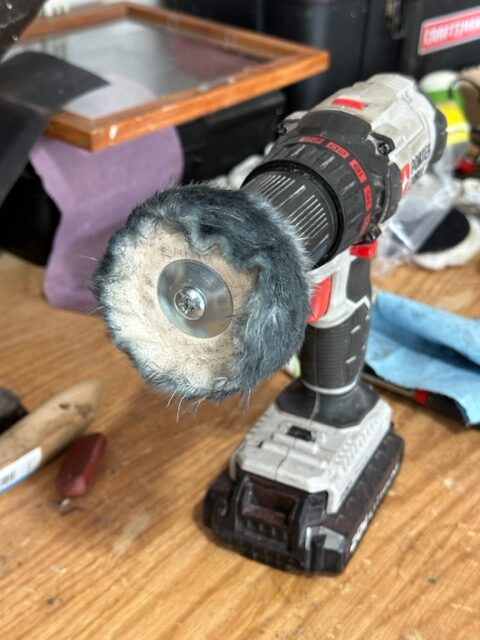
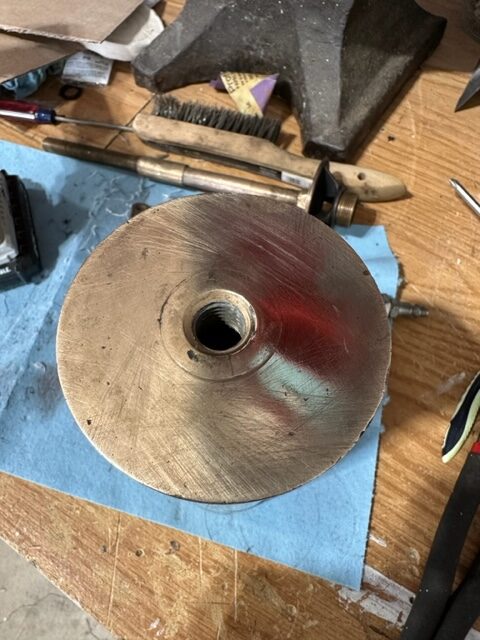
As shown above, the brass air/steam valve works by pressing an angled ring up against an opening with another angled surface. The back side of the valve (right) has a spring, forcing the valve shut, unless pushed open by the valve stem (left) on the opposite side. At first, I thought about adding a coating of silicone, but knew I would struggle to get it perfectly smooth. Next, I thought a rubber washer was a good idea. The rubber lasted a whole 10 seconds under 50 psi, before blowing through to the other side. One video I watched online showed how to re-surface the brass using a lathe. Since I don’t have a lathe, I knew I had to find another solution. My answer came after chatting with a neighbor up the street who loves to tinker with old engines. He suggested I try valve grinding compound, which he happened to have in his garage. We applied a generous amount to the surface, then began twisting the two pieces of the valve together, by hand because there wasn’t enough room to attach it to a drill. After about 10 minutes of manual twisting, we tried the whistle again, but it still leaked. Then, eager to use a power tool, I found the solution seen in a video and photos below. I taped a drill extension to the back of the valve, which worked great! Roughly 5 minutes of spinning under gentle pressure, and re-applying valve grinding compound three times, the surface was perfectly smooth and free of leaks.
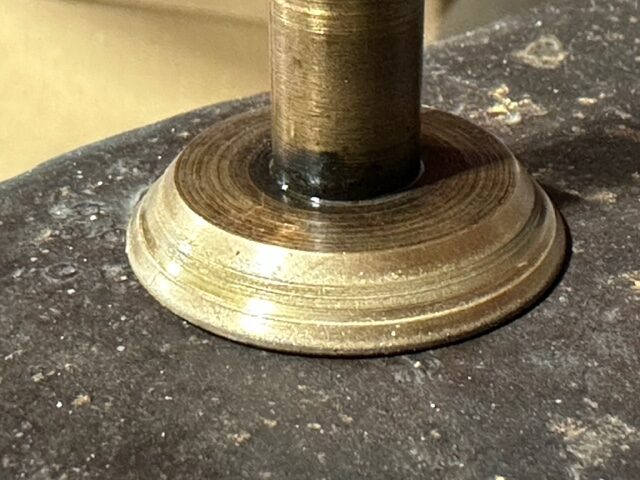
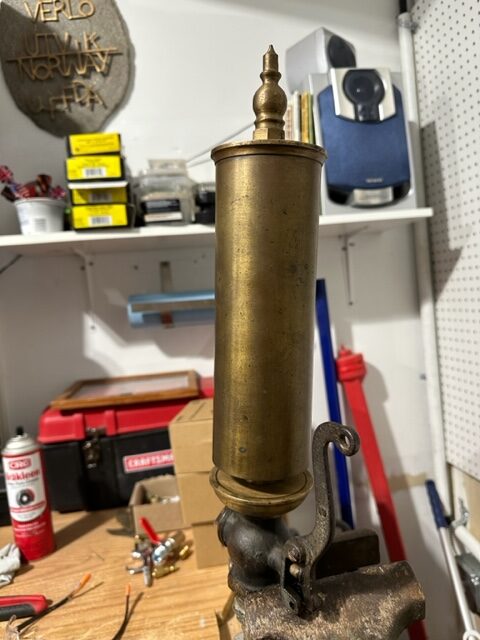
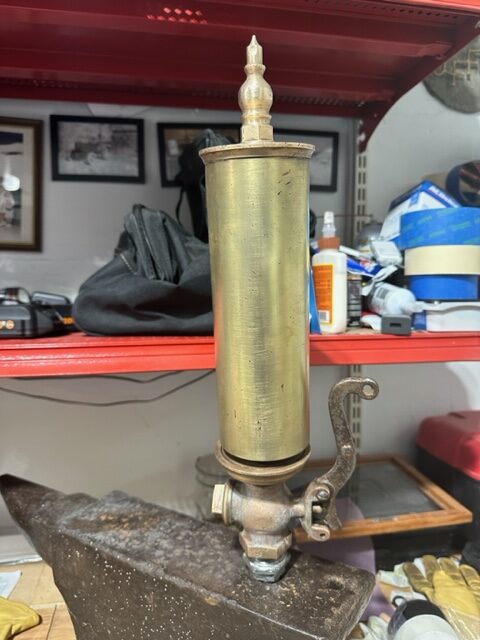
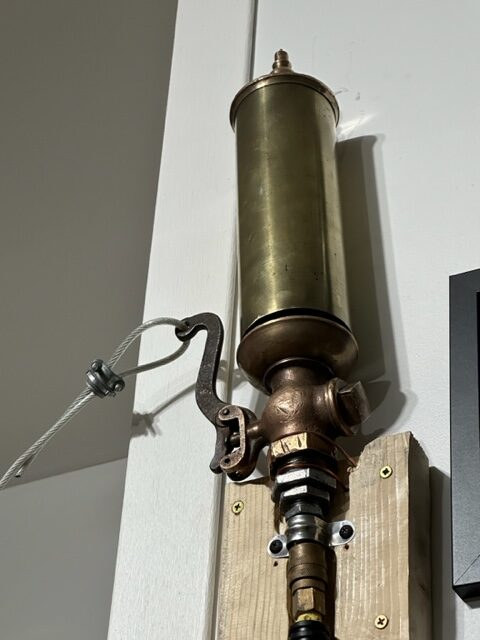
The valve grinding compound was just what the conductor of this restoration journey needed! The valve now closes tight, keeping air out of the whistle until the handle is pulled. The whistle seems to be able to tolerate air pressure anywhere between 50 and 150 psi, which is as high as my compressor goes. It may even go higher than that. The pitch of the whistle can be adjusted by twisting the bell cylinder, which goes up and down on a screw stem.
With the whistle working, my focus shifted and I hopped on the “restoration express.” After reading a lot about cleaning and polishing old brass, I started with a vinegar rinse, then cleaned every surface with Brasso. After that, I used Tripoli followed by White Rouge polishing compound with a buffing wheel attached to my drill. It’s still not a perfect mirror-finish, but it’s much better than it was before.
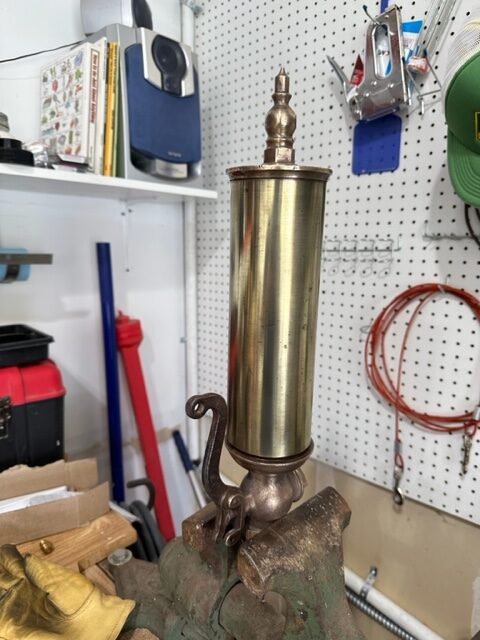
Finally, I used my router to fabricate a custom wall mount for the whistle from a 2×6 piece of pine and attached an old dog run to the handle.
In the future, I may find a better way to mount it to the wall and rig up a better pulley system to activate it from across the garage. I’d also like to learn more about the whistle’s history. I haven’t found any markings on the brass to help me determine its age or origins and while it has similarities to others I’ve seen online, I have yet to find a perfect match. If dimensions help with identification: From the tip of the top nut to the bottom of the base screw, the whistle measures about 16 inches. The bell cylinder itself is 9 inches tall. I’d ask anyone who knows anything about this whistle to please leave a reply to this blog post.
Thanks for reading!
-Mike