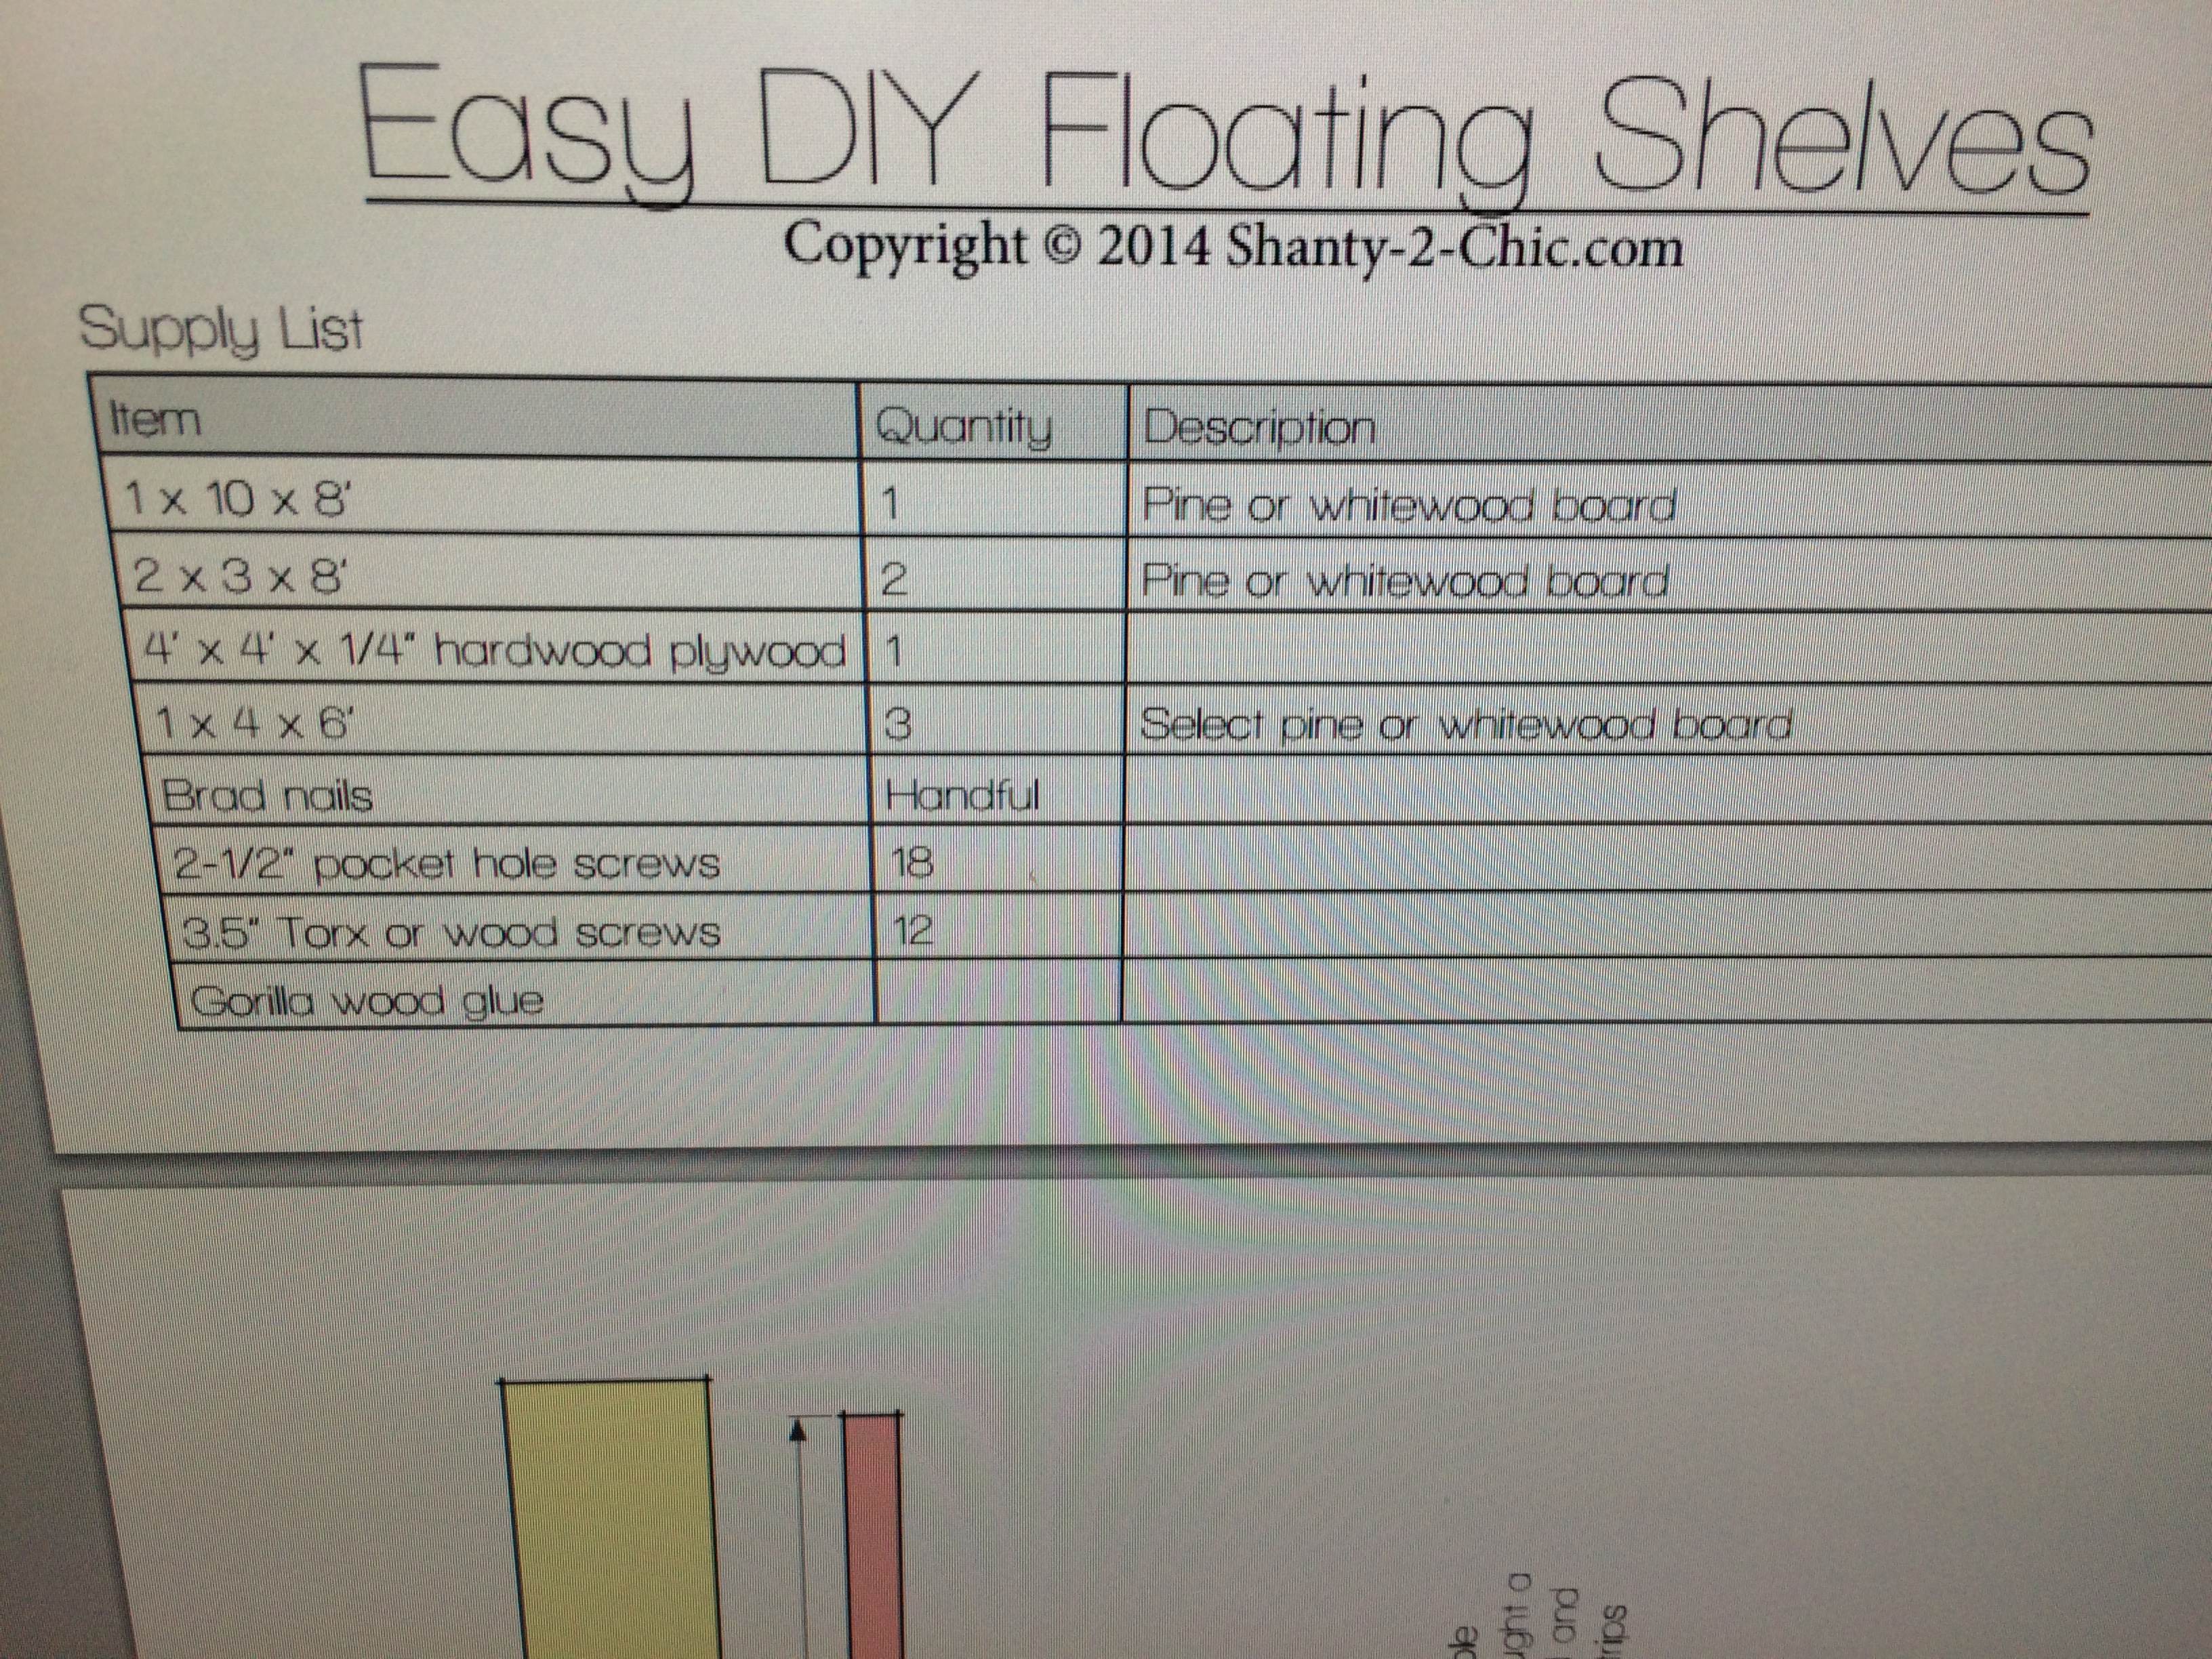
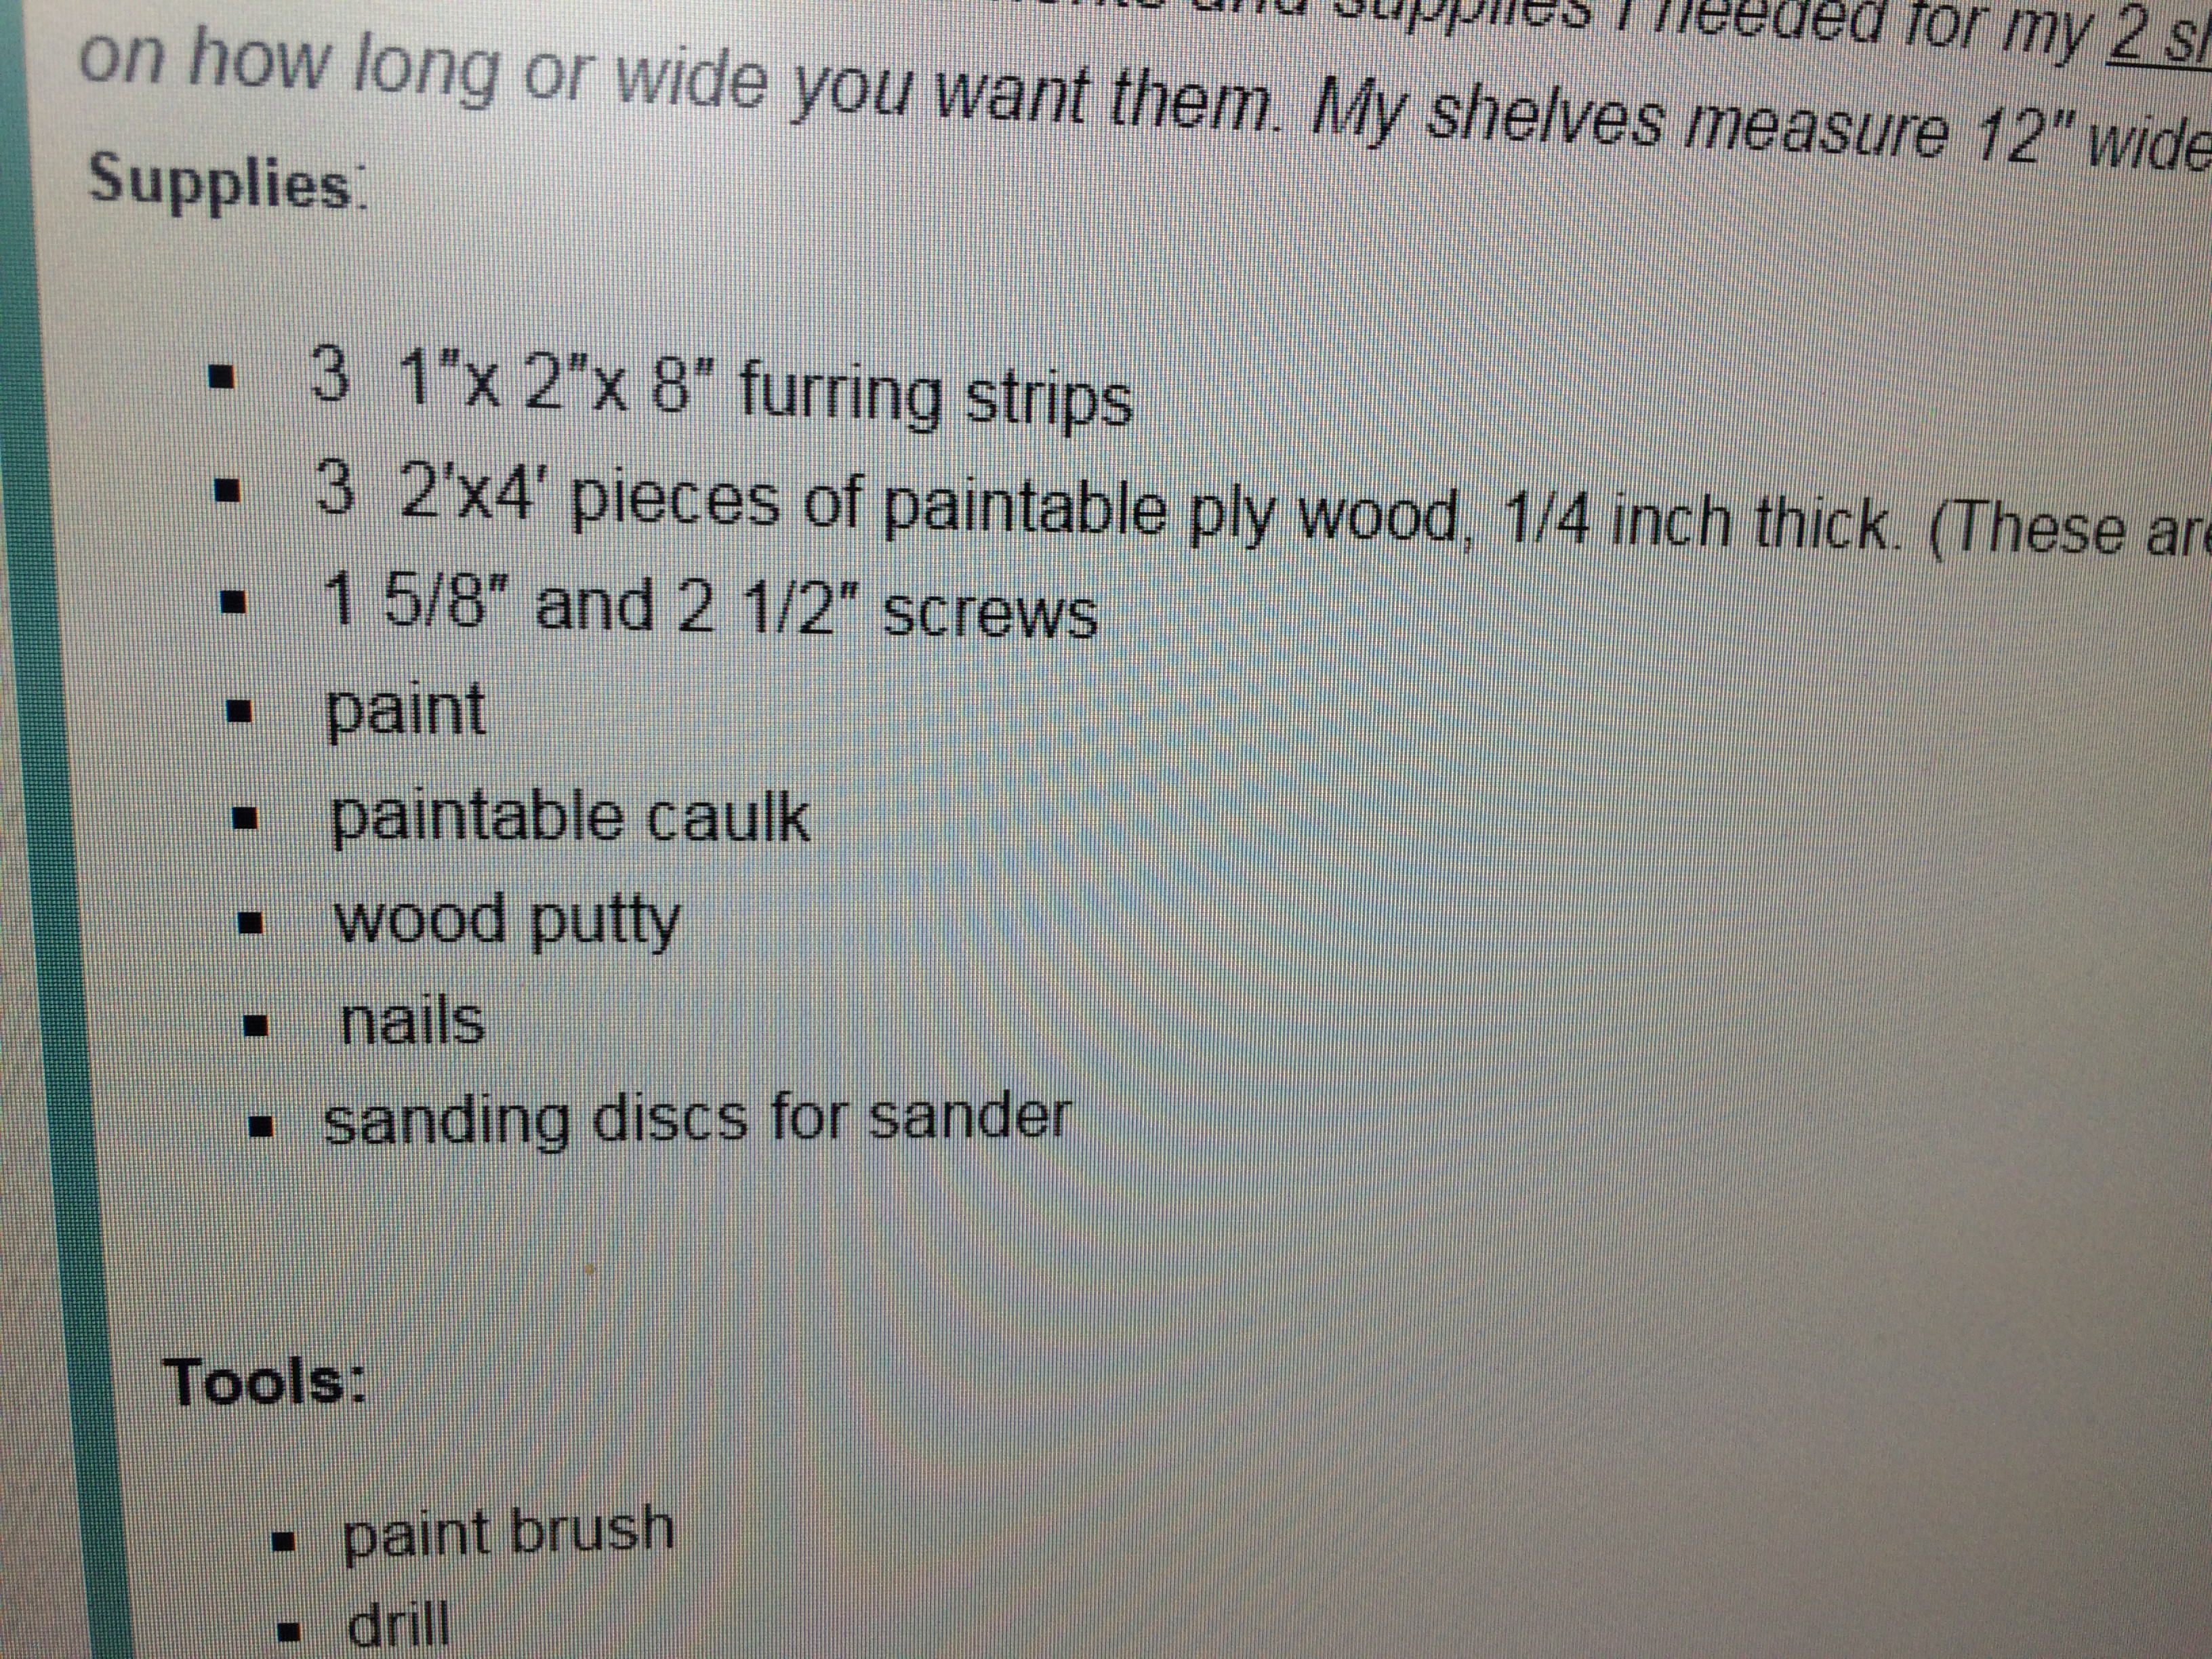
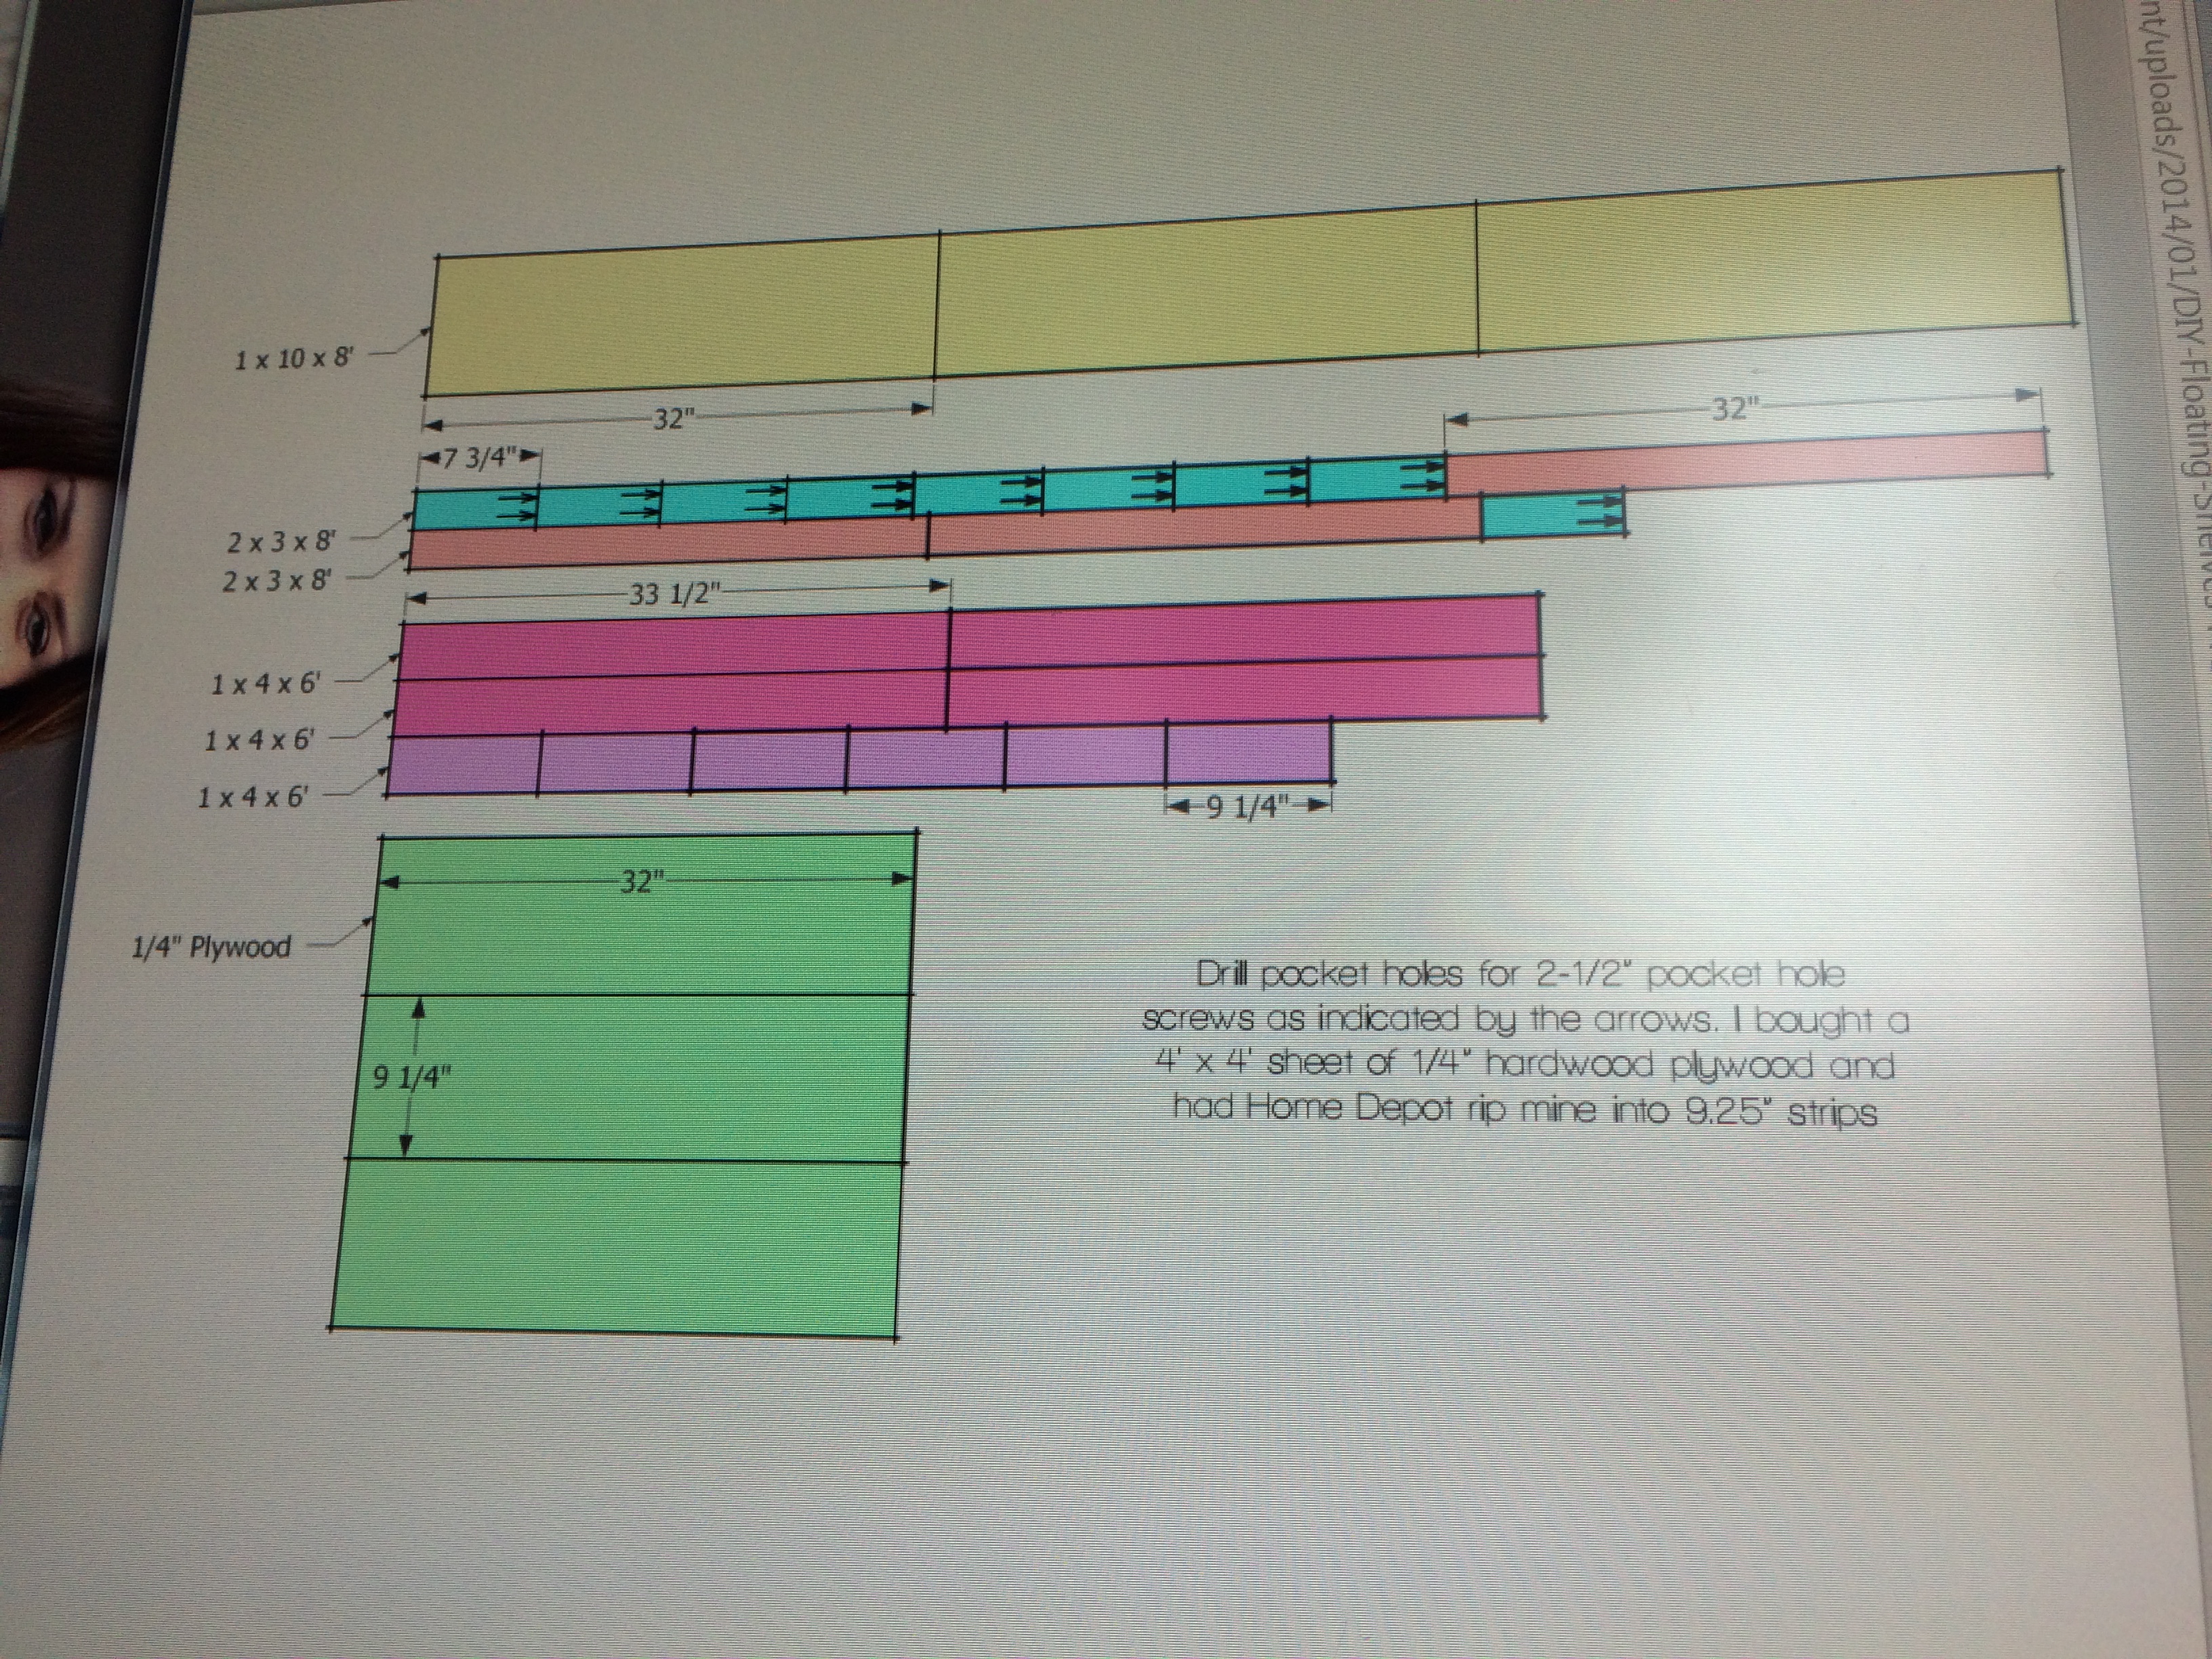
We found easy instructions for floating shelves on the website Shanty-2-Chic.com. The website told us the necessary wood and screws to purchase, then had instructions for how to make the cuts.
This project was also the first that I was able to use our new truck!


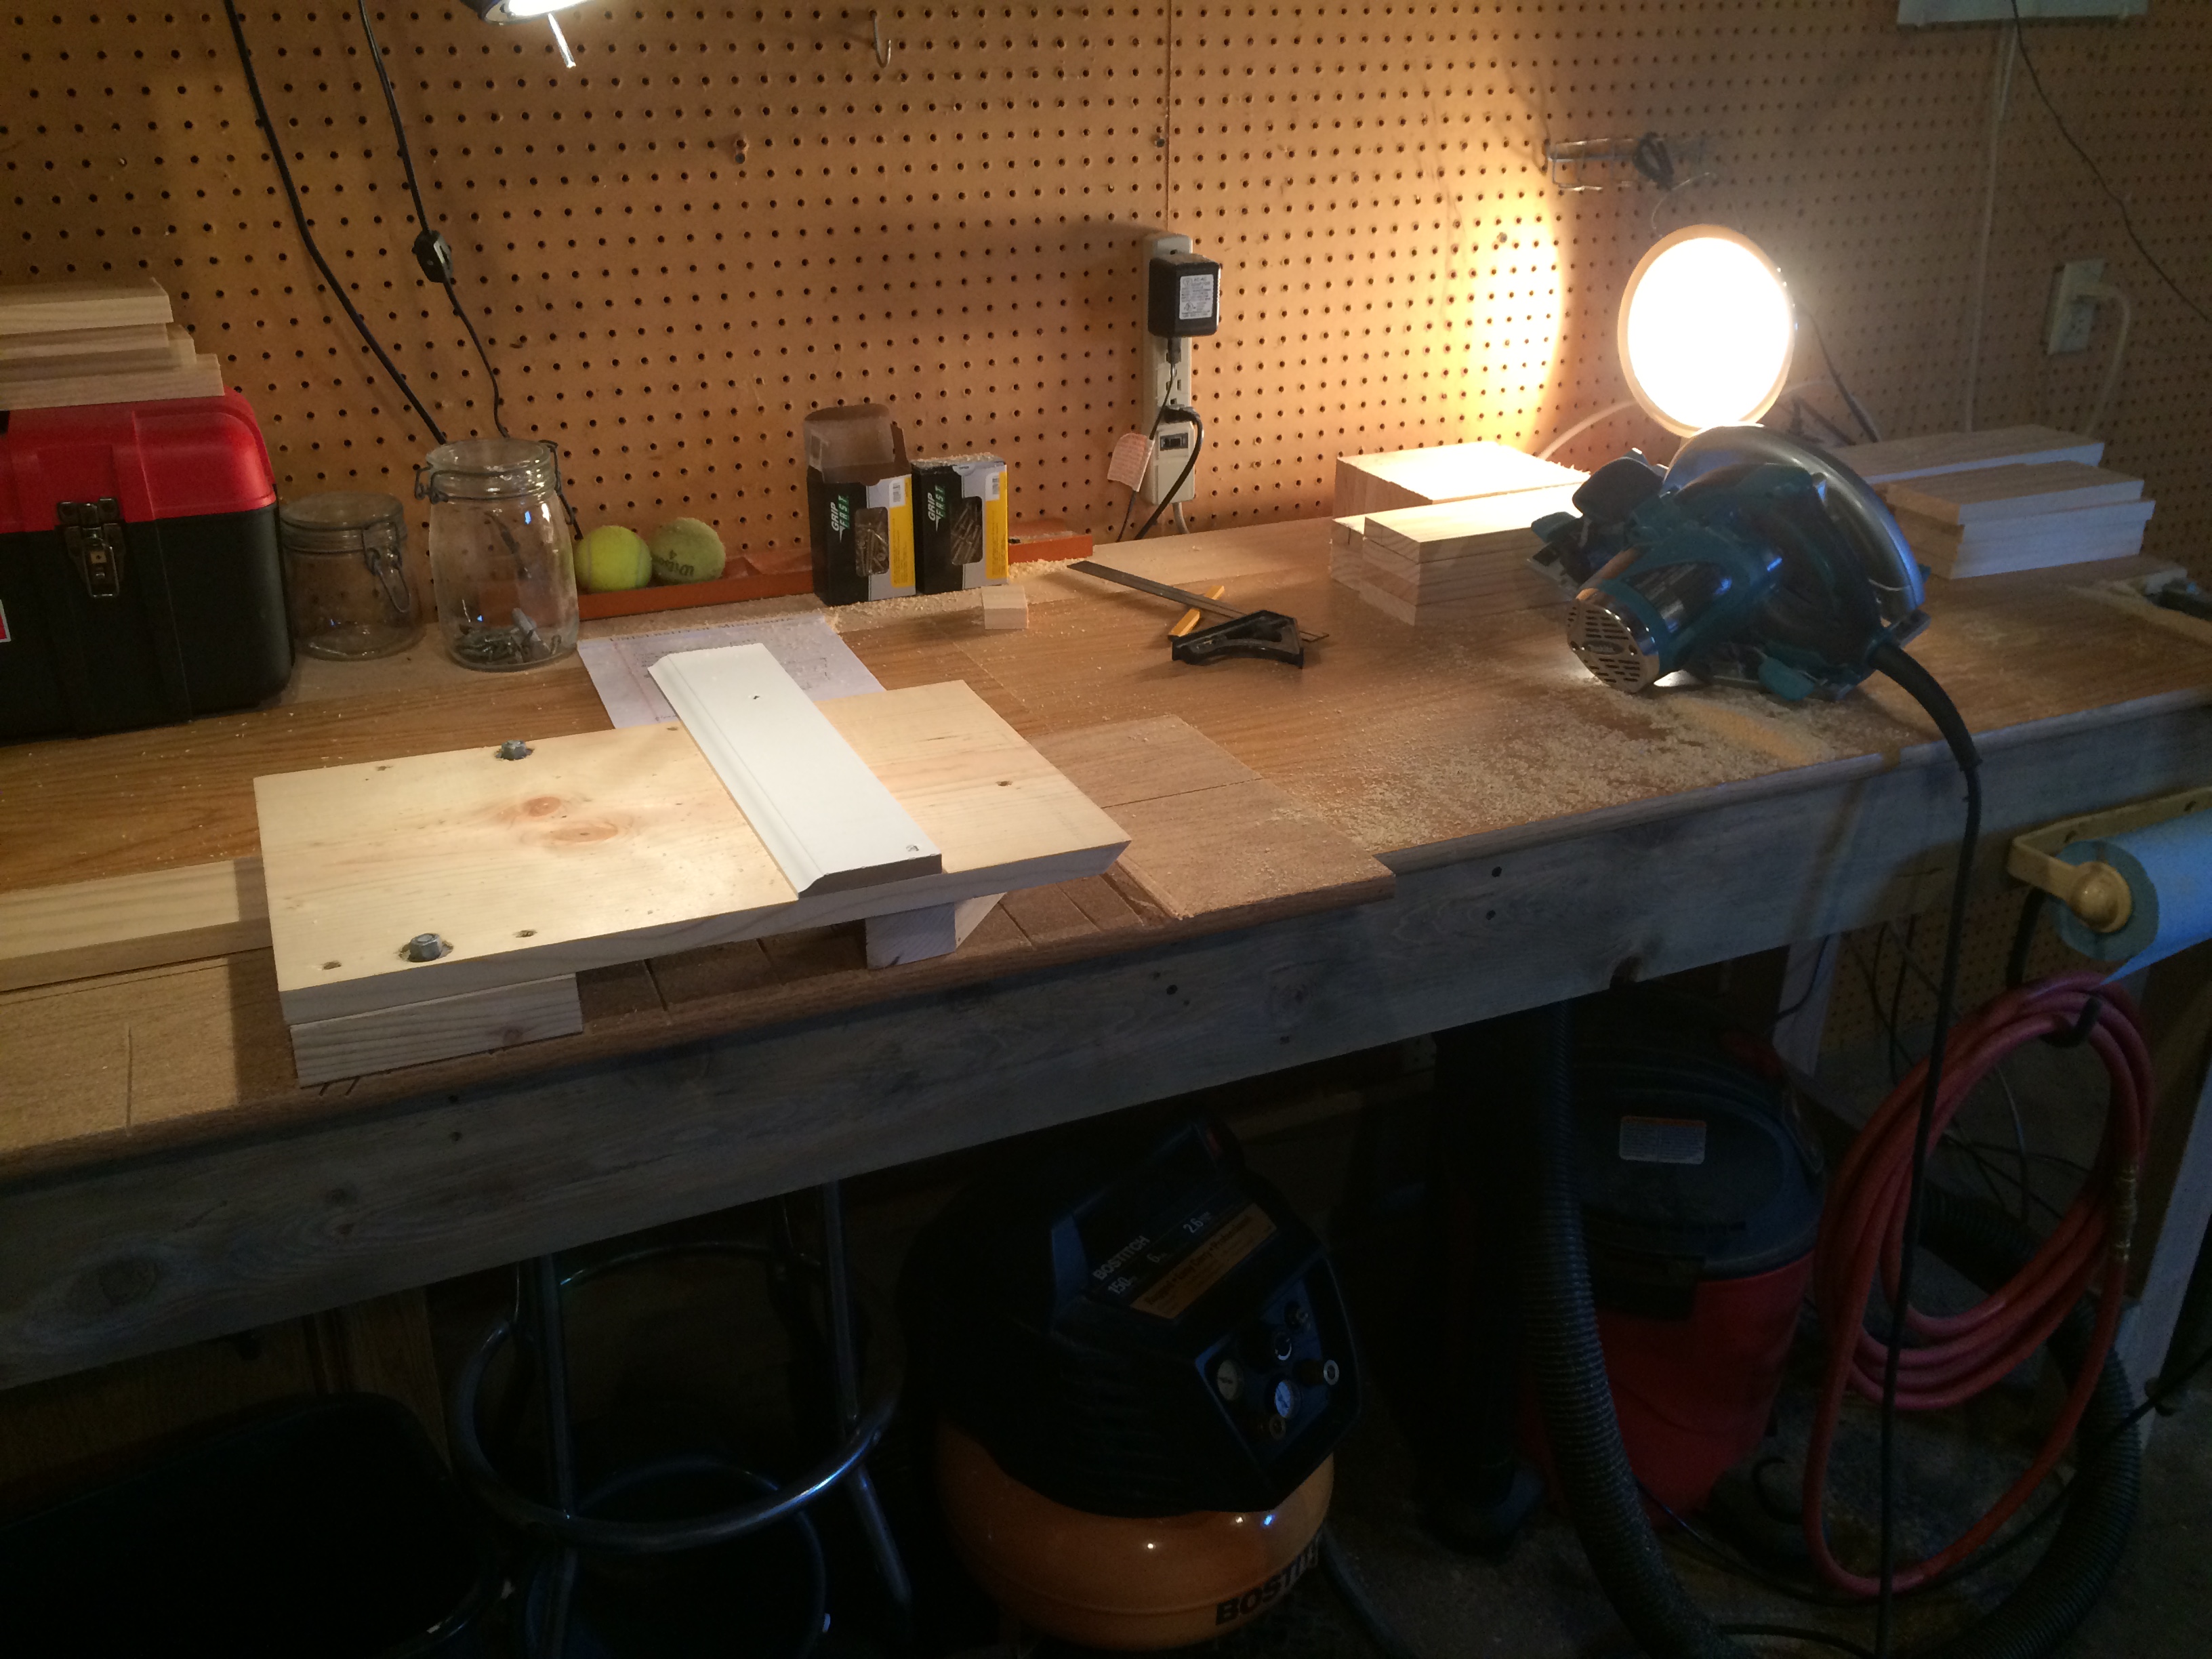
I made all of the cuts using a new contraption I built for my circular saw.
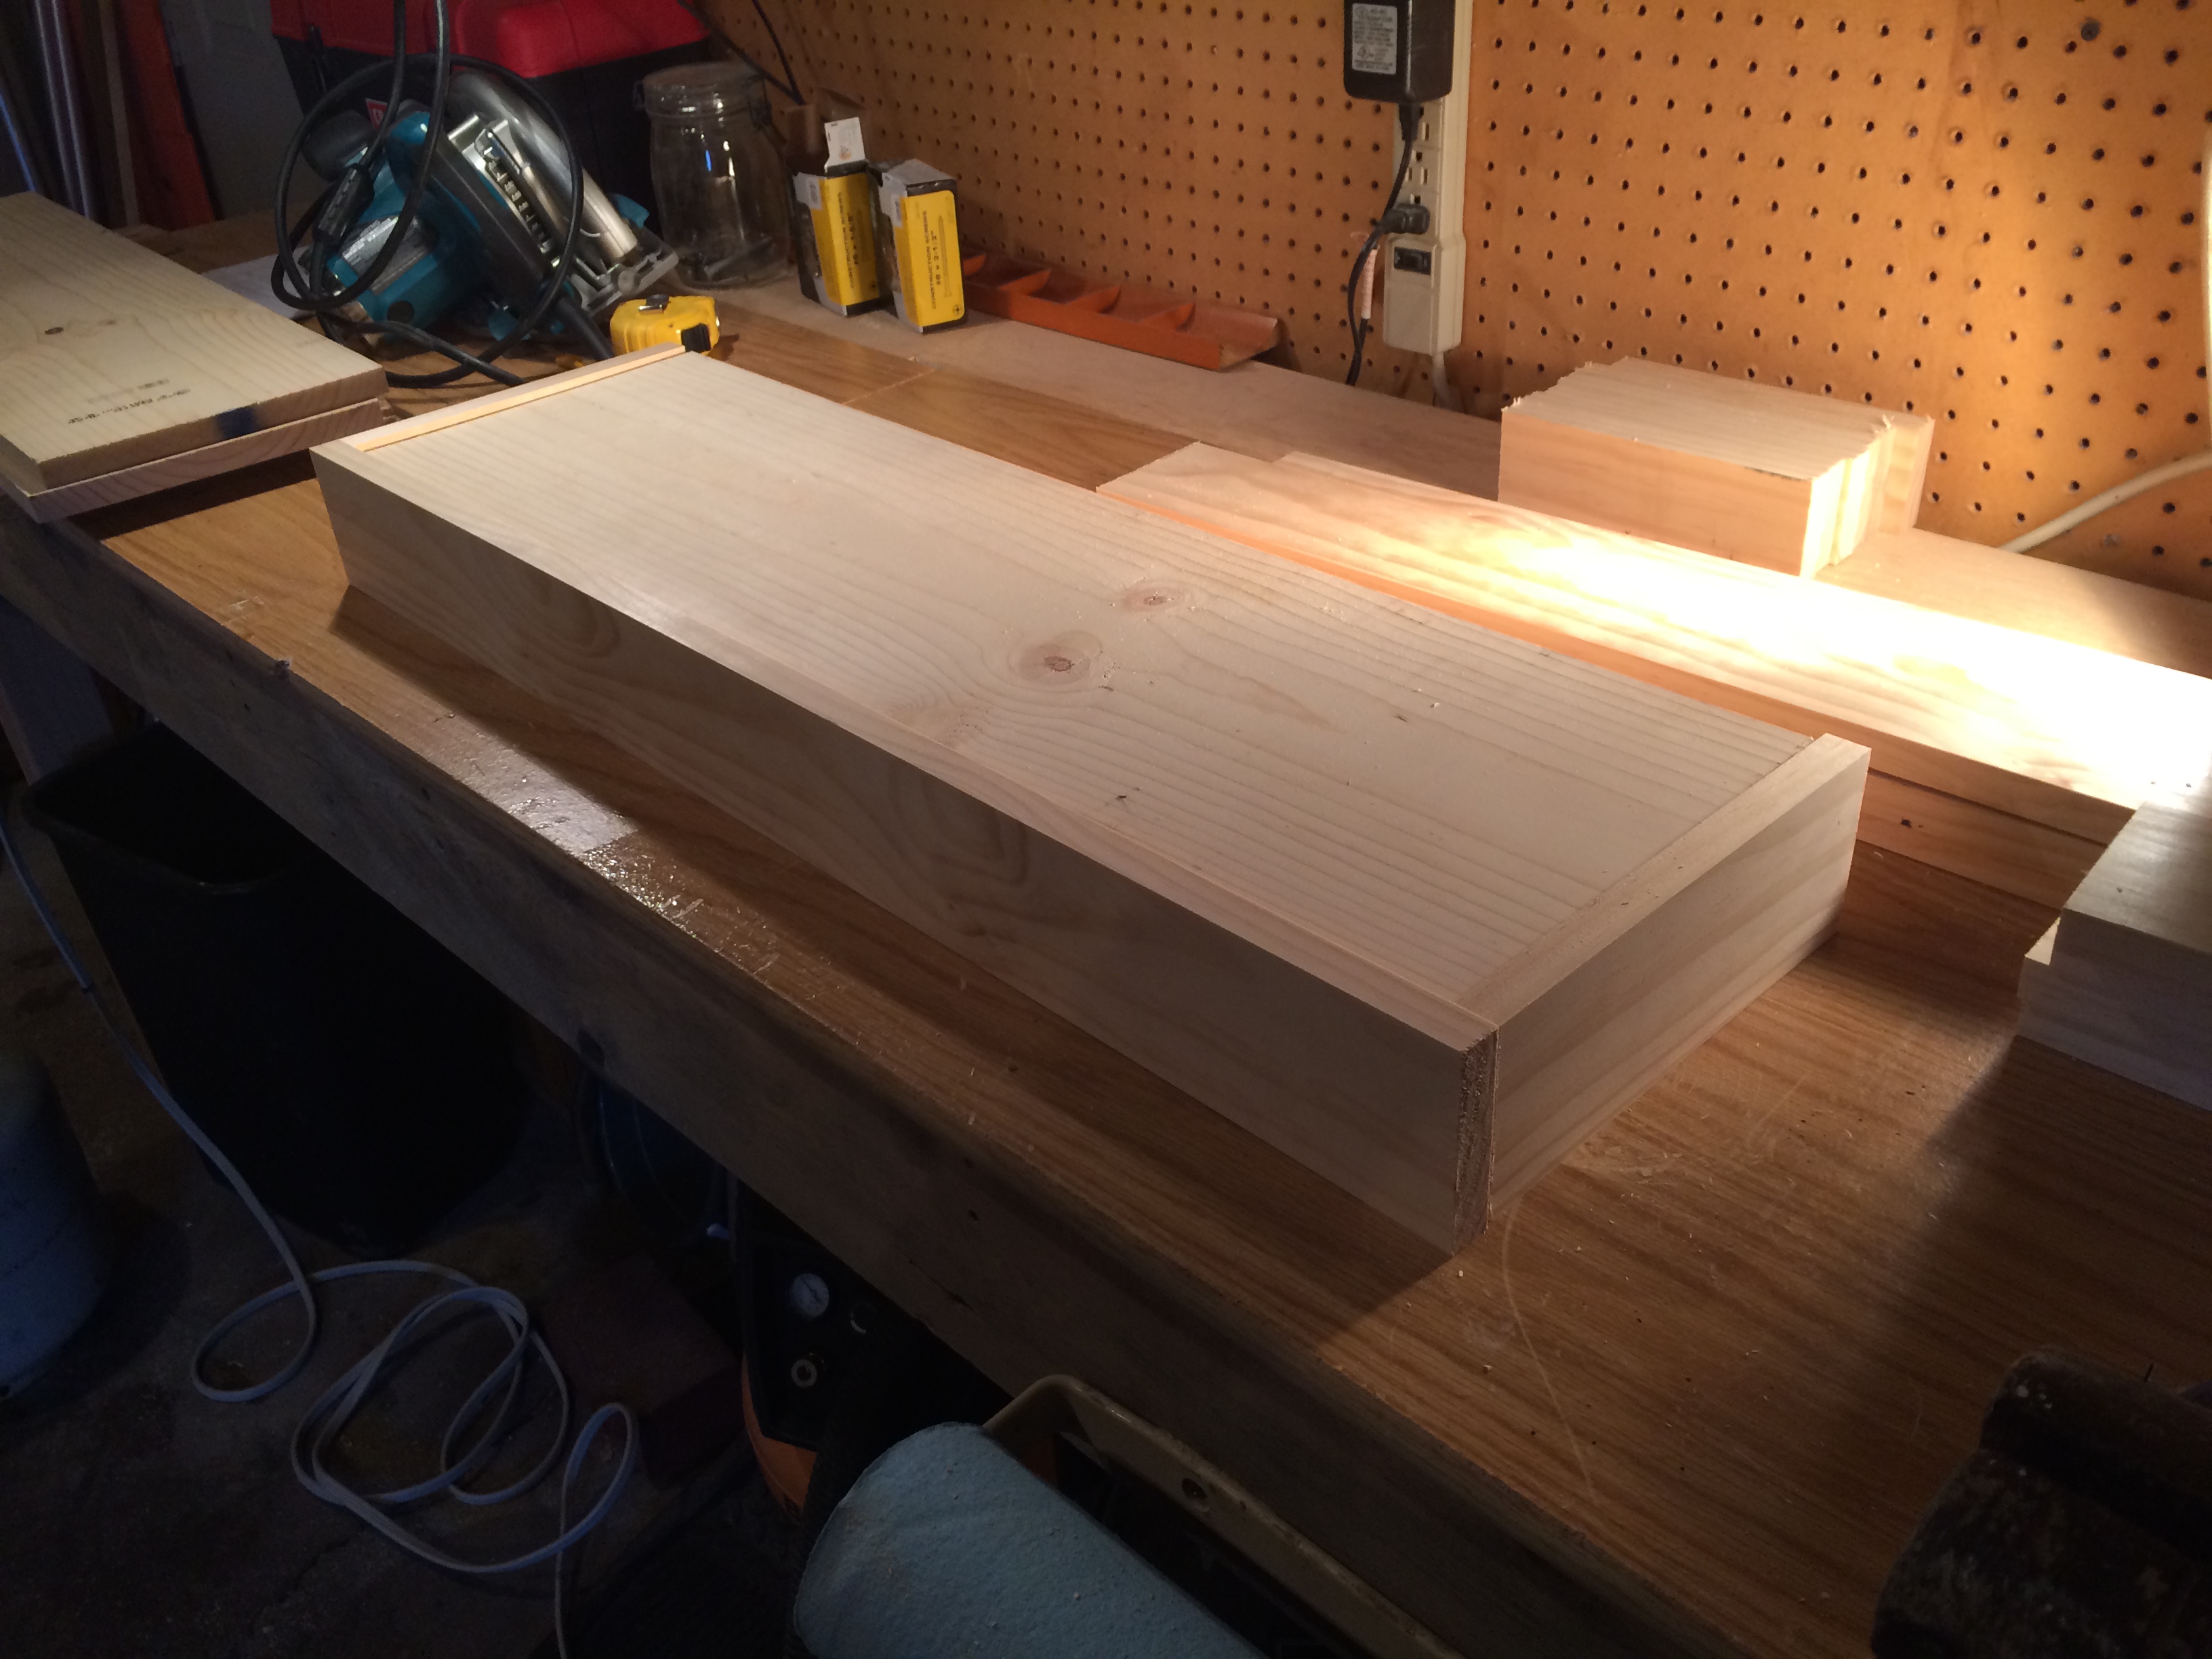
Piecing together the wood after it was cut was simple. 
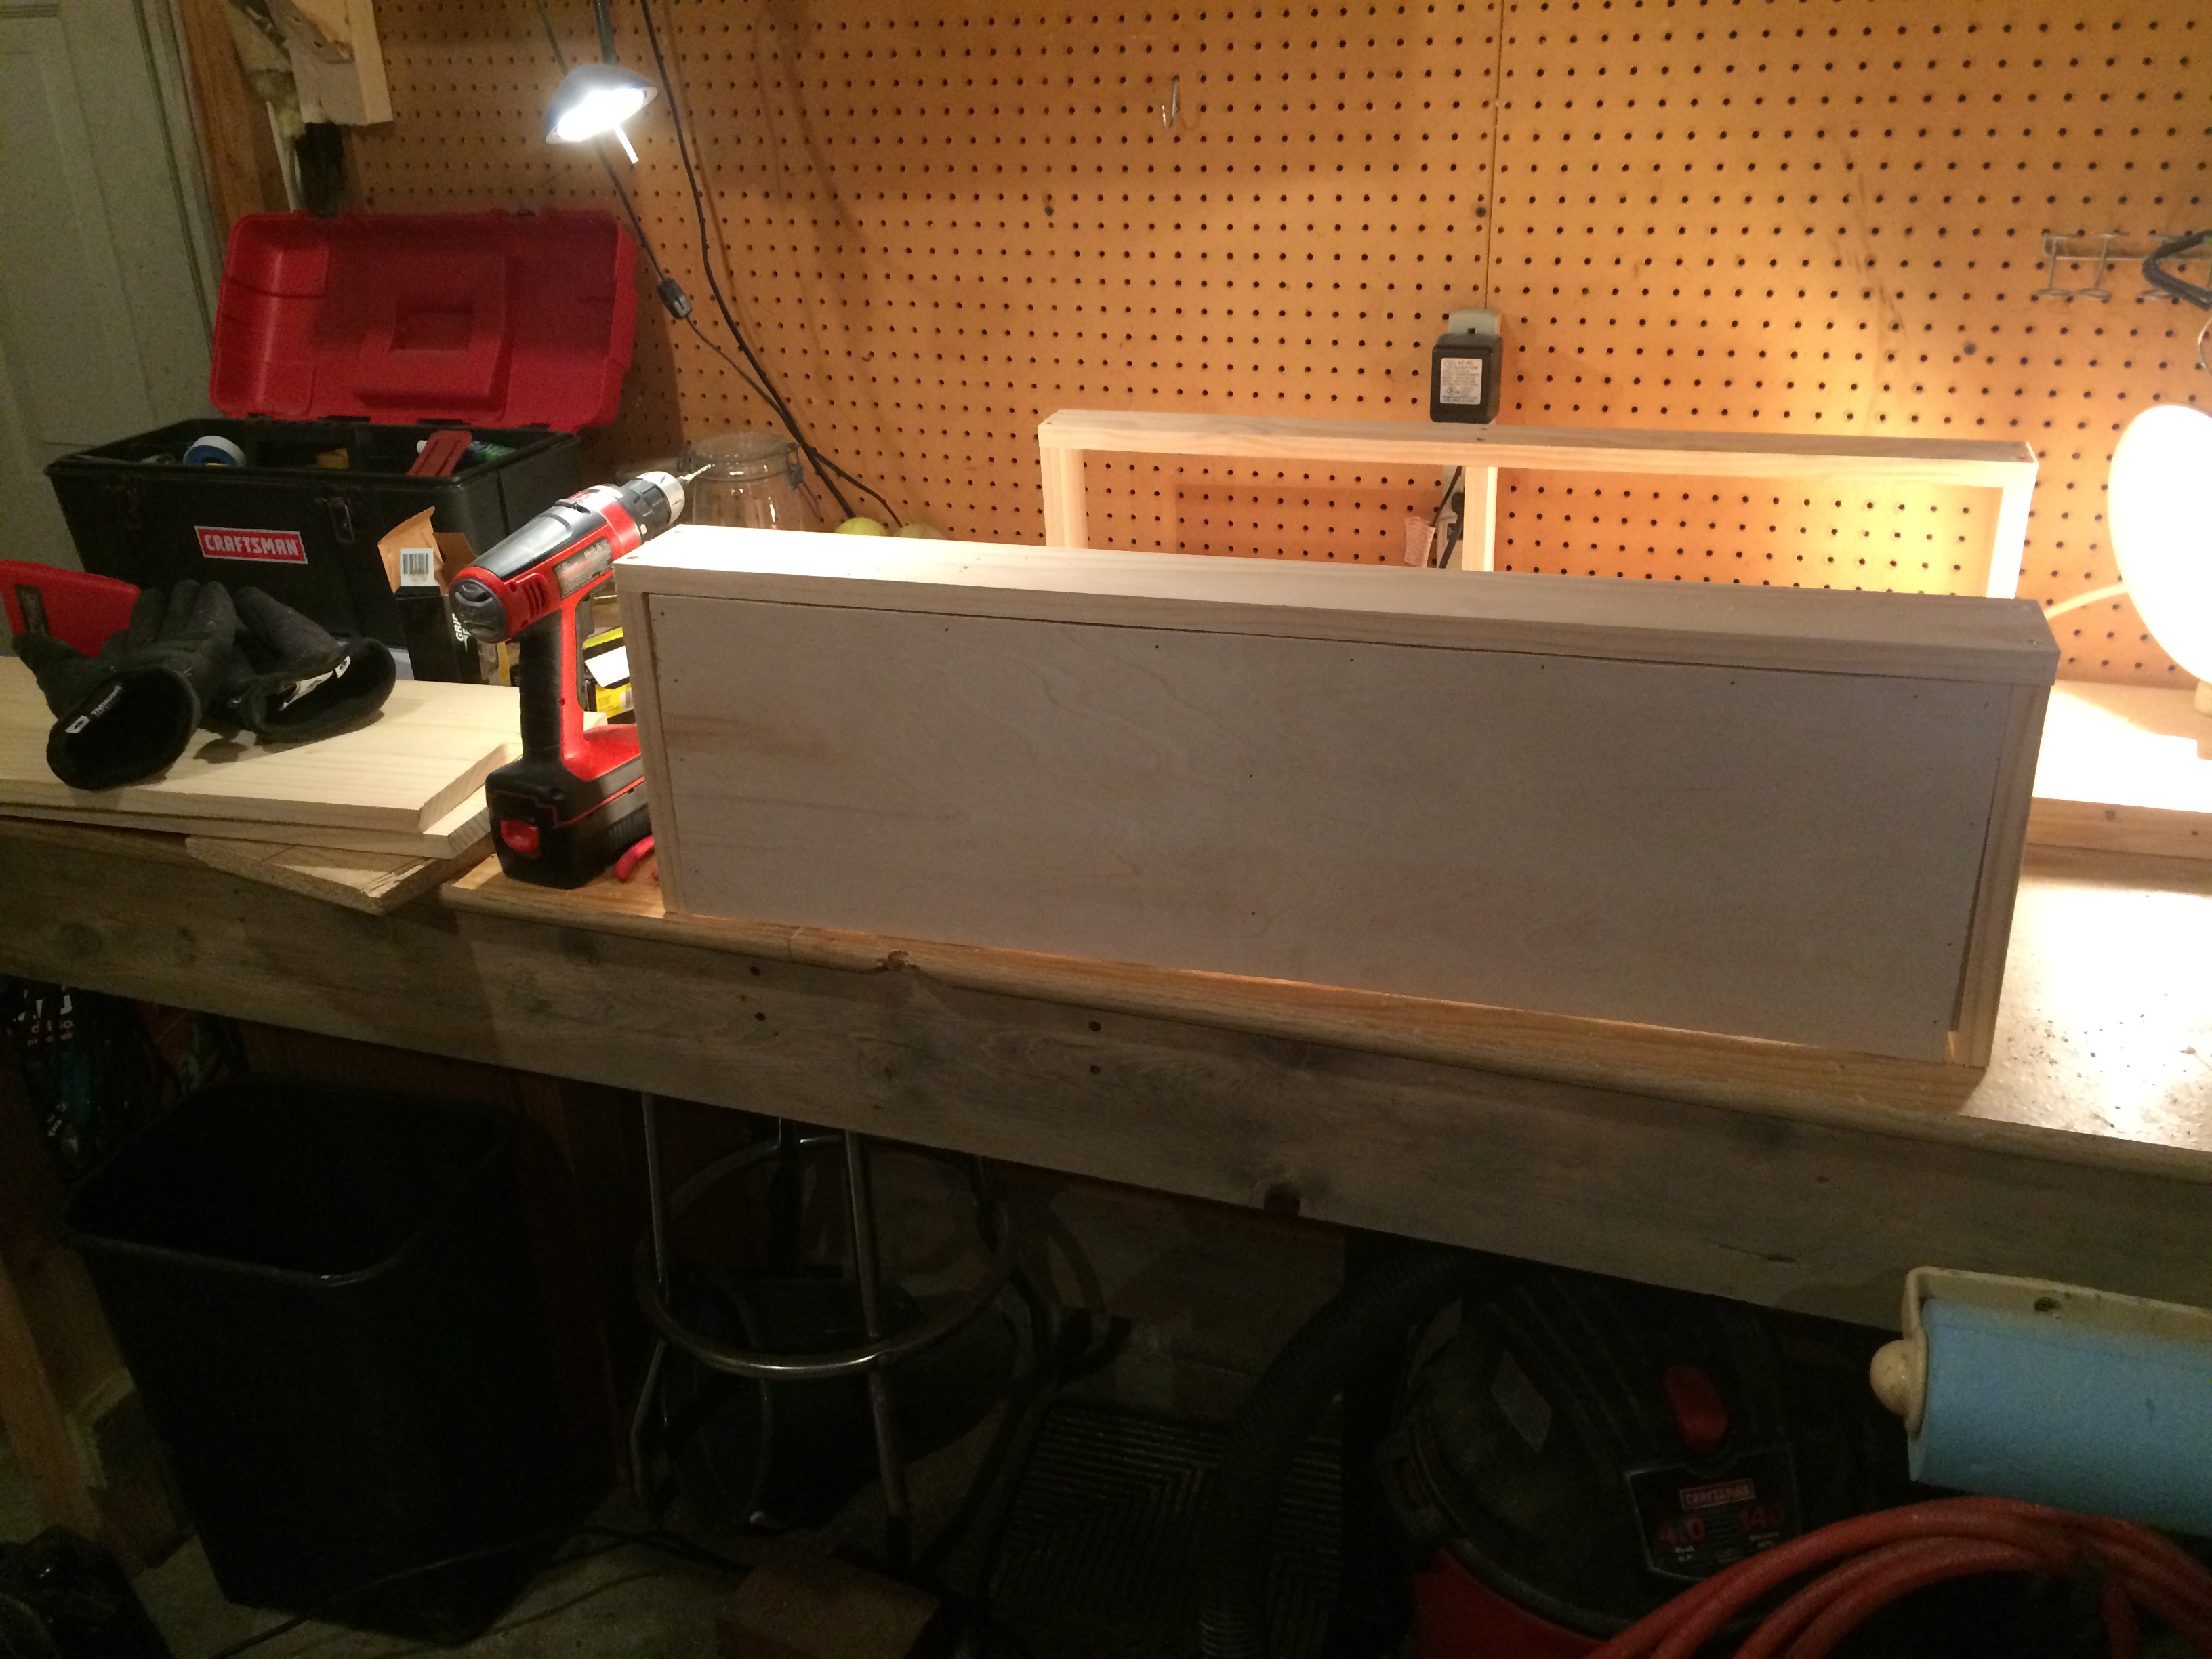
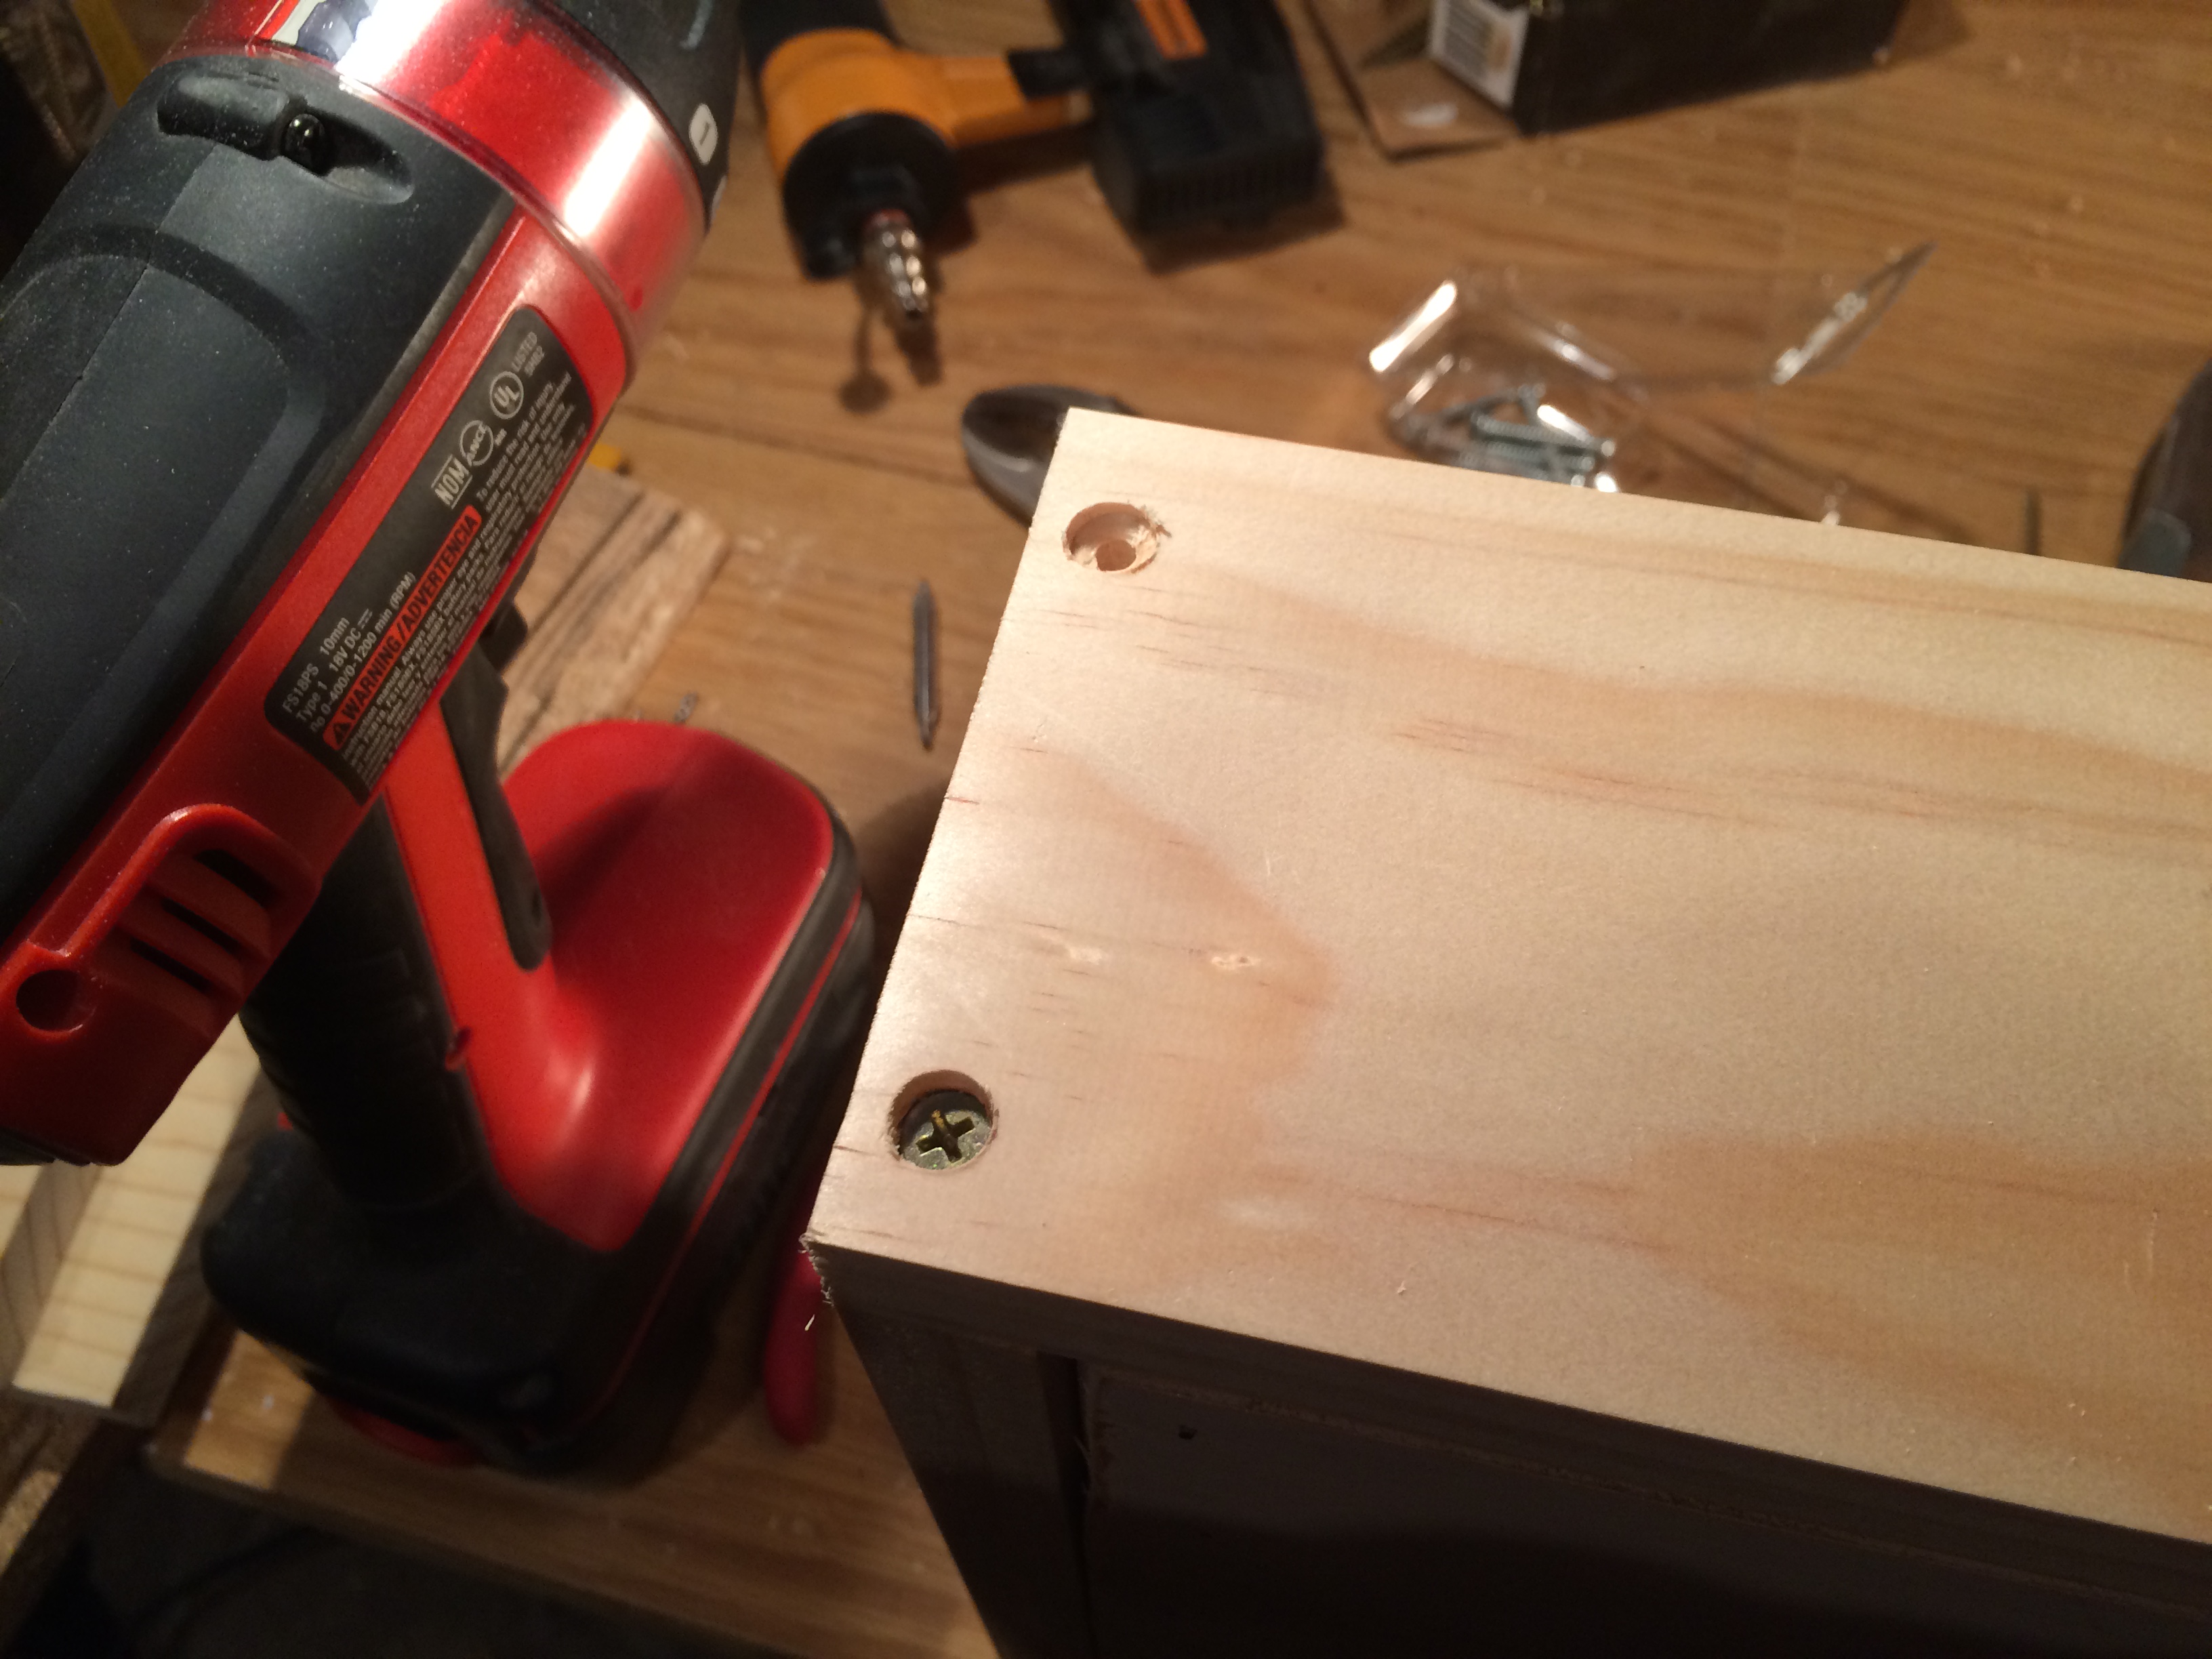
I drilled out extra space for the screws so it wouldn’t damage the wood and I could fill in the hole with putty later.
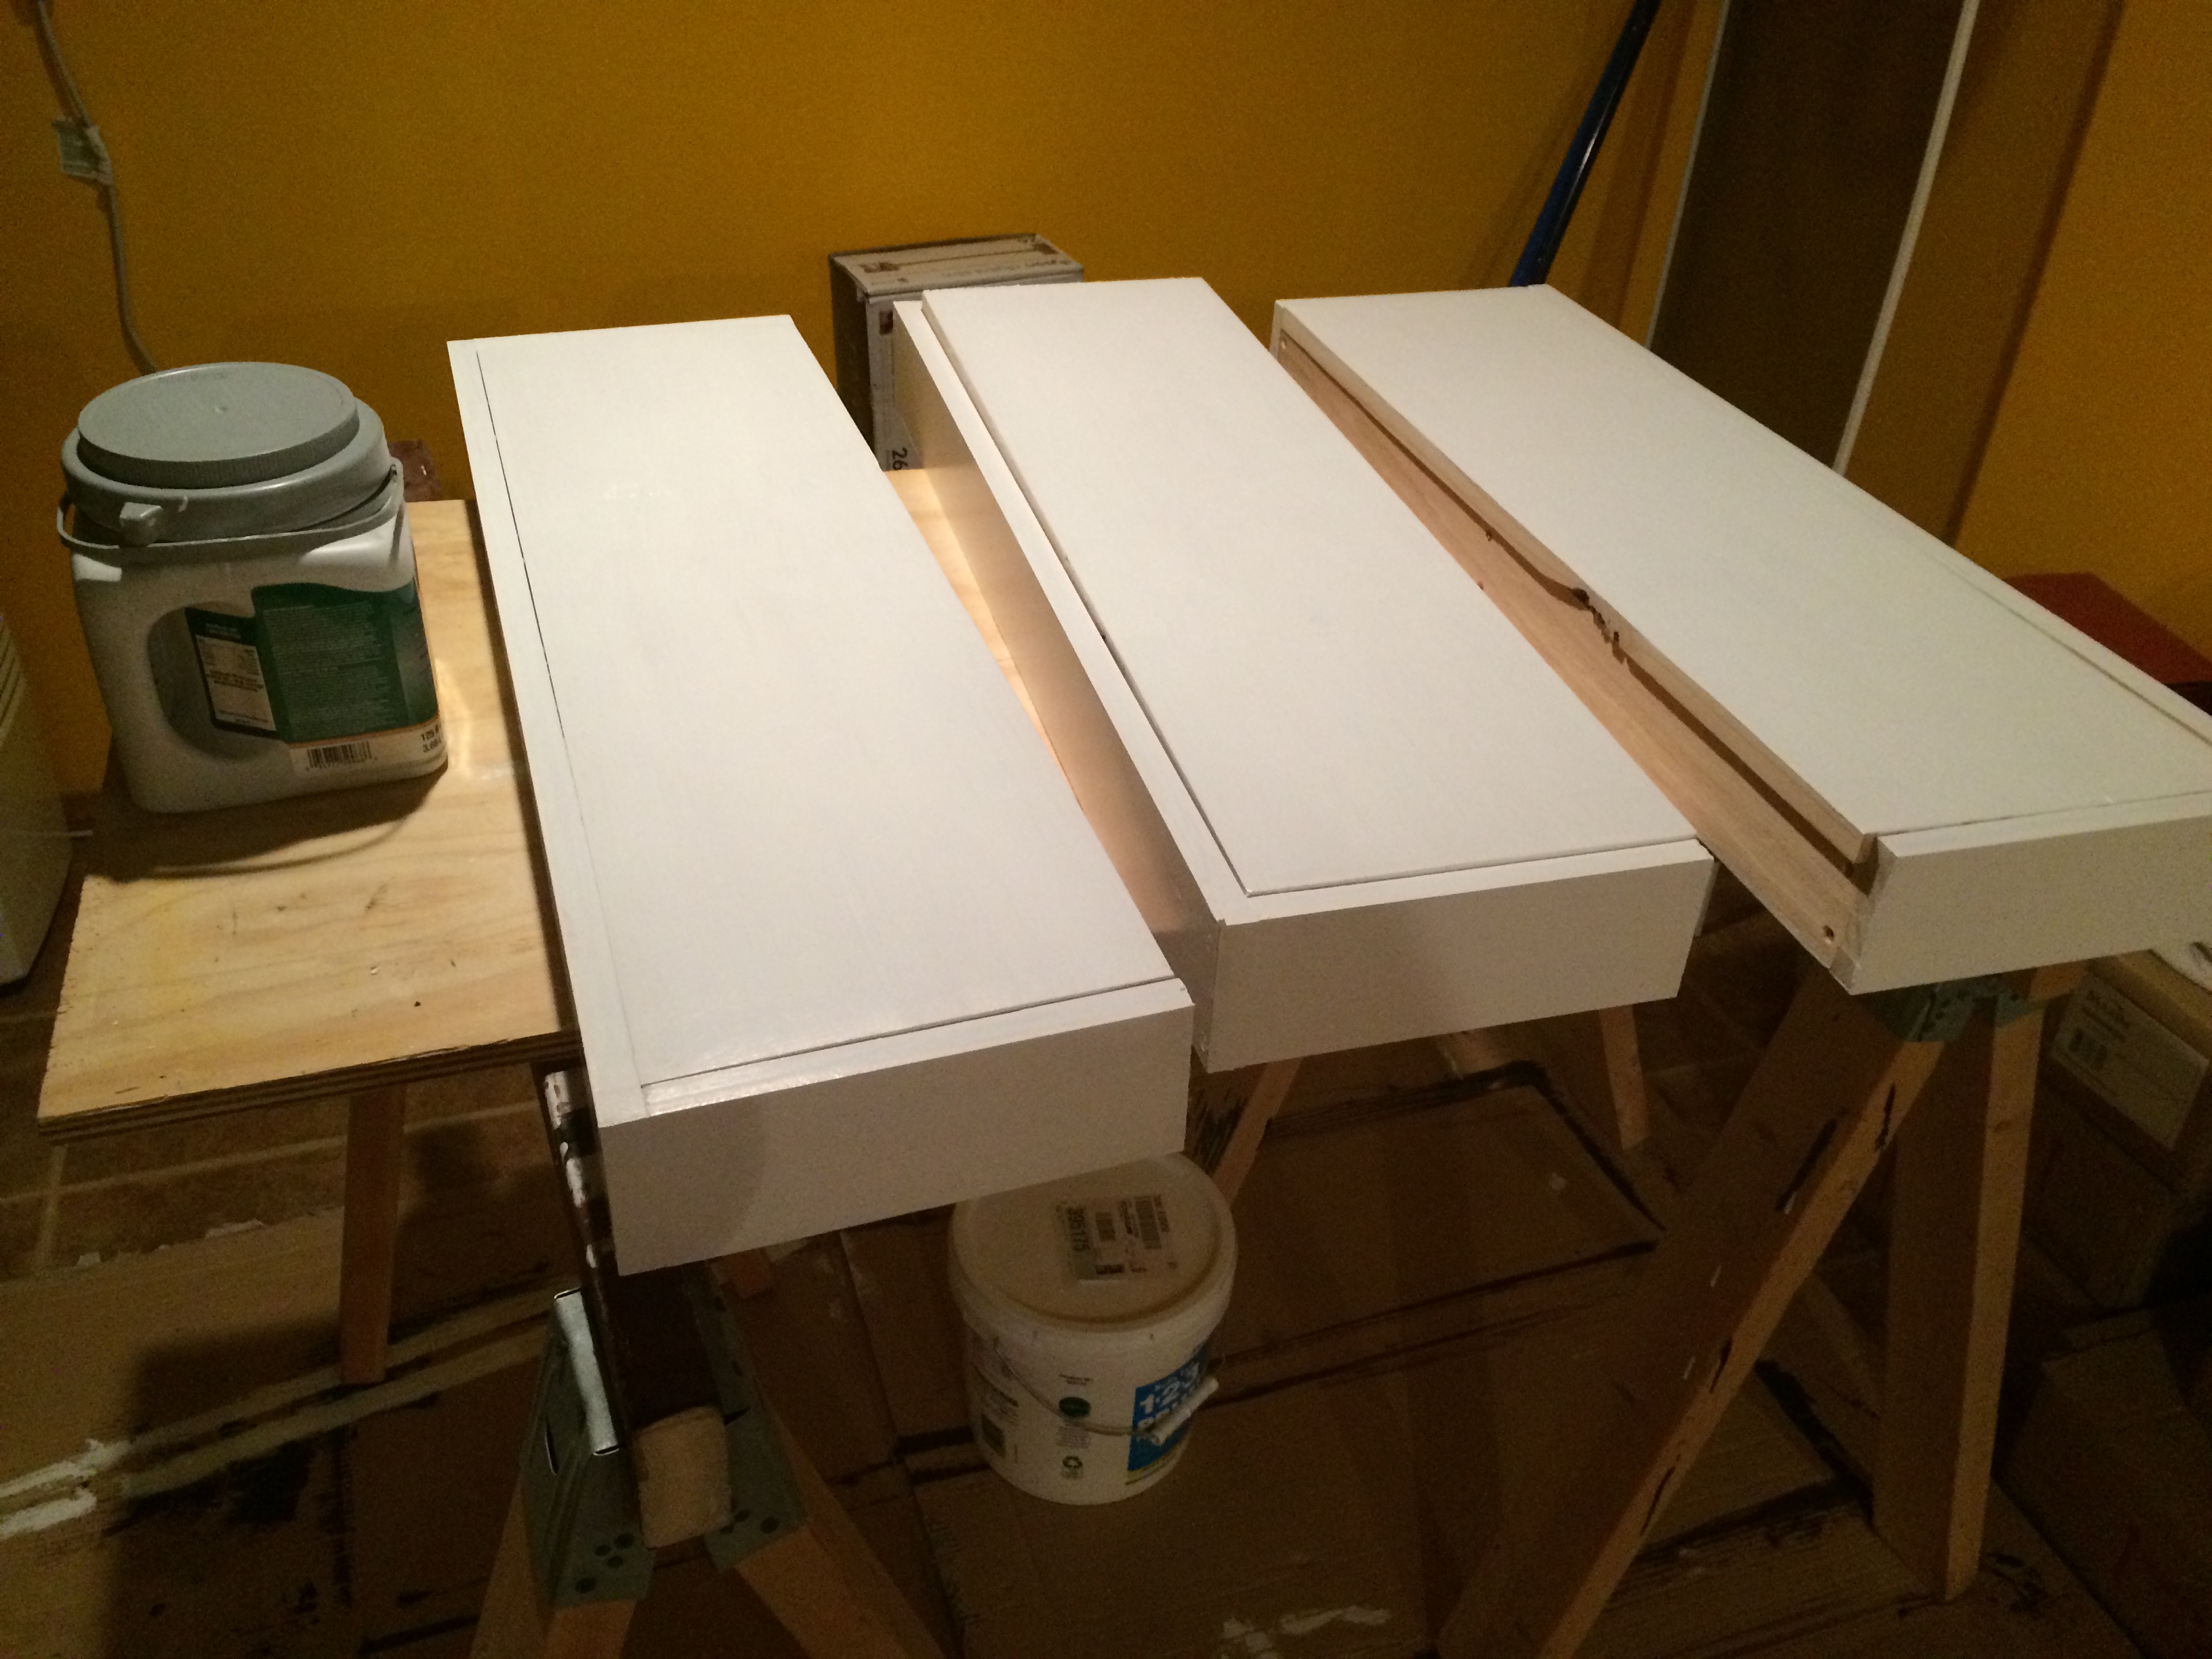
Here are the shelves after they have had one coat of primer and paint.
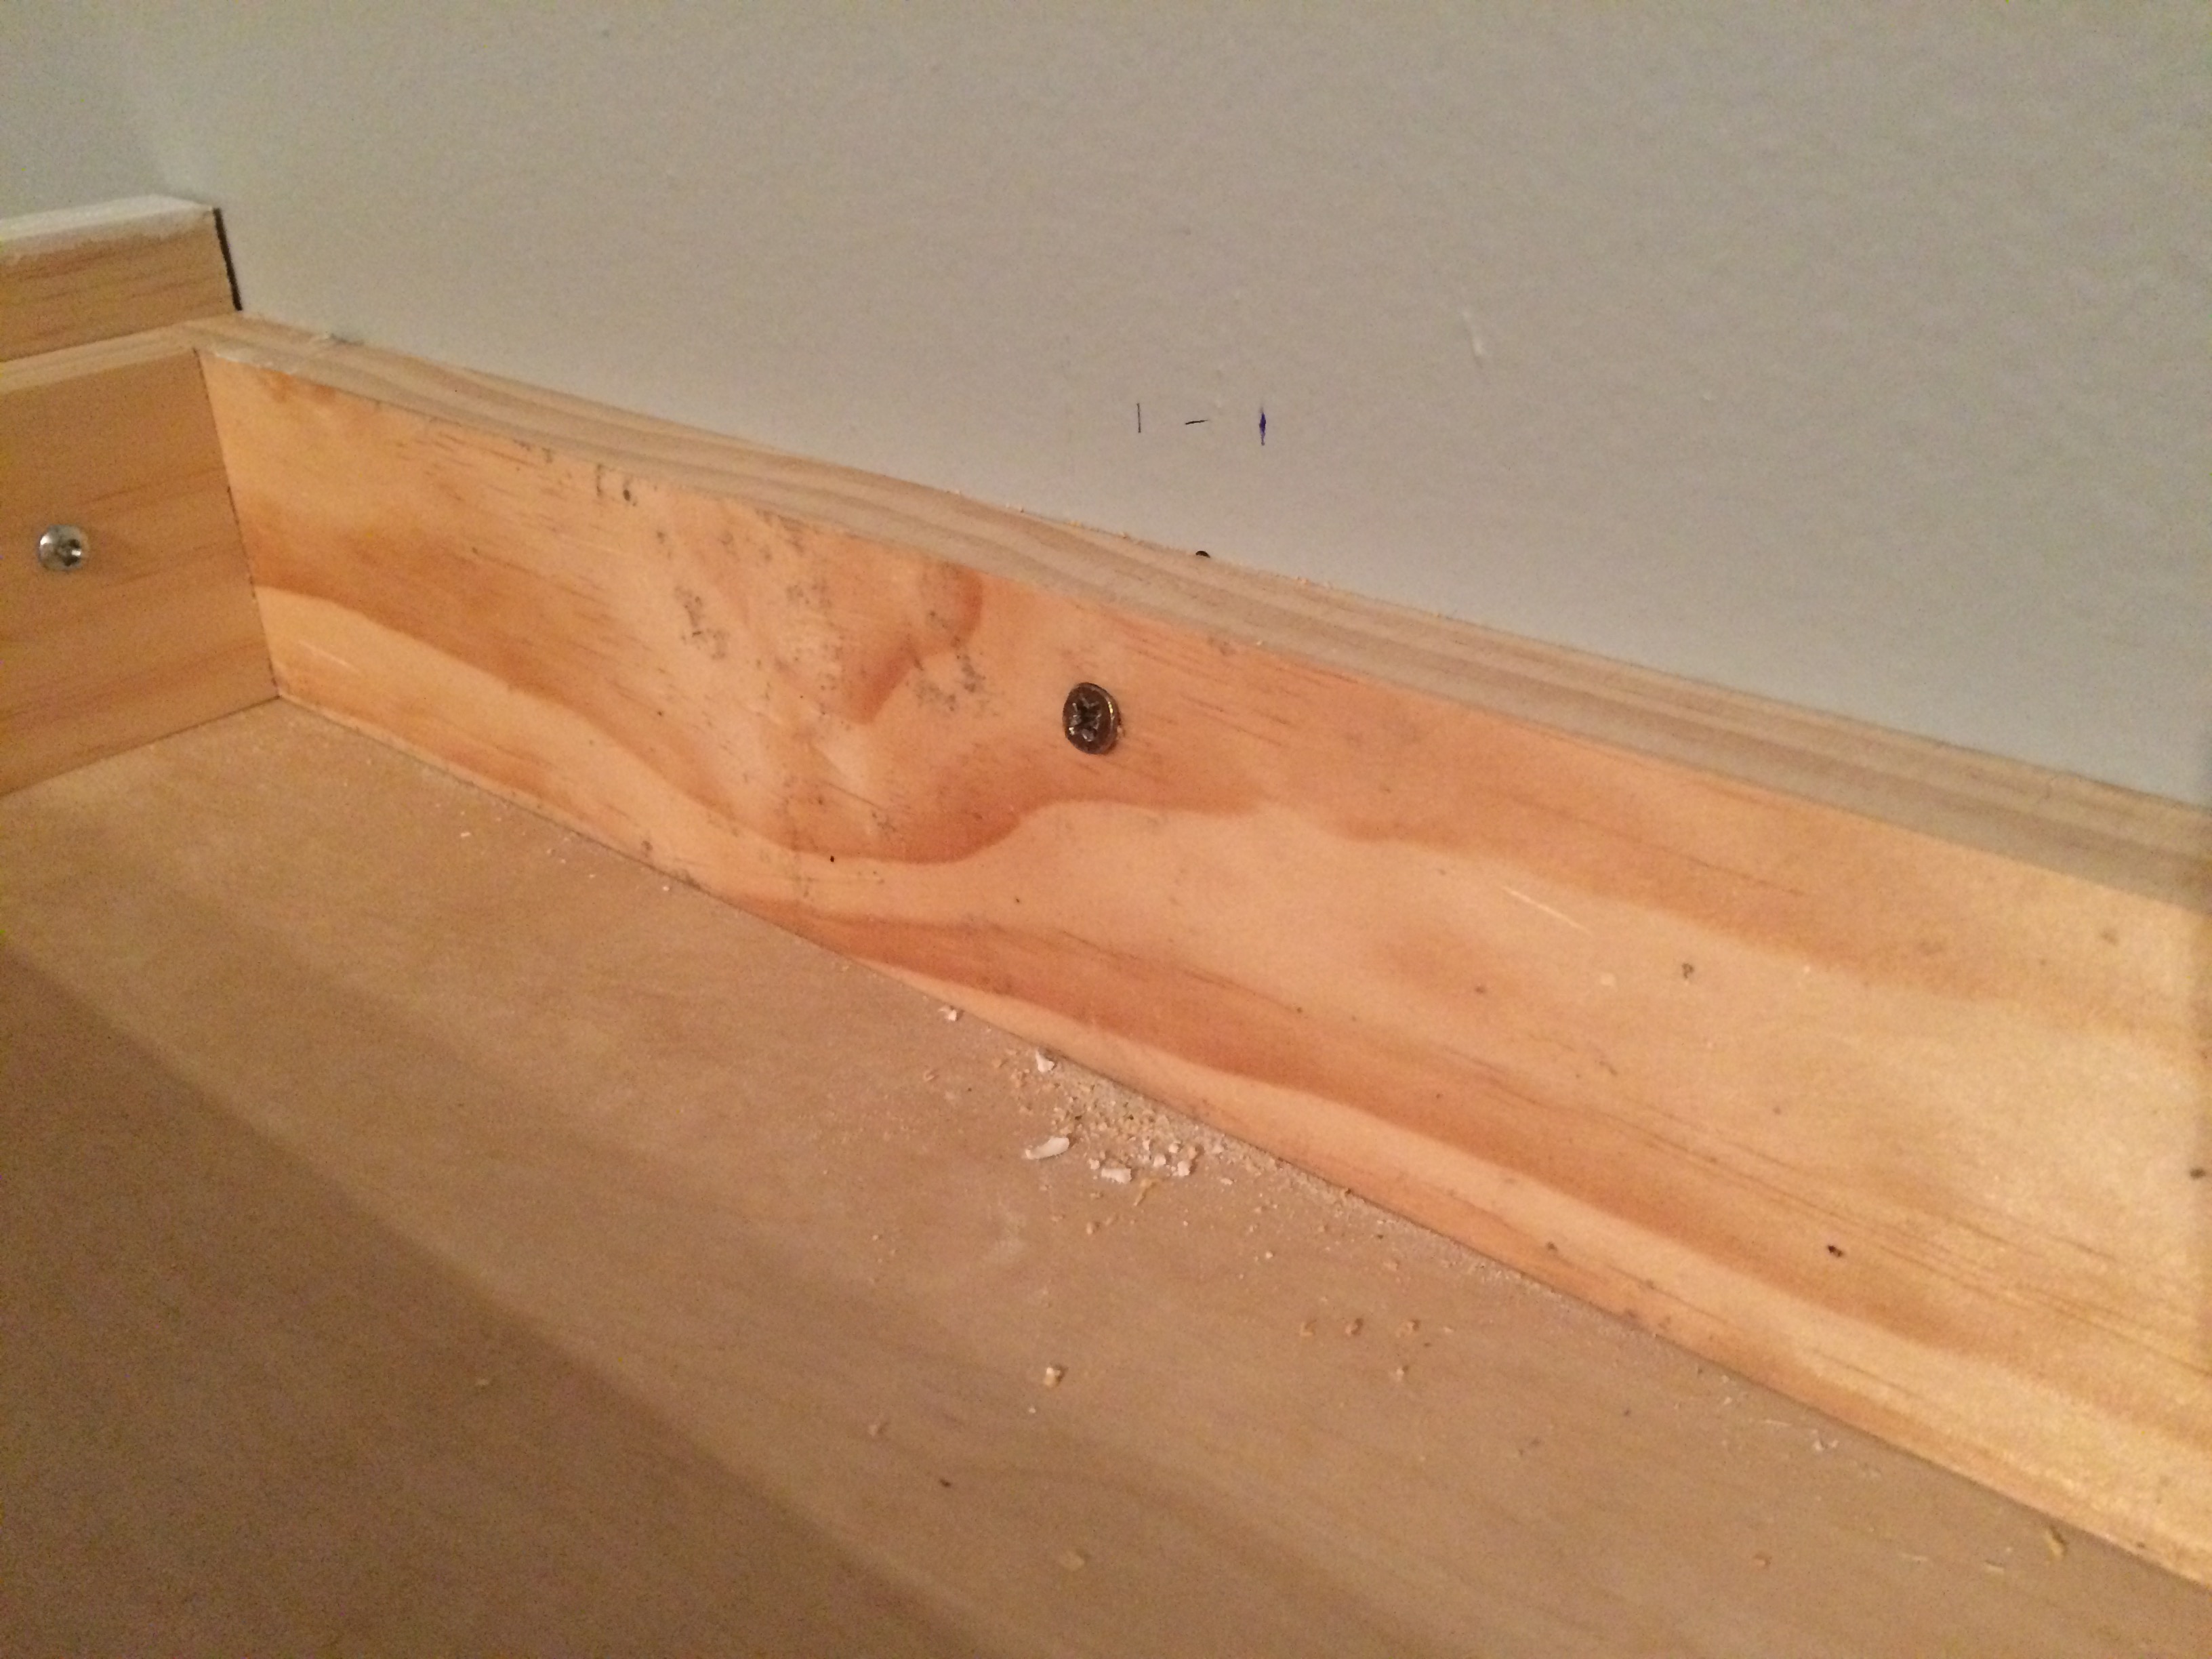
The shelves are attached to the wall with screws going directly into the studs.

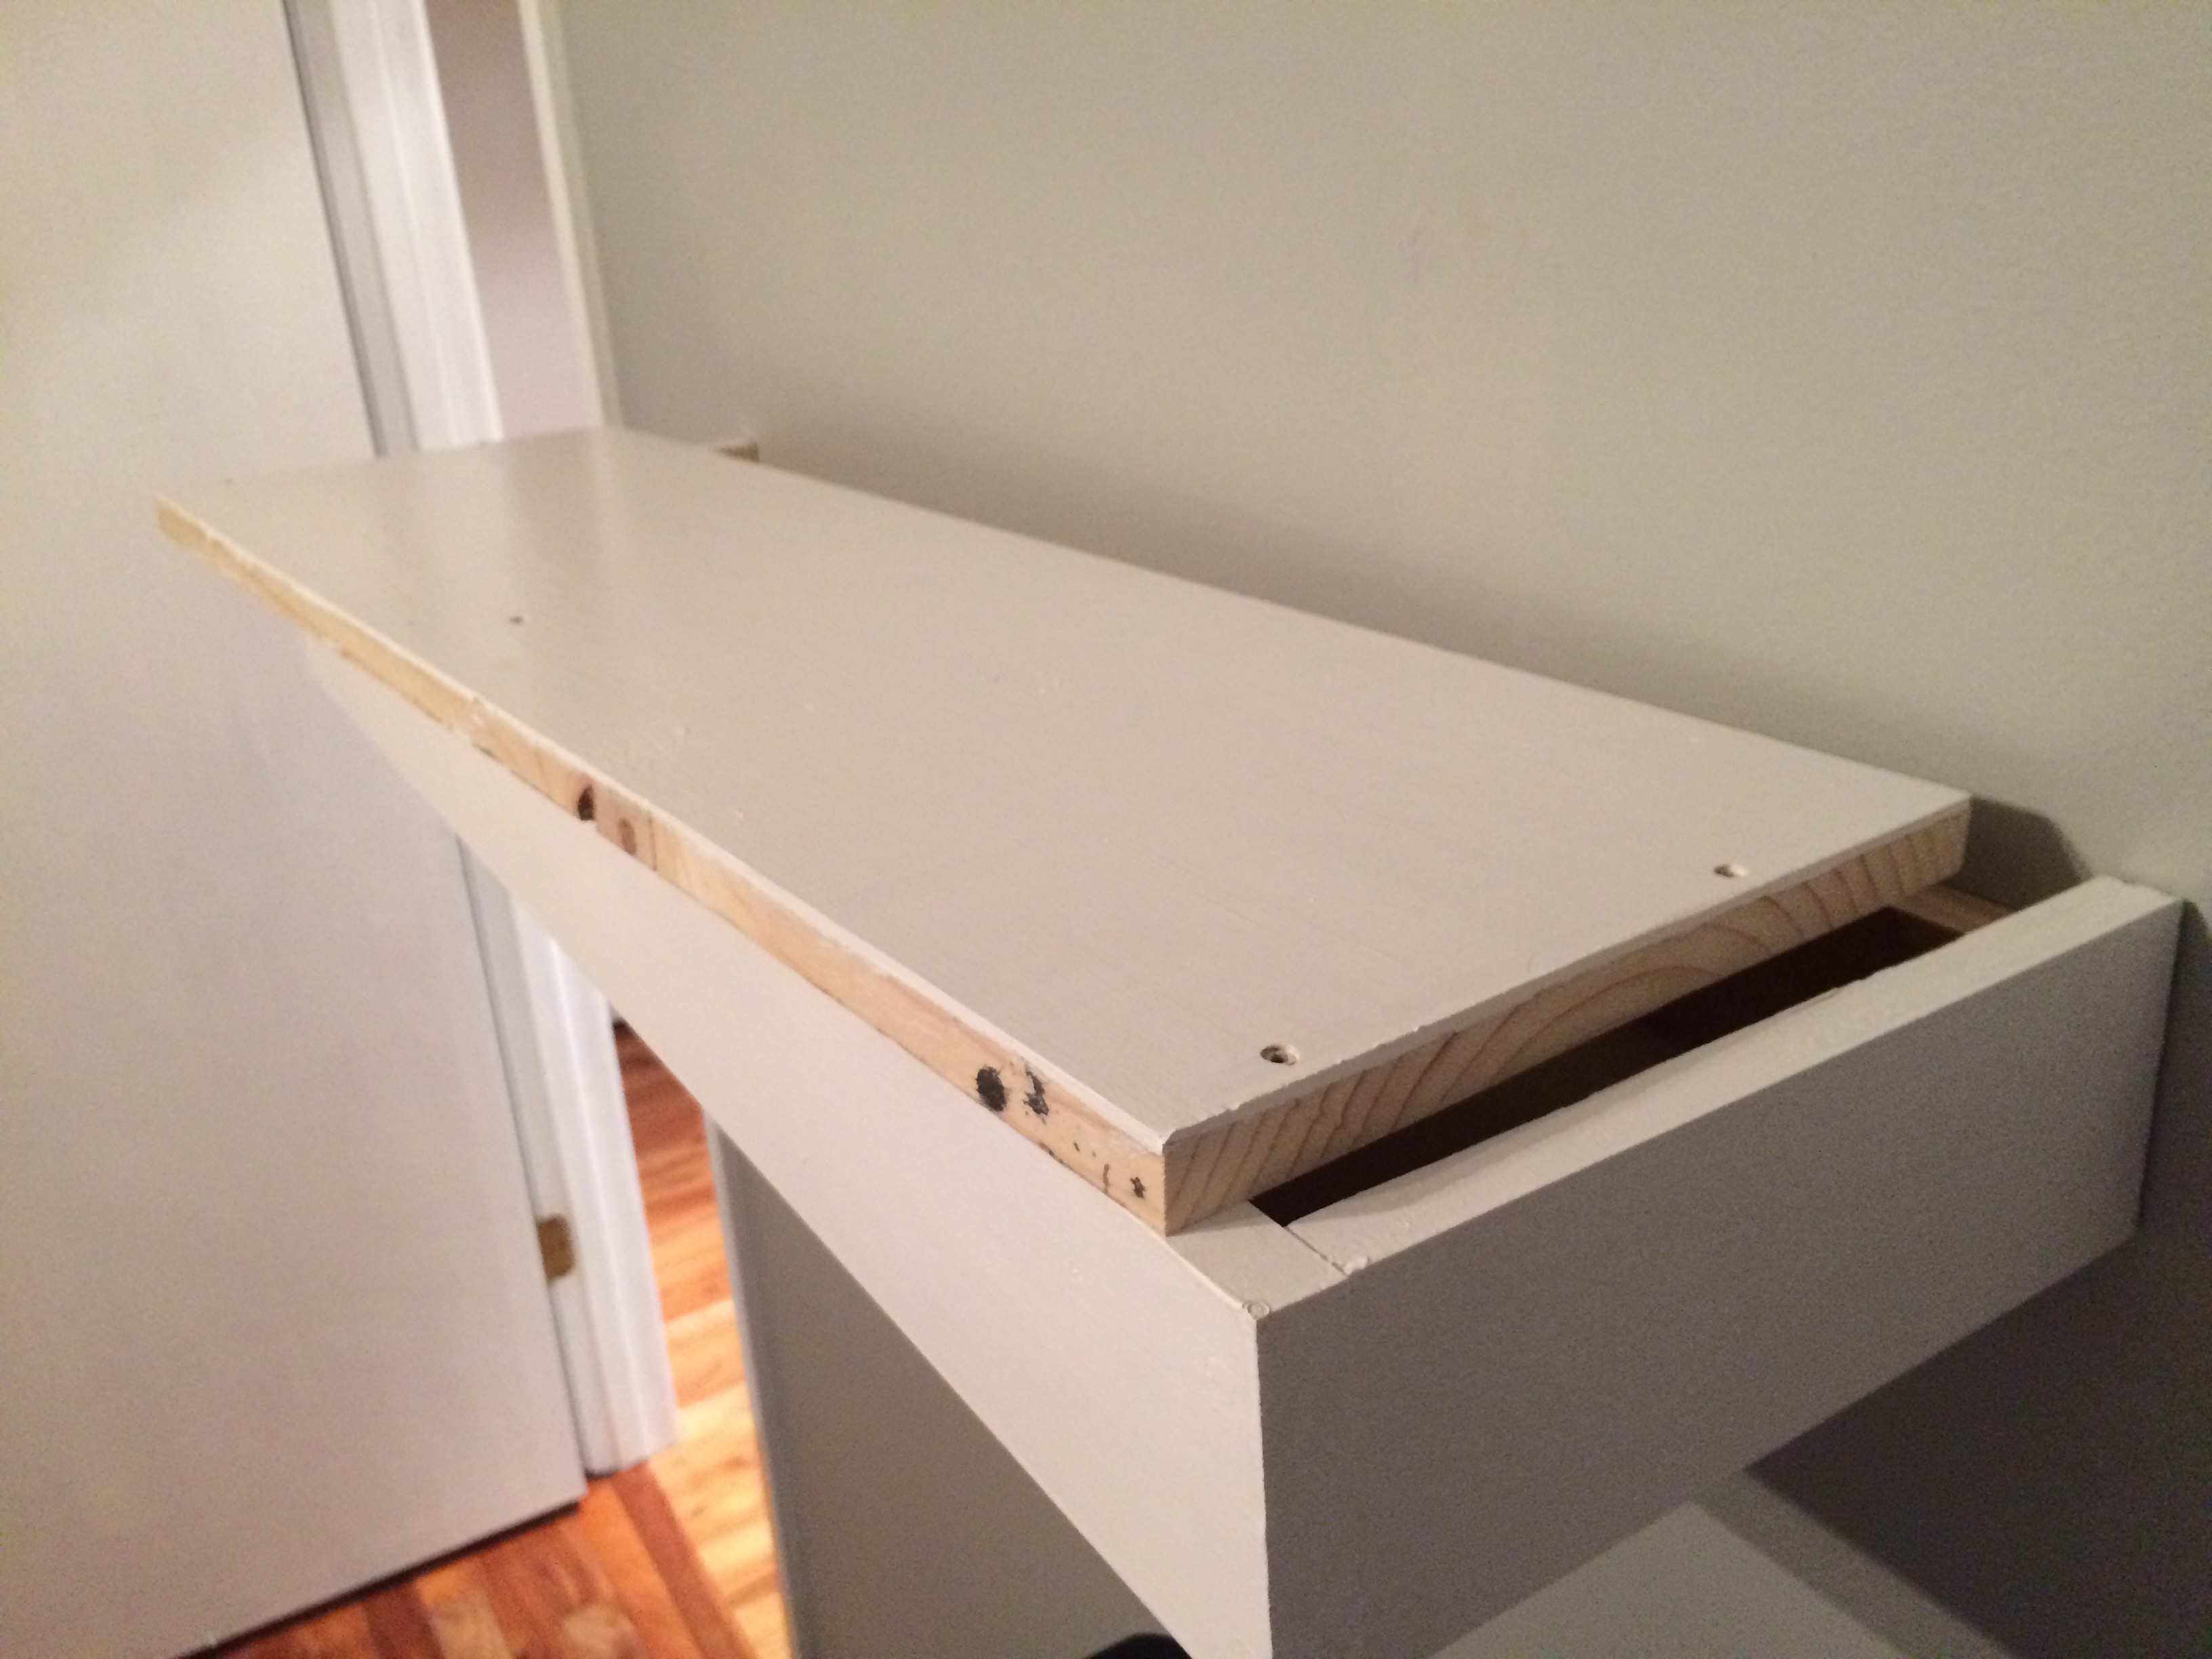
And the top piece slips right into place.


Finally, a stylish place to put awards from my job away from the house!

-Mike